Overview
This section contains the following configurations that should be complete, prior to installing or upgrading to Ephesoft Transact Version 2019.1:
- Pre-installation Checklist
- Configuring the Named Instance for Microsoft® SQL Server Prior to Installing Transact 2019.1
Pre-installation Checklist
When installing Ephesoft, there are a few prerequisites that will make the installation process faster and more effective.
| Pre-installed applications: |
| .NET 3.5 (.NET 3.5.1 will work) |
| .NET 4.5 |
| Fully up to date Windows Updates (Run a windows update before installing Ephesoft) |
| Pre-installation configurations: |
| Verify that your server name does not include any invalid characters such as underscores or other special characters (!@#$%^&*?<>[]{}~,) |
| Disable UAC on the server (This is a mandatory and vital step before installing Ephesoft) |
| Verify that the user from which you will run the Ephesoft service has full control of the SharedFolders and Watch folder for each Batch Class. |
| Verify that there are no other applications using port 8080 on the intended Ephesoft server |
| If using an external SQL instance, verify that the correct ports are open on the Server’s firewall(MSSQL= 1433,MySQL/MariaDB= 3306) |
| Enable TCP/IP in the MSSQL instance if using a pre-installed MSSQL instance.(https://ephesoft.com/docs/microsoft-sql-server-mssql-installation-and-configuration-instructions) |
| Create an exclusion for the Ephesoft directory in any running antivirus Software |
| Check that the Ephesoft installation file isn’t blocked by certain versions of Windows. Right click msi file and check the properties. Unblock if necessary. |
| Disable IPv6 by applying Microsoft patch – http://download.ephesoft.com/Ephesoft_Product/Wiki_links/MicrosoftEasyFix50409.msi |
| Mandatory installation steps: |
| Always install Ephesoft in windows from a command line with admin privileges using the command msiexec /i Ephesoft_Installer.msi |
| Known Compatibility issues: |
| Windows 7 x86 has known issues with Ephesoft that require extra steps while installing. (https://ephesoft.com/docs/windows-installation-win7-32)Issues with MS SQL Server 2008 – Link |
Configuring the Named Instance for Microsoft® SQL Server Prior to Installing Transact 2019.1
Introduction
Prior to installing Transact 2019.1, it is necessary to set up the named instance, and then configure related settings.
This article describes how to set up named instances on Microsoft® Server.
- First, follow the steps in this document to create the named instance:
https://ephesoft.com/docs/kb0021050-how-to-install-ephesoft-with-mssql-named-instance-through-installer
Note: The wiki article above states that you should use the server name of <<SERVERNAME>>\<<NAMED_INSTANCE>>, when defining the server name during installation. The system will prompt you to provide the remote MS SQL Server details during this step. Only previous versions of Transact require the server name, with this convention. Server name definition does not apply to Transact 4.5.0.0.
In Transact 4.5.0.0, there are two required parameters:- Instance Name (optional)
- Listener Port (required)
- Once you have created the named instance, using the procedure above, and before installing Transact 4.5.0.0, complete the steps in this document, which are as follows:
- Find and Set up the Listener Port
- Enable the Named Pipes
- Ensure the SQL Server Browser is Running
- Use the Listener Port During the Transact 4.5.0.0 Installation
Find and Set up the Listener Port
Perform these steps to set up the listener port.
- One way to find the listener port is through the Sql Server Configuration Manager.
For SQL Server 2016, it may be located through Start > and search for “SQLServerManager13.msc“. - Expand the Sql Server Network Configuration.
- Click Protocols for your instance.
- Right click on the TCP/IP in the right pane and select Properties.
- On the IP Addresses tab, scroll to the bottom and find the TCP Port for IPALL.
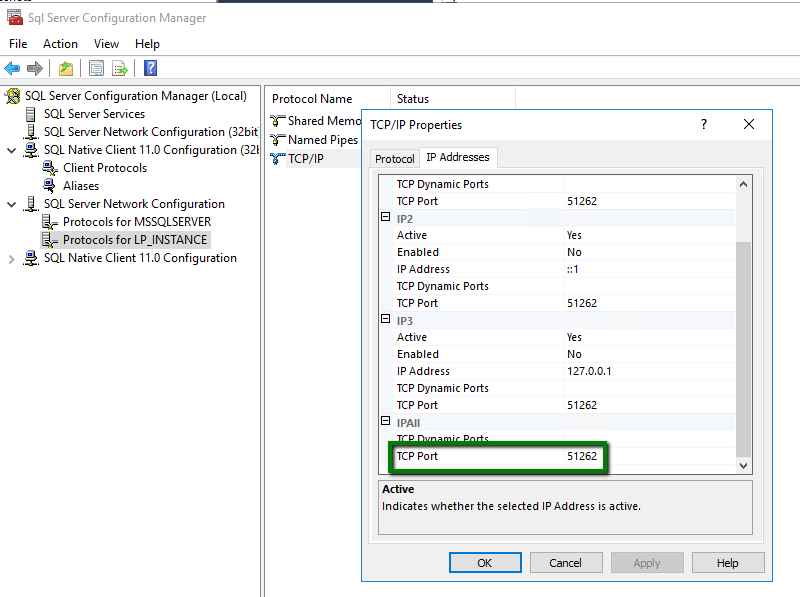
Sql Server Configuration Manager — TCP Port - Type this port number into all the TCP Port lines cited above.
- Remove the “0” from the TCP Dynamic Ports.
Enable the Named Pipes
-
- In the Sql Server Configuration Manager, ensure that named pipes are enabled.
The following snapshot illustrates this configuration:
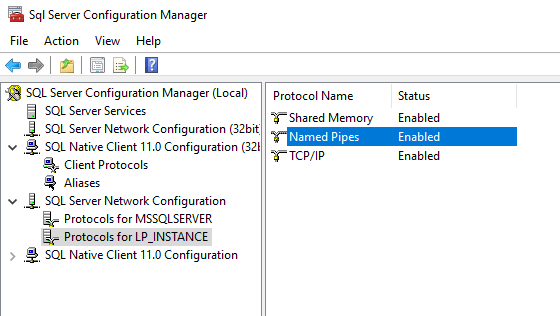
- In the Sql Server Configuration Manager, ensure that named pipes are enabled.
Sql Server Configuration Manager — Named Pipes Enabled
Ensure the SQL Server Browser is Running
- In the Sql Server Configuration Manager, ensure that the SQL Server Browser is running.
The following snapshot illustrates this configuration and state:
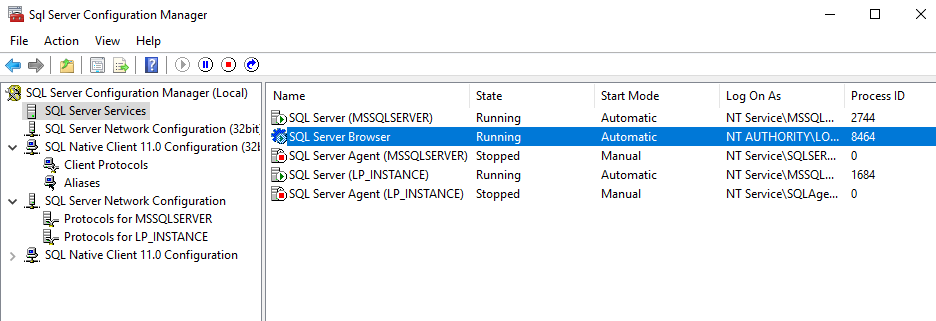
Sql Server Configuration Manager — SQL Server Browser is Running
Use the Listener Port During the Transact 4.5.0.0 Installation
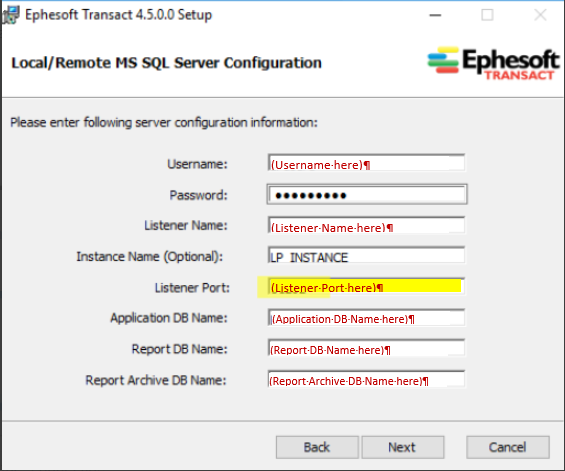
- When you begin the Transact 4.5.0.0 installation, be sure to use the Listener Port that you defined with previous steps.
The following snapshot illustrates this port.
Windows and Server Installations
Before installing Ephesoft on Windows, we need to perform some configuration changes. Ephesoft installer Service Packages, such as 3.1.2.0, are all inclusive; there is no need to install 3.1.0.0 beforehand. After installation is complete, please check our Downloads and Updates page for cumulative updates between Service Pack versions that may be available.
Windows Compatibility
(V3.1 and above) – Compatible with all certified Windows versions up to Windows Server 2012 R2.
(Up to V3.0.3.4 SP2) – Compatible with all certified Windows versions up to Windows 8.0 and Windows Server 2012.
Note: If you are attempting to install Ephesoft in order to add another server to your environment (Multi-Server) Please refer to the following Article: How to create a Multi-Server Environment with Ephesoft?
Steps to be followed in order to properly run the Ephesoft Installer:
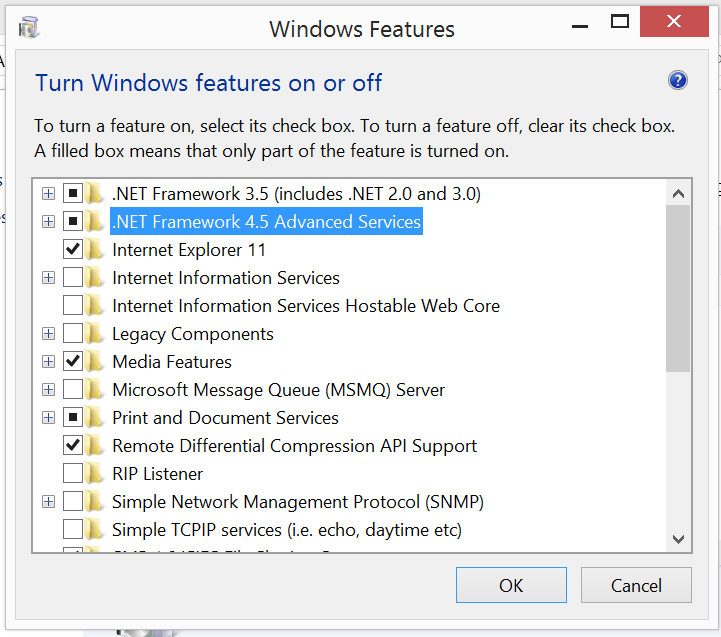
1. Turn on .NET Framework 3.0(includes .NET 2.0 and 3.0) Windows feature.*
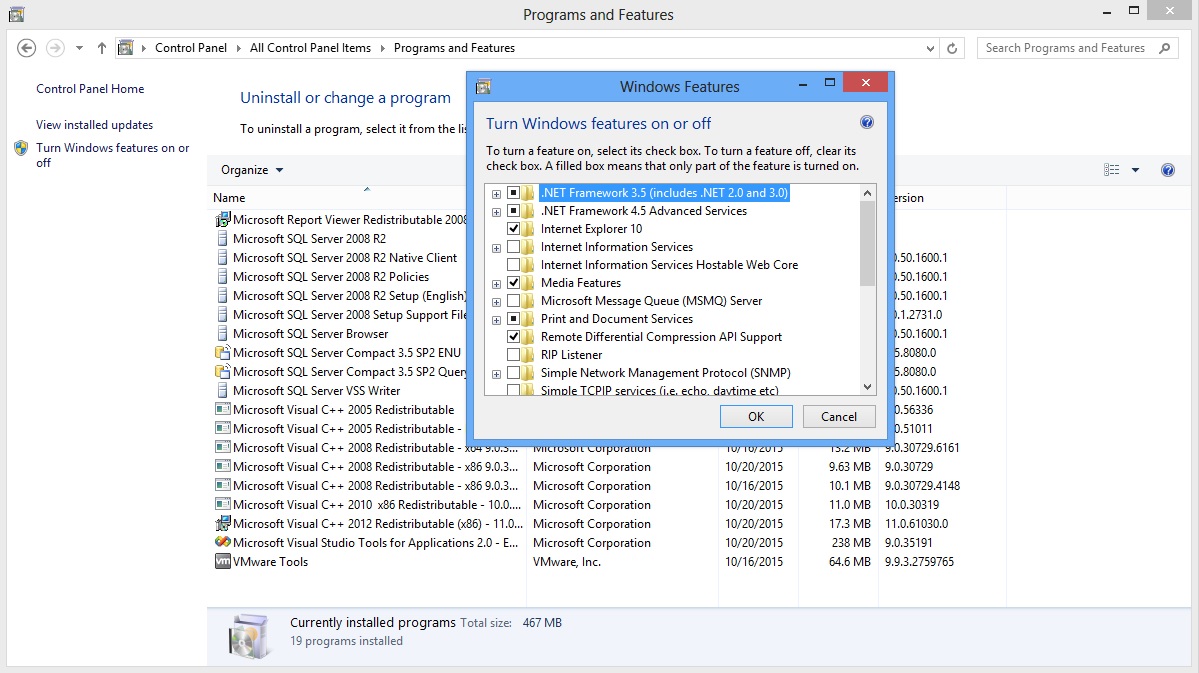
Note: Windows 8 and Server 2012, 2016 by default have this .Net Framework version disabled. We need to enable this manually.
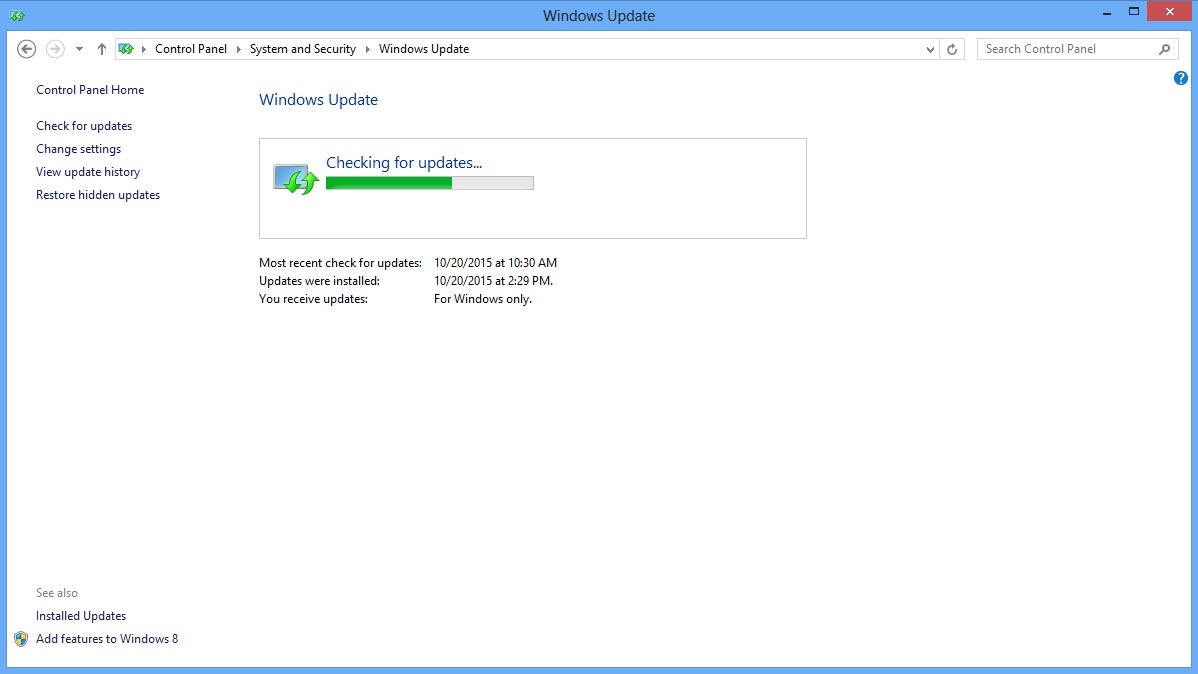
2. Check for windows update, download and apply updates.
3. Turn Windows User Account Control (UAC) OFF.
4. Check that the Ephesoft installation file isn’t blocked by certain versions of Windows. Right click file and check the properties. Unblock if necessary.

5. If the infrastructure environment that supports Ephesoft has antivirus, exclude all ephesoft directories for best performance.
6. You also need to ensure that the following are installed on the Windows server:
.Net Framework 4.0 (Applies to All Versions of Ephesoft)
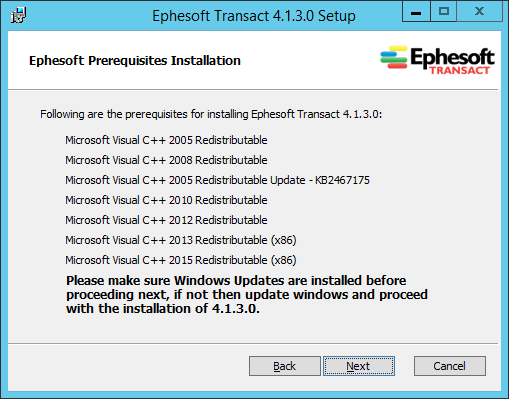
The following Redistributables are installed through the Transact installer:
- Microsoft Visual C++ 2005 Redistributable
- Microsoft Visual C++ 2008 Redistributable
- Microsoft Visual C++ 2005 Redistributable KB2467175
- Microsoft Visual C++ 2010 Redistributable
- Microsoft Visual C++ 2012 Redistributable
- Microsoft Visual C++ 2013 Redistributable x86
- Microsoft Visual C++ 2015 Redistributable x86
- Microsoft Visual C++ 2015 Redistributable x64
Please be aware that any version of Visual Studio higher than the latest Microsoft Redistributable included in the Ephesoft Transact installer will stop the installation. Ephesoft Transact has to be installed before any higher version of Visual Studio if needed.
7. For Ephesoft versions up to Ephesoft 4.5 disable IPv6 by applying Microsoft process – http://download.ephesoft.com/Ephesoft_Product/Wiki_links/MicrosoftEasyFix50409.msi
8. If using MS SQL Server Following the instructions using the following link (Applies to v4.5.0.0 or higher) – Link
9. After successful completion of previous steps, you are now ready to Install Ephesoft on a Windows server using one of the following (Click to go to the desired page):