Introduction
This document describes how to start using Ephesoft Transact inside UiPath.
What You Need
To complete the tasks in this document, ensure that you have the following prerequisites in place:
- Installation and licensing of Ephesoft Transact 4.5.0.2 or a later release
- Ephesoft Webservice/API license
- Basic understanding of Ephesoft Transact batch class administration
- Installation and licensing of UiPath Studio Enterprise or Community
- 30-minutes of time to complete the tutorial
- Access to the Ephesoft Getting Started tutorial resources:
- Download the Ephesoft Transact Getting Started Demo
- In the package you will find the following components:
- Ephesoft Example batch class (Batch Class RPA Invoice Example.zip)
- UiPath Project (EphesoftGettingStartedDemo project.json)
Import the Batch Class into Ephesoft Transact
You must import the example batch class to help complete the setup for this tutorial. Note the following details about this batch class:
- The download package contains a sample Ephesoft Transact batch class.
- Log into Ephesoft Transact as an Administrator.
- Use the Batch Class Management screen to import the Ephesoft batch class that you downloaded from the Getting Started resource cited earlier.
UiPath Activities Overview
This section provides the following examples of how to use Ephesoft Transact together with UiPath:
- Batching Method
- Open and Run the Batch Processing Action
- Execute Non-Batch-Processing Actions
1. Batching Method
The most common method of using Ephesoft Transact with UiPath is the batching method.
- This method puts images into an Ephesoft batch.
- The user processes the batch through the complete Ephesoft Transact workflow.
- The user exports the batch using a CSV export within the batch class export plugin.
The following snapshot illustrates the Ephesoft-UiPath actions that are available for download on the UI Path Marketplace: Transact for Ephesoft.
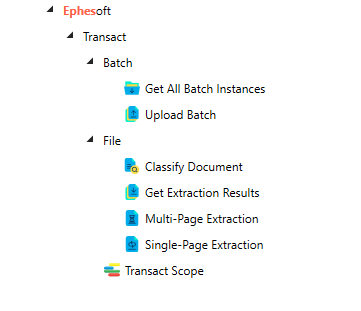
In this sample setup, all the UiPath actions use the Ephesoft REST API as an integration point.
The UiPath actions supported in Ephesoft Transact in this sample setup are as follows:
1. Transact Scope — This is the authentication scope that is needed for all Transact Actions.
2. Get All batch Instances — This will get all the batches of a particular batch status.
3. Classify Document — This action will classify a single file document type.
- This activity supports the following image file types:
One file to be processed (a single- or multi-page TIFF file, or a zip file containing one or more TIFF or PDF files)
4. Multi-Page Extraction — This action will process multiple pages. If you are familiar with the Ephesoft Rest API this action uses the InitiateClassifyExtract API which returns a callback token.
- This activity supports the following image file types:
One file to be processed (a single- or multi-page TIFF file, or a zip file containing one or more TIFF or PDF files)
5. Get Extraction Results — This action is used in conjunction with the multi-page extraction call.
6. Single-Page Extraction — This action processes a single-page document and returns document-level fields. This action uses Ephesoft REST API v2/OcrClassifyExtract API.
- This activity supports the following image file types:
One input file of a valid file format, or a zip file containing multiple files of valid file formats.
2. Open and Run the Batch Processing Action
Another method of using Ephesoft Transact with UiPath is to perform one or more batch processing actions.
To use this method, you must sign up for UiPath Studio and download the UiPath Studio app from UiPath.com.
Perform the following steps to open and run a batch-processing action:
1. Open the UiPath project by opening the project.json file.
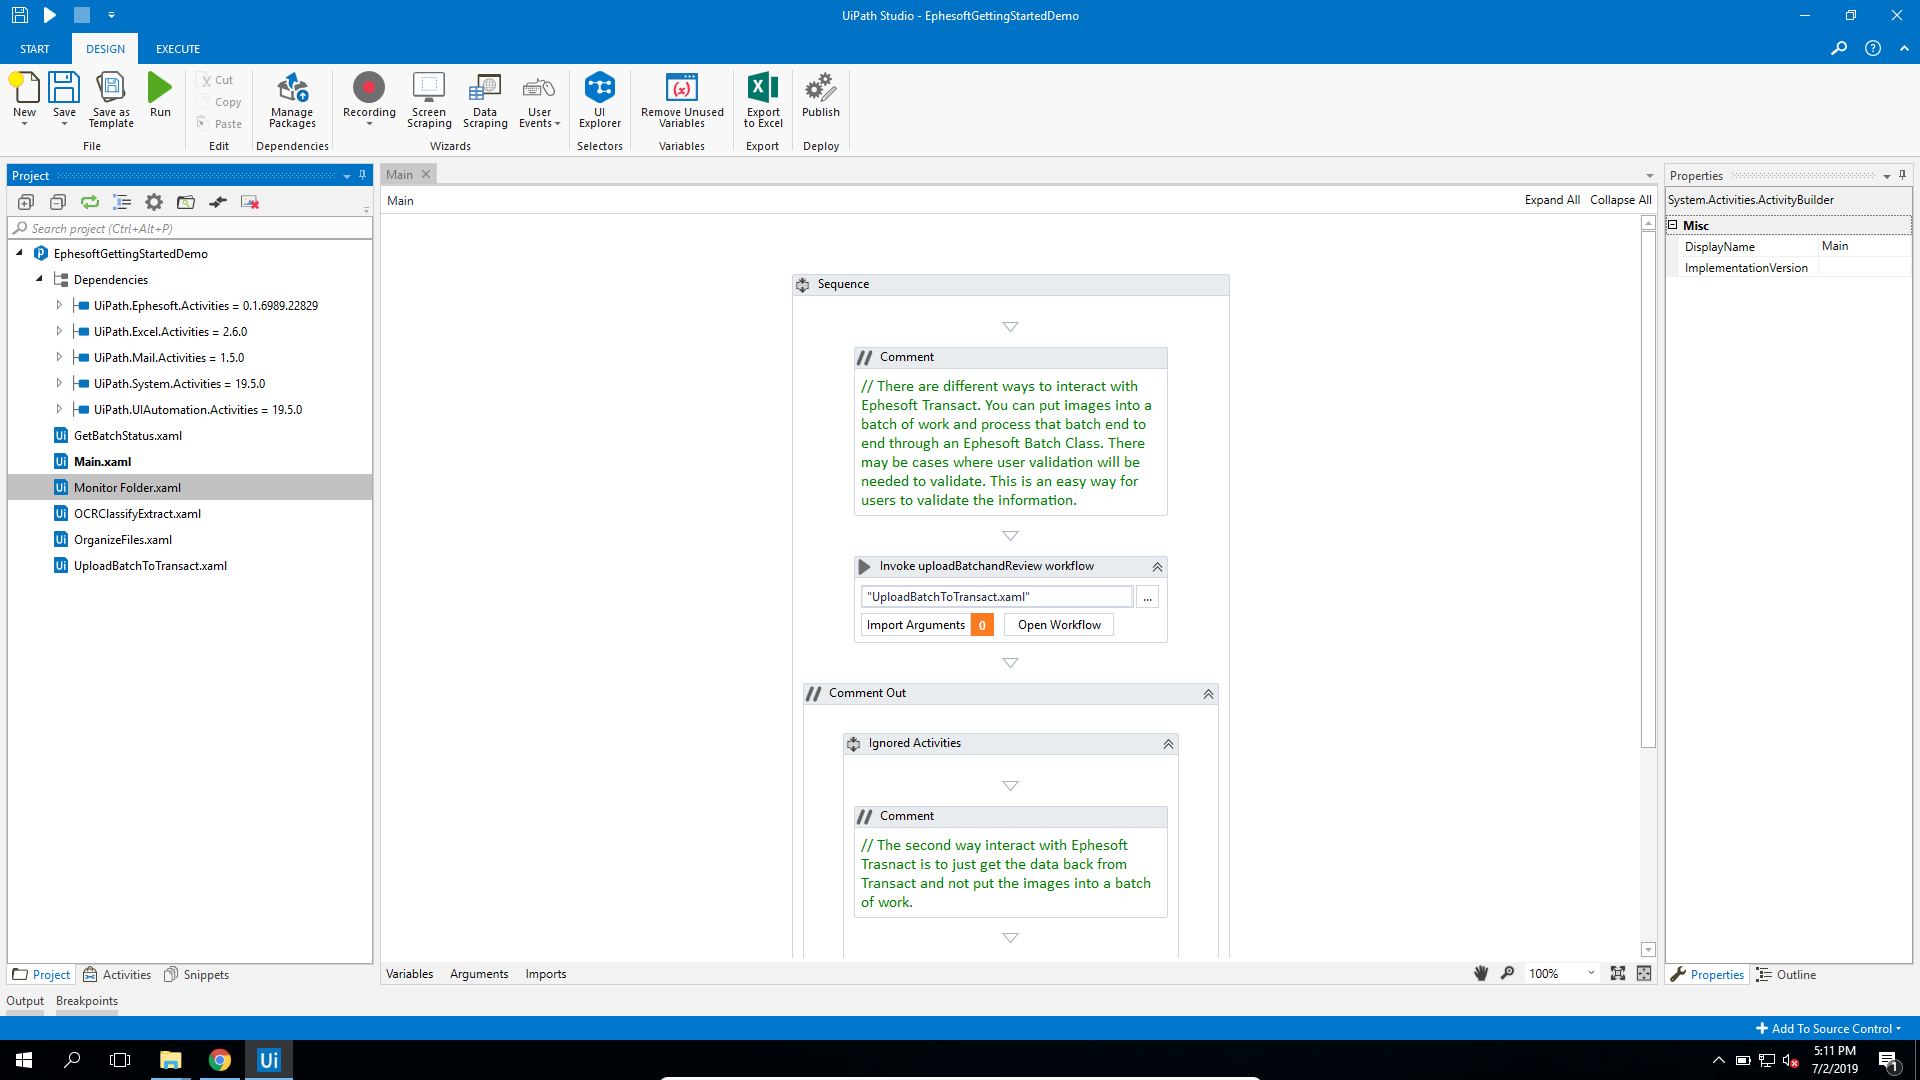
2. Be sure to update the Ephesoft Transact scope.
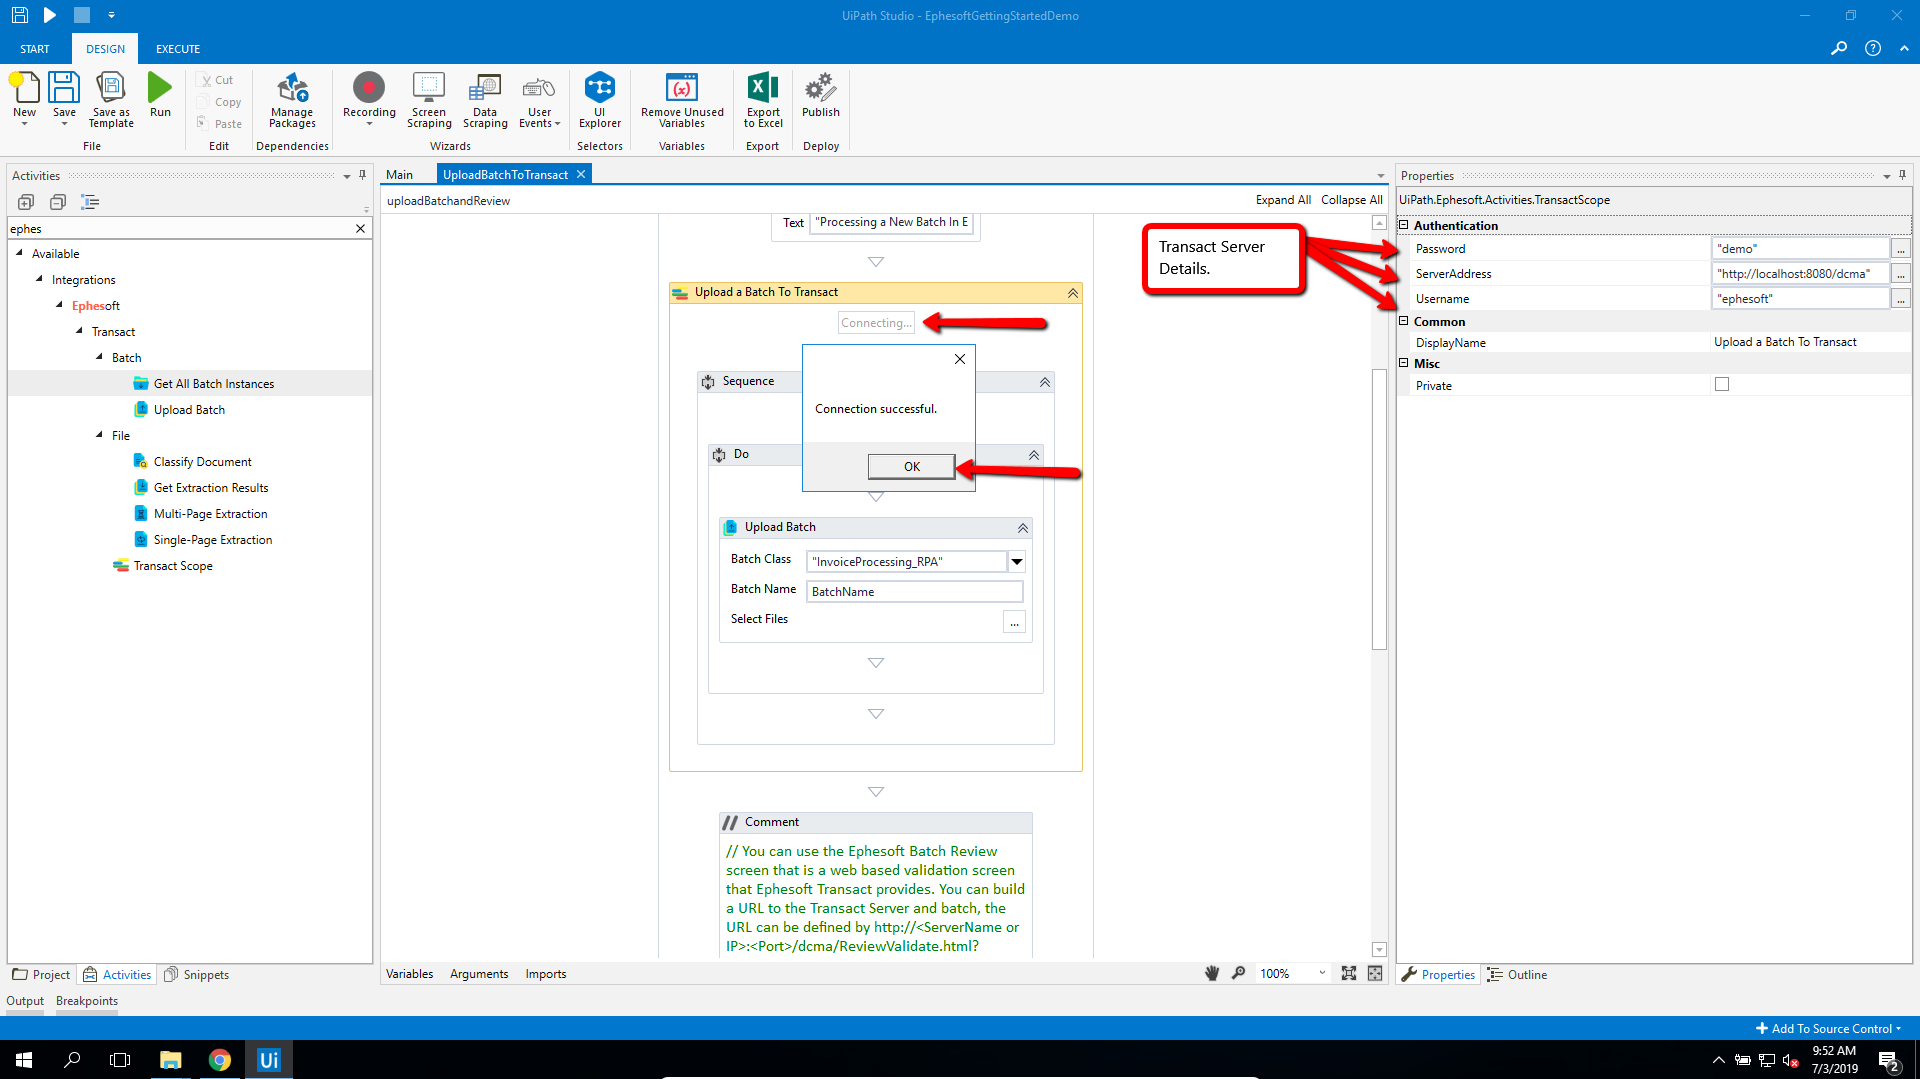
3. When the sequence is running, you are able to view the batch queue up in the Batch Instance Management screen, as illustrated in the following snapshot:
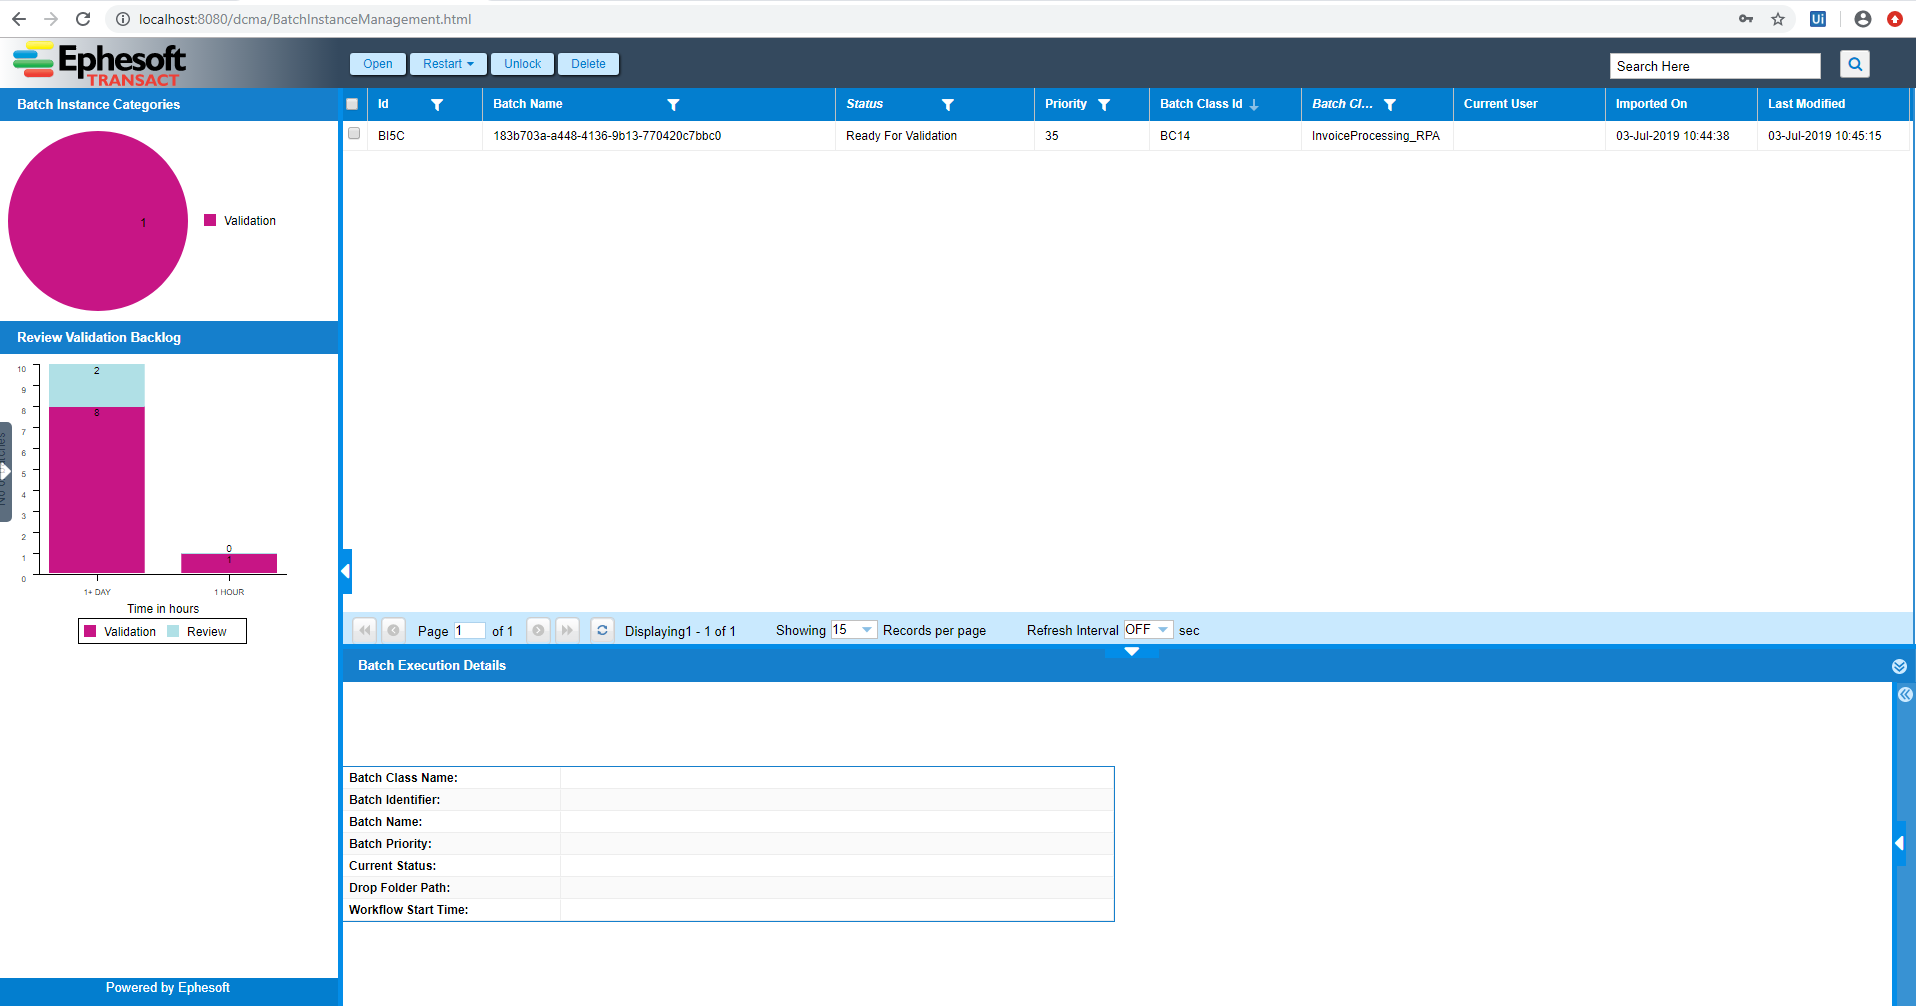
4. If the batch becomes Ready for Review or Ready for Validation, Transact prompts you with a dialog that contains a hypertext link to the Validation page.
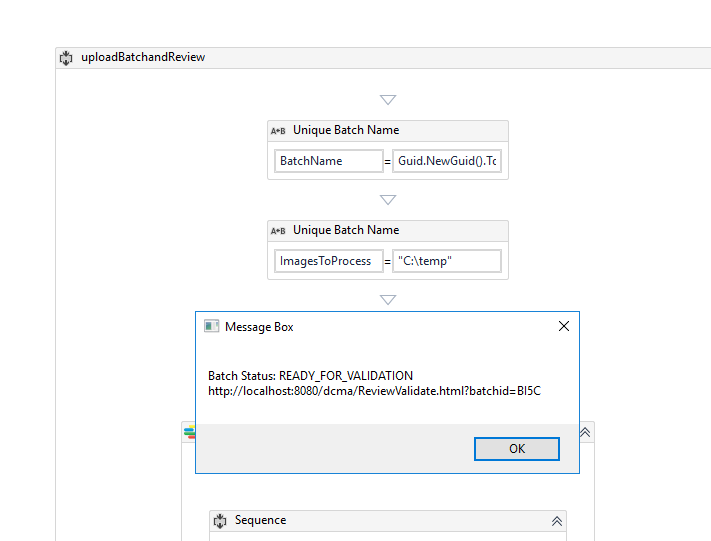
5. Open the URL in the message to be directed to the Ephesoft web-based Validation screen.
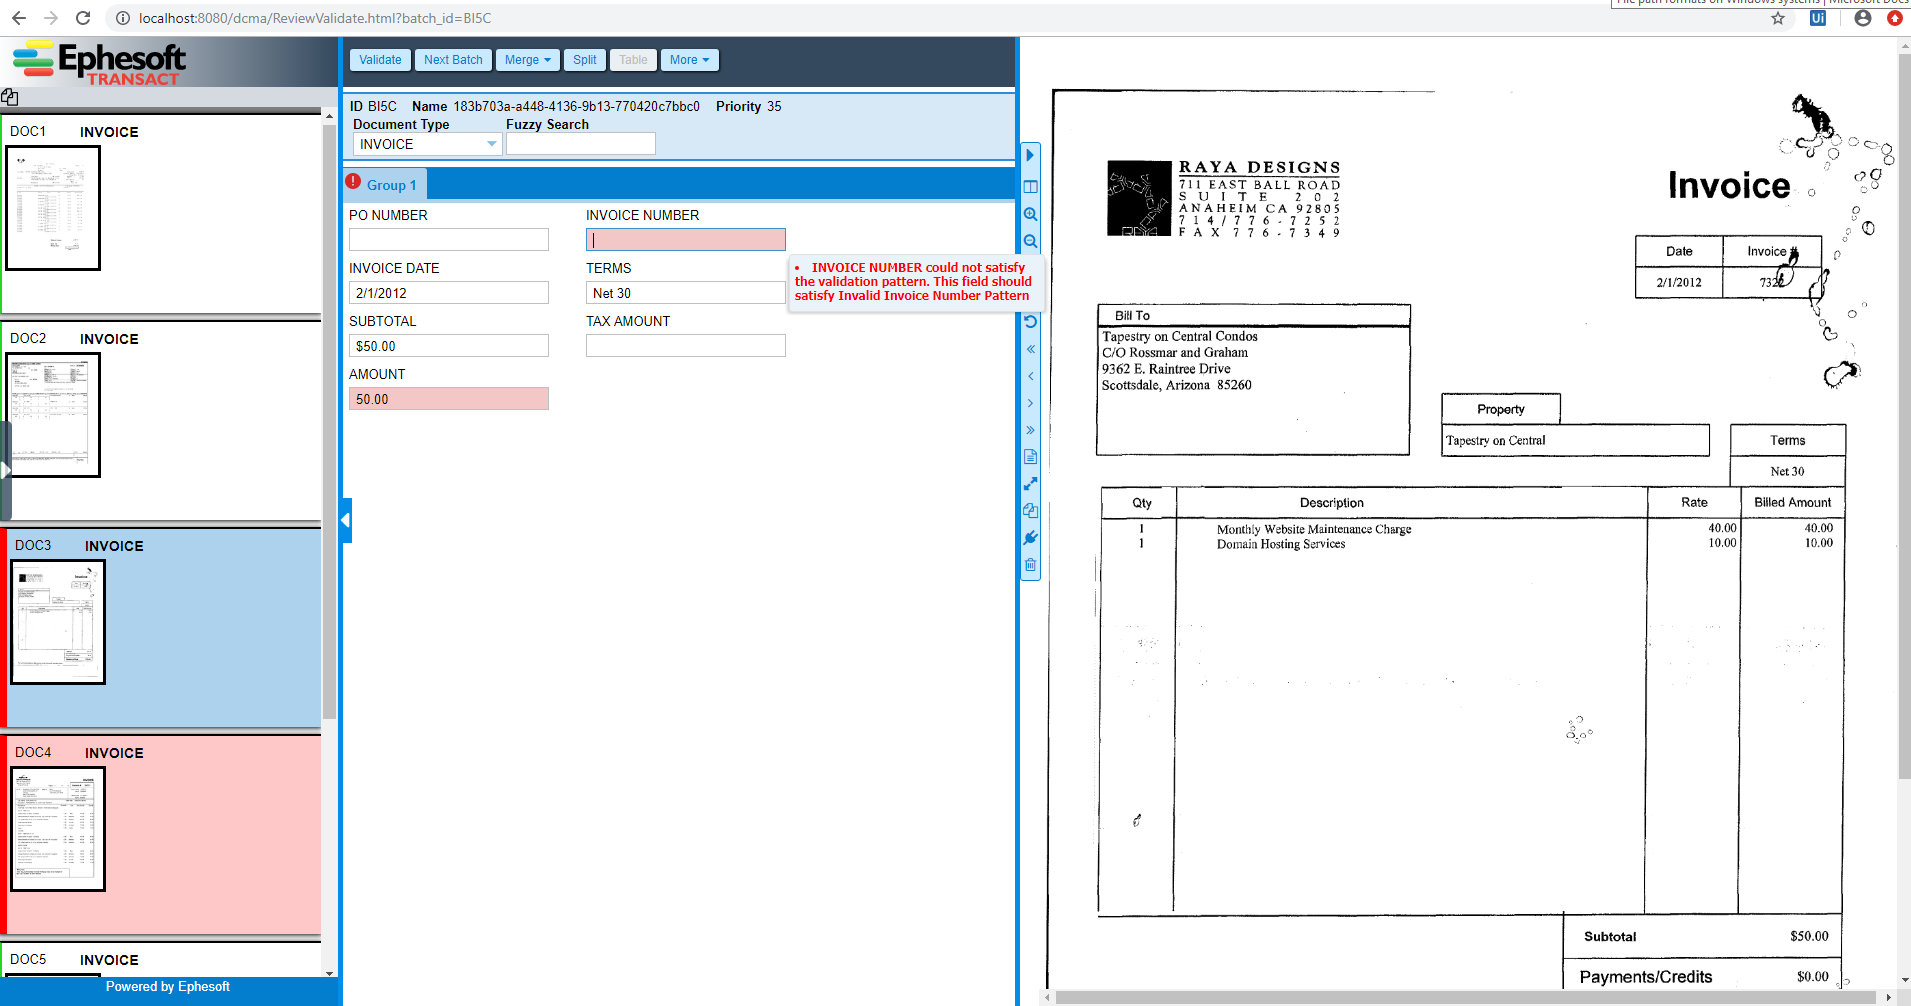
Figure 6. Validation screen
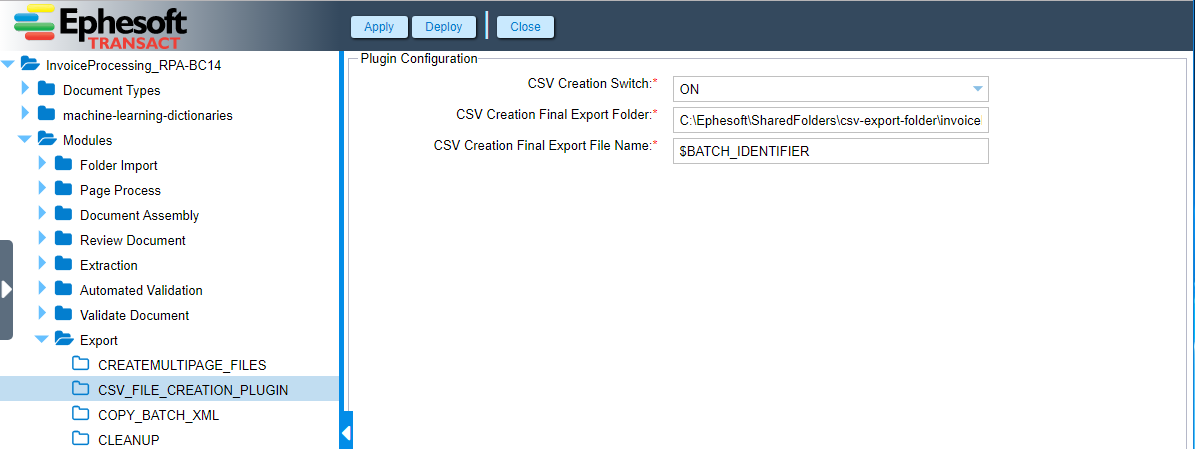
Once the batch is validated in the Validation screens, Transact exports the batch as a CSV file.
The following snapshot illustrates the Export plugin that is used in this sample batch class.
This example includes a UiPath workflow that monitors a folder path for the CSV data to drop out and for the Uipath robot to pick it up and continue to a process.
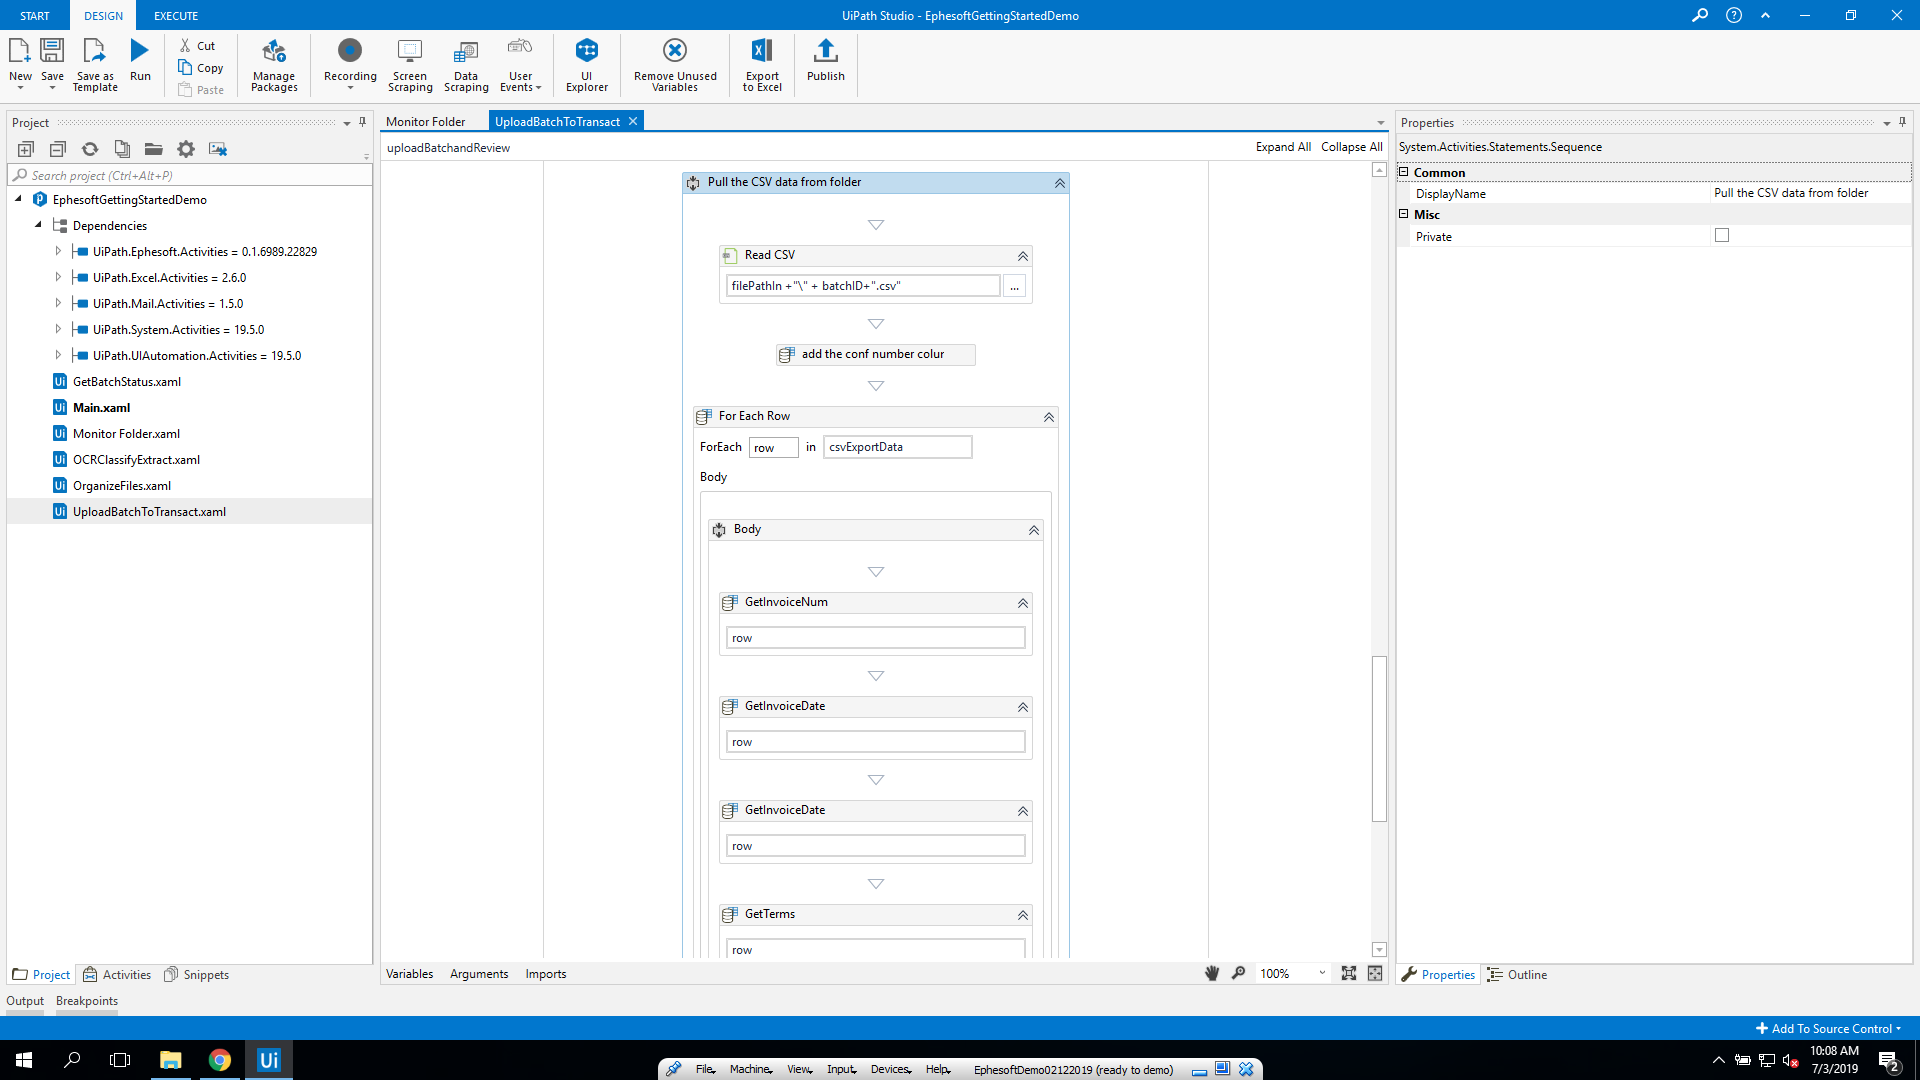
The user can load data back in via the CSV actions contained in UiPath.
3. Execute Non-Batch-Processing Actions
The alternate method of calling Ephesoft Transact from UiPath is an in-process type of data capture.
This method does not put the image into an Ephesoft Transact batch. Instead, it returns the data as depicted in the example below.
The workflow that showcases this method is the Multi-PageExtraction example.
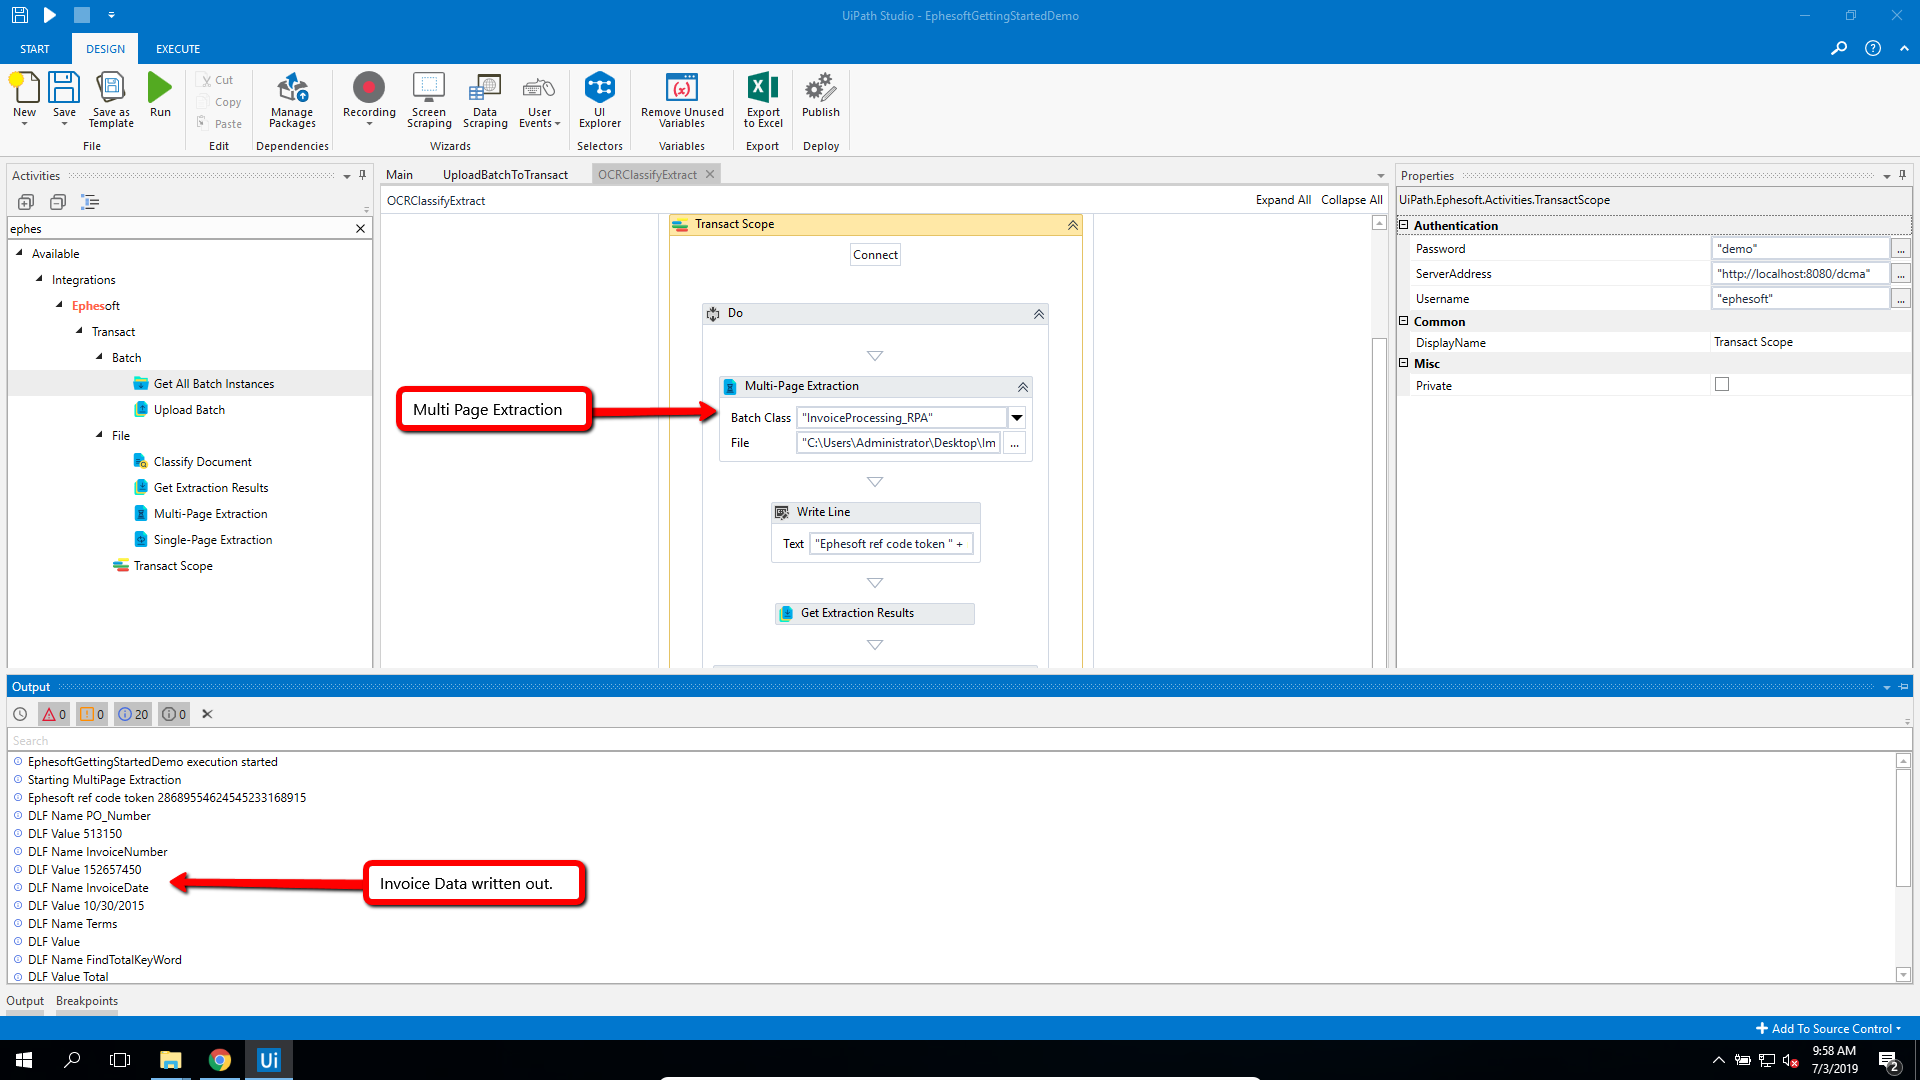
Be sure to update the Transact Scope as needed.
Conclusion
If you have completed the tasks in this document, you have experience with setting up and performing multiple UiPath activities with Ephesoft Transact.