This document provides an overview of validating documents in Ephesoft Transact. This information is intended for Transact operators.
In this page:
- Validate User Interface
- Why Documents May Need Manual Validation
- How to Validate Documents
- How to Validate Table Data
Validate User Interface
This section describes different aspects of the Validate user interface (UI). Operators use the Validate UI to verify that the content extracted from documents is accurate. After the batch is validated, it is sent to the Export module.
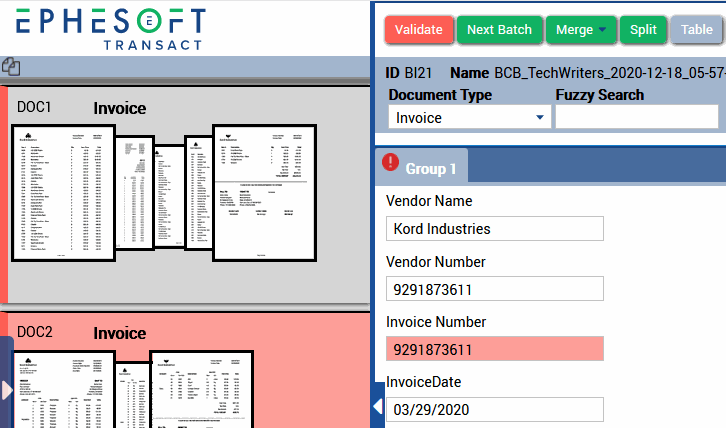
The Validate UI is split into three panels:
- Left Panel: Document Types and Pages
- Middle Panel: Validate Extracted Data
- Right Panel: Image Preview

Left Panel: Document Types and Pages
The left portion of the UI displays the documents in the batch using a red light/green light system, just like in the Review module. Green indicates no action is needed, while red indicates an operator may need to add missing information or confirm that the data Transact extracted is correct.
When processing multi-page documents, you can reorder the pages by opening the Document Page View Panel. To do so, click the document icon (📄) in the top left, or use the shortcut Ctrl + Shift + O.
Then drag and reorder the pages as needed.
Middle Panel: Validate Extracted Data
The middle panel displays the index fields and data that Transact extracted from a document. These fields are configured by the administrator when setting up the batch class. Transact locates these fields and extracts data from the documents.
Some fields may be highlighted red during Validation. This means that the field must be addressed by an operator before the document can be validated. Index fields may be highlighted red if:
- The index field couldn’t be found;
- The OCR confidence for the field isn’t met; or
- The validation pattern couldn’t be satisfied.
Main Toolbar

The middle panel also includes the main toolbar, which includes the following options:
| Option | Description |
| Validate | Validates the currently selected document and proceeds to the next document in the batch. Once the last document in the current batch is reviewed, it will automatically proceed to the next batch. |
| Next Batch | Proceeds to the next batch. If no batches remain, you will be redirected to the Batch List page. |
| Merge | Used to merge two or more documents together. When selected, opens a drop-down with the documents in the batch, and the currently selected document highlighted.
|
| Split | Used to split a multipage document into two documents. When selected, the following confirmation appears:
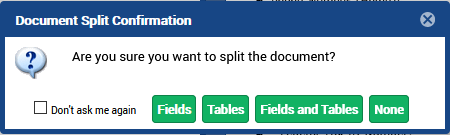 These options determine what will be available in the split document:
|
| Table | Replaces the index field view with the table view. This button is only enabled if your administrator has configured table extraction for the selected document type. |
| More | |
| Function Key | Under More > Function Key, this sub-menu lists available function key scripts configured by your administrator. If none are available, this sub-menu will be disabled. Refer to Function Keys for more information. |
| External Application | Under More > External Application, this sub-menu lists external applications configured by your administrator. If none are available, this sub-menu will be disabled. Refer to External Applications for more information. |
| Scanning | Under More > Scanning, this sub-menu lists the following options:
Refer to the Web Scanner User Guide for more information. |
| Next Batch Algorithm | Under More > Next Batch Algorithm, this sub-menu controls how the next batch will be chosen.
Available options are:
|
| Learn File(s) | Under More > Learn File(s), this option performs machine learning of a document configured with Search Classification or Multidimensional Classification. |
| Expedite Export | Under More > Expedite Export (or using the shortcut Ctrl+Shift+E), this option moves currently validated documents to a new batch and sends it to the next stage of the workflow process.
Refer to Expedite Export for more information. |
| Shortcuts | Under More > Shortcuts, this sub-menu displays all shortcuts supported during validation.
Refer to Using Keyboard Shortcuts for more information. |
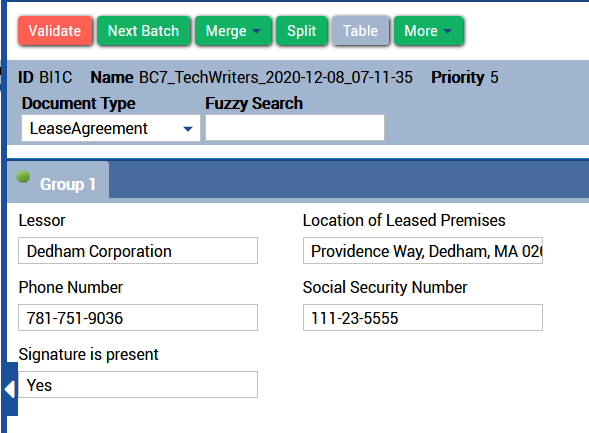
Directly beneath the main toolbar is various information about the batch (batch ID, name, priority level, and the selected document type), and the Fuzzy Search option.

Figure 6. Batch Information
Group Tabs
If your administrator has configured groups, the middle panel will also display tabs that group similar index fields together. Any index field that does not have a group specified will be assigned to “Group 1” by default.

Figure 7. Group Tabs
If all index fields in a group have been extracted correctly, the tab will be marked with a green circle (🟢). If any index fields in the group require validation, the tab will be marked with a red exclamation mark (❗).
Right Panel: Image Preview and Toolbar
The right panel displays the image preview and the image toolbar.
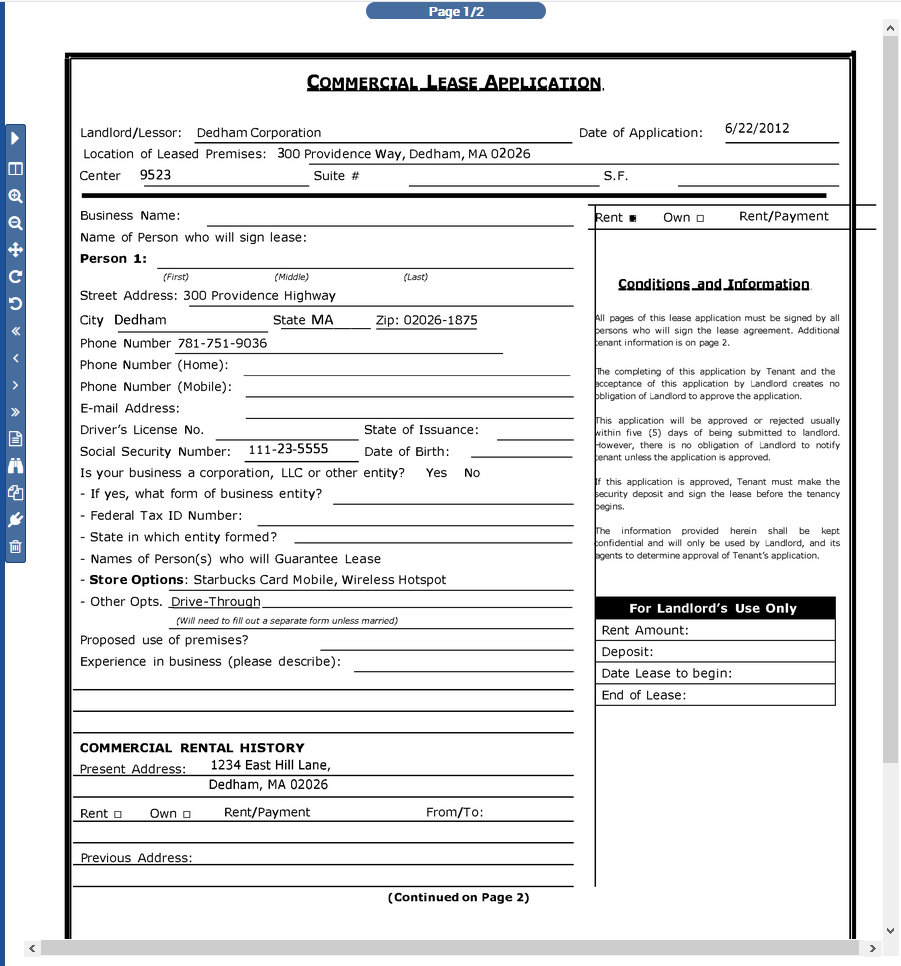
Figure 8. Image Preview
The image toolbar provides various ways to interact with and adjust the preview image during validation. The table below describes each available option.
| Toolbar Option | Icon | Description |
| Move Right/Move Left | Moves the toolbar to the opposite side of the previous image. | |
| Split Image | Used to split a multipage document into two documents. Performs the same action as the Split button in the Main Toolbar. | |
| Zoom-in | Zooms in on the preview image. | |
| Zoom-out | Zooms out of the preview image. | |
| Fit Image | Fits the preview image to the window size. | |
| Rotate Clockwise | Rotates the preview image 90° to the right. | |
| Rotate Counterclockwise | Rotates the preview image 90° to the left. | |
| First Page | Moves to the first page of a multipage document. | |
| Previous Page | Moves to the previous page of a multipage document. | |
| Next Page | Moves to the next page of a multipage document. | |
| Last Page | Moves to the last page of a multipage document. | |
| View OCR/View Image | Toggle between the preview image and the OCR (optical character recognition) data. | |
| Magnification Mode/Zoom Overlay |
|
|
| Duplicate Image | Duplicates the current page. | |
| Pop-out Image | Opens the preview image in a separate window. | |
| Delete Image | Deletes the current image from the batch. |
Why Documents May Need Manual Validation
The main reasons why you may need to manually validate documents could be due to image quality, OCR confidence, and validation rules.
Image Quality
Transact cannot extract data from a document if the uploaded document is low resolution, or has artifacts on it like smudges or stains on the page. Therefore, you may need to confirm that extracted data is correct, or manually enter the information that Transact couldn’t extract.
OCR Confidence
You may need to validate a document if the OCR confidence is low. This means that the system was not confident in what was extracted. Your administrator sets the OCR confidence threshold for each index field.
Transact will highlight any fields that need your attention. You will need to inspect the document and click the highlighted index field to confirm that the extracted data is correct, or enter any missing information.
Validation Rules
Your administrator may create validation rules for the extracted data. For example, they may configure the Date field to require a specific format, such as MM-DD-YYYY for Month-Day-Year. If it does not meet that criteria when extracted, it will be flagged for an operator to edit and will remain flagged until the pattern matches.
How to Validate Documents
This section describes how to validate documents in Transact.
When validating documents in Transact, you will need to approve any fields that are highlighted in red. If the information is correct, you can move on to the next field by clicking Validate or using the keyboard shortcut Ctrl + E.
There are four options available to enter data into the necessary fields:
Manual Entry
You can click the highlighted field and enter any missing data by typing it in the field.
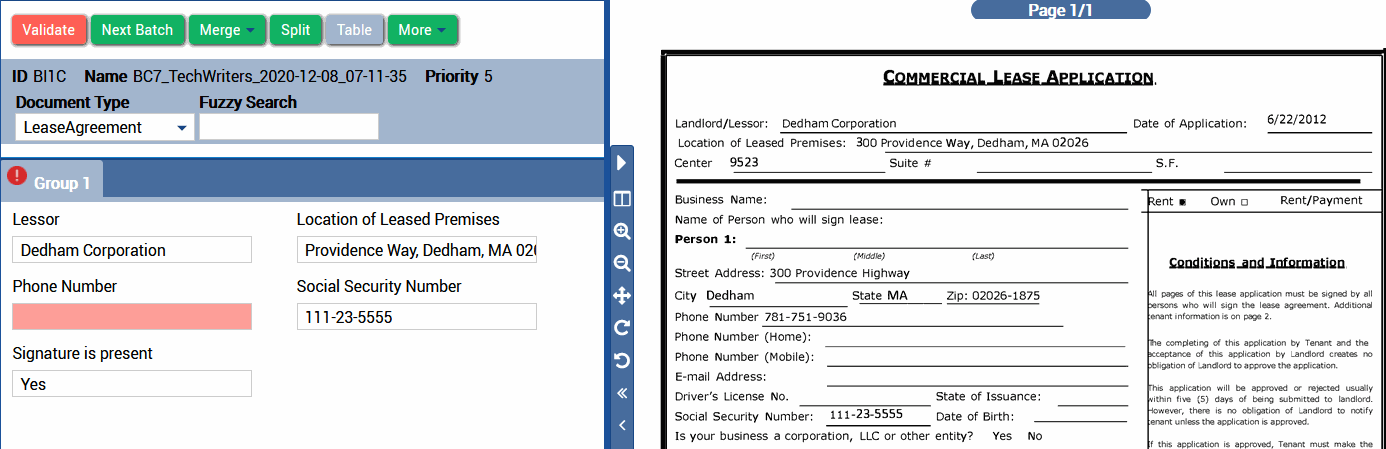
Figure 9. Manual Entry
Single Click to OCR
To copy a word or number (without spaces) into an index field, select the highlighted field, and left-click the value on the image.
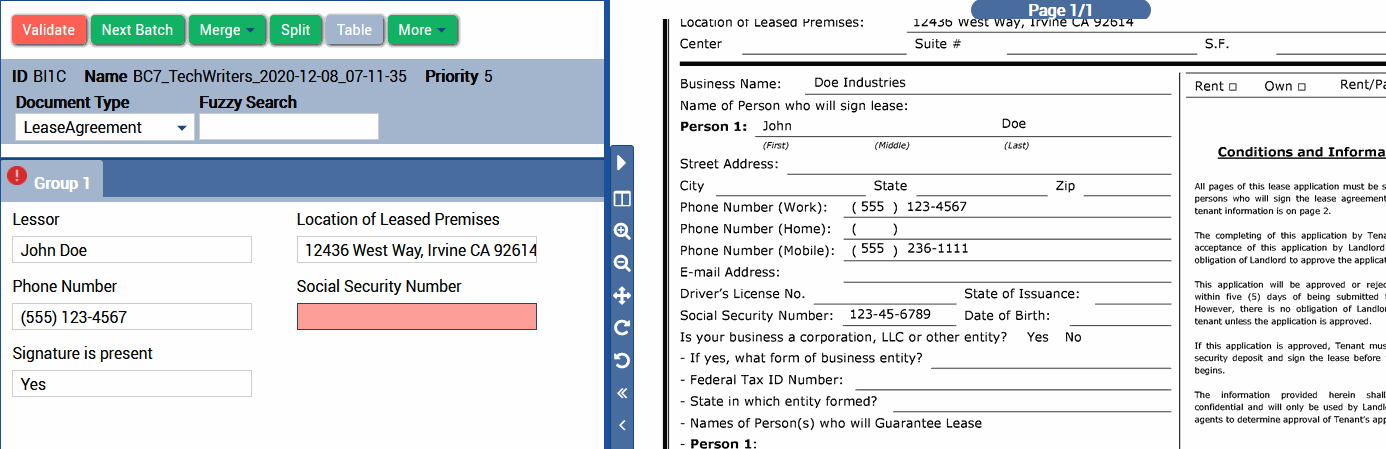
Figure 10. Single Click to OCR
Multi-Click to OCR
To copy multiple words, select the highlighted field and hold the Ctrl key while clicking the values on the image.
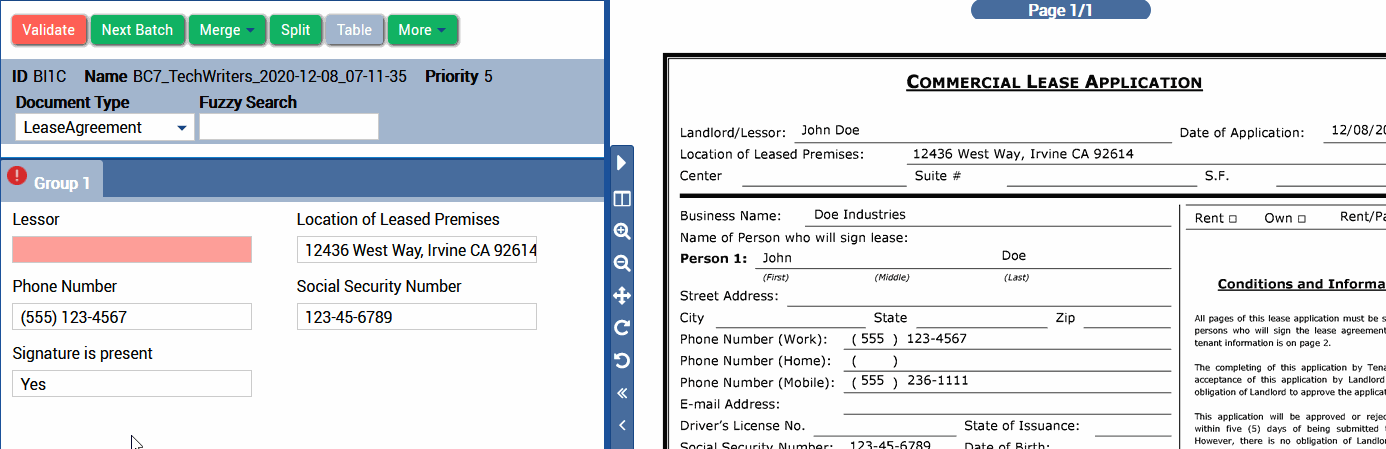
FIgure 11. Multi-Click to OCR
Rubber Band OCR
To copy a line or block of text, drag your cursor over the information. Select the highlighted field and right-click the preview image to define a corner of the selection rectangle. Then right-click again to define the opposite corner.
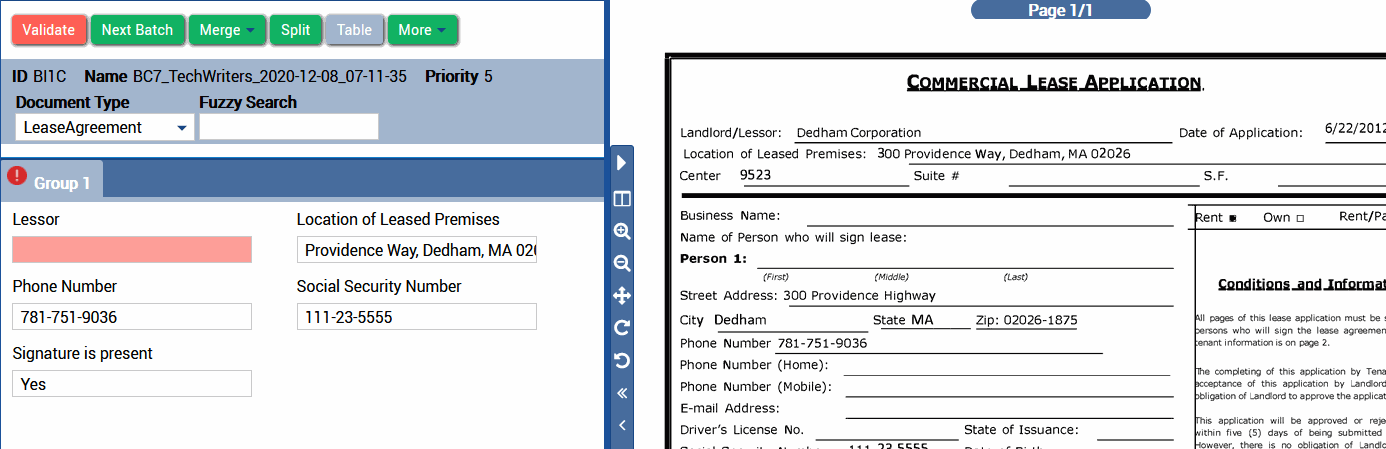
FIgure 12. Rubber Band OCR
How to Validate Table Data
When validating documents, Transact will default to the index field view. If your administrator has configured table extraction rules for your document type, you may need to validate table data as well.
To switch to the table data view, click Table. This button will be red if any table data needs approval.
Note: You can return to the index field view at any time by clicking Field View.
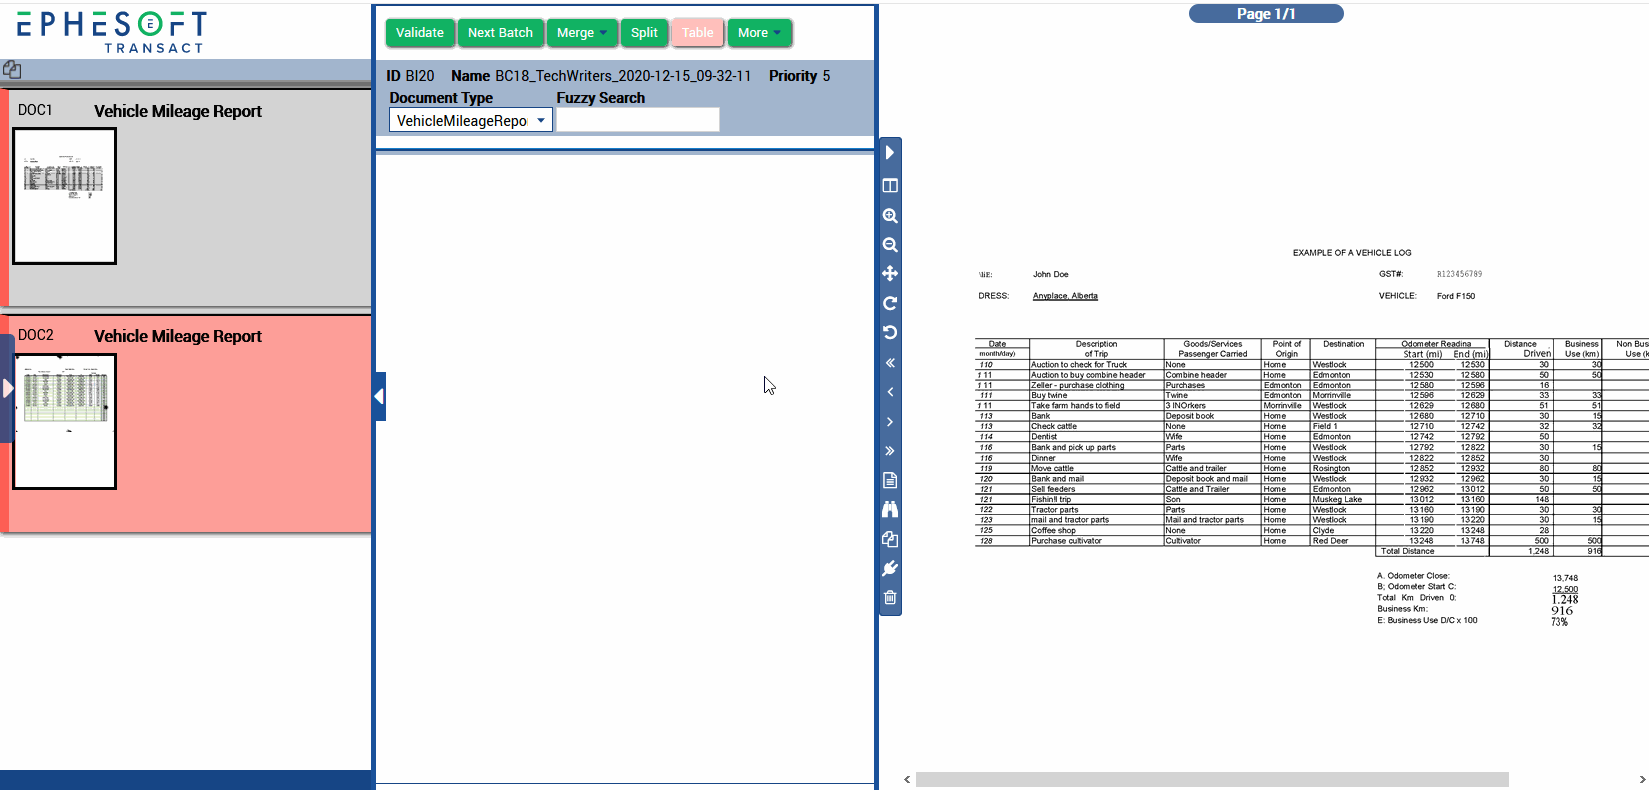
Figure 13. Switch Between Table and Field View
Review the extracted results and make any changes, if needed. Validating table data follows the same process as validating index fields.
Note: If your administrator has mapped table columns, but has not created an extraction rule for your table, you will need to extract the table manually. Refer to Semi-Automated Table Extraction for help.
Conclusion
This completes an overview of validating documents in Ephesoft Transact.