Introduction
This document describes how to configure Ephesoft Transact to export batch files and metadata to the Box repository from Ephesoft Transact, with the following elements of deployment:
- Prerequisites for using the Box Export plugin
- Setting up the Box repository application
- Configuring the BOX_PLUGIN plugin in Transact
- Executing a batch with files exported to the Box repository
- Referring to common system messages (error codes) and support
Note: This document includes configurations and steps to be completed on the Box website, which can be updated without warning at any time. If you try to follow the steps and notice the Box website UI no longer matches the information provided in this document, please contact the Ephesoft support group for assistance.
Prerequisites
- Ensure that Ephesoft Transact is installed and licensed, with an administrator account
- Ensure that a Box administrator can access and configure Box storage outside of Ephesoft Transact
Configurations: Box Platform
Creating and Configuring a New App
1. Navigate to https://developer.box.com.
2. Log in to the Box account with the credentials in which the developer application is to be created.
3. Create a new developer application by clicking Create New App.
If you are creating your very first Box app, the following screen is displayed:
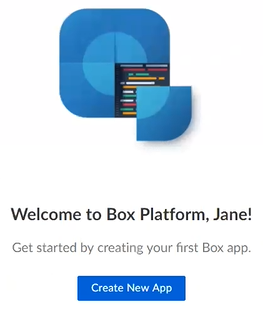
Figure 1. Welcome Screen
If you already have Box apps created, you will see the following screen:
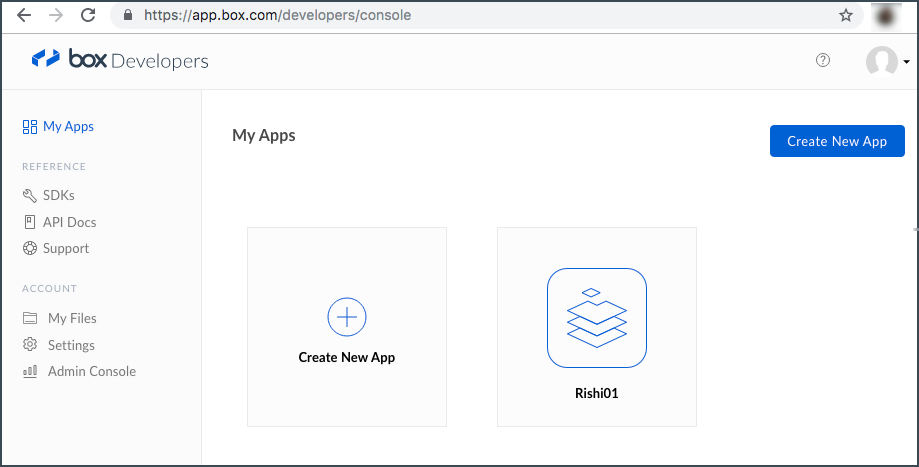
Figure 2. Displayed Screen for Box Applications Users
4. On the Create a New Box App page, select Enterprise Integration and click Next to proceed.
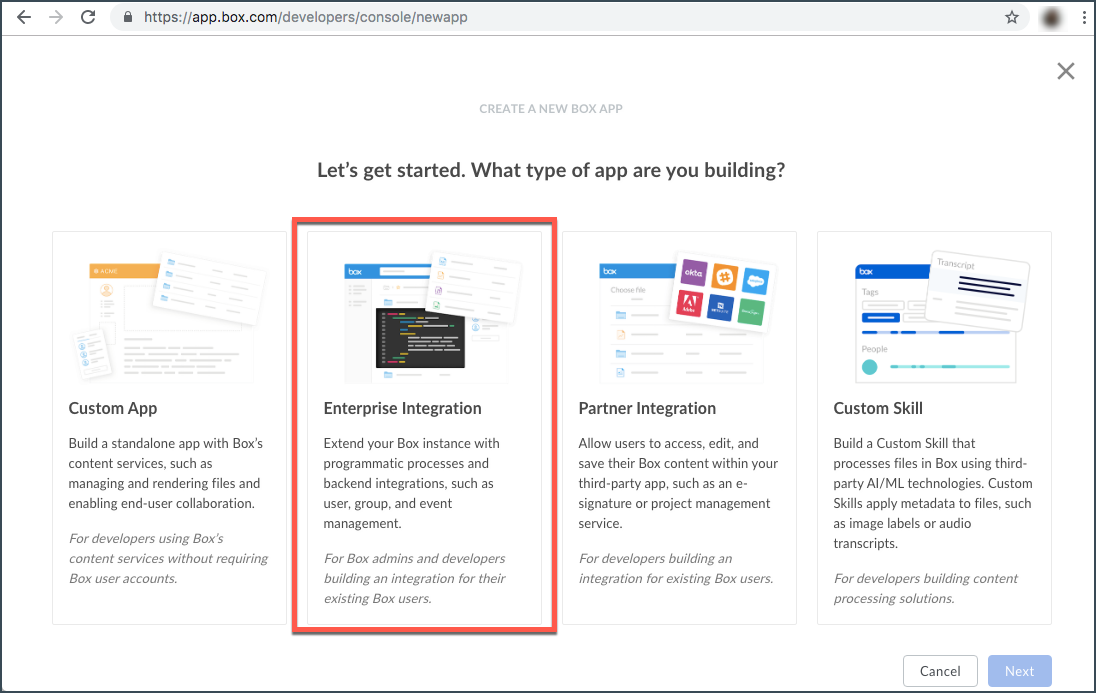
Figure 3. Create A New Box App Screen
5. On the next page, set the authentication method to OAuth 2.0 with JWT (Server Authentication). Click Next.
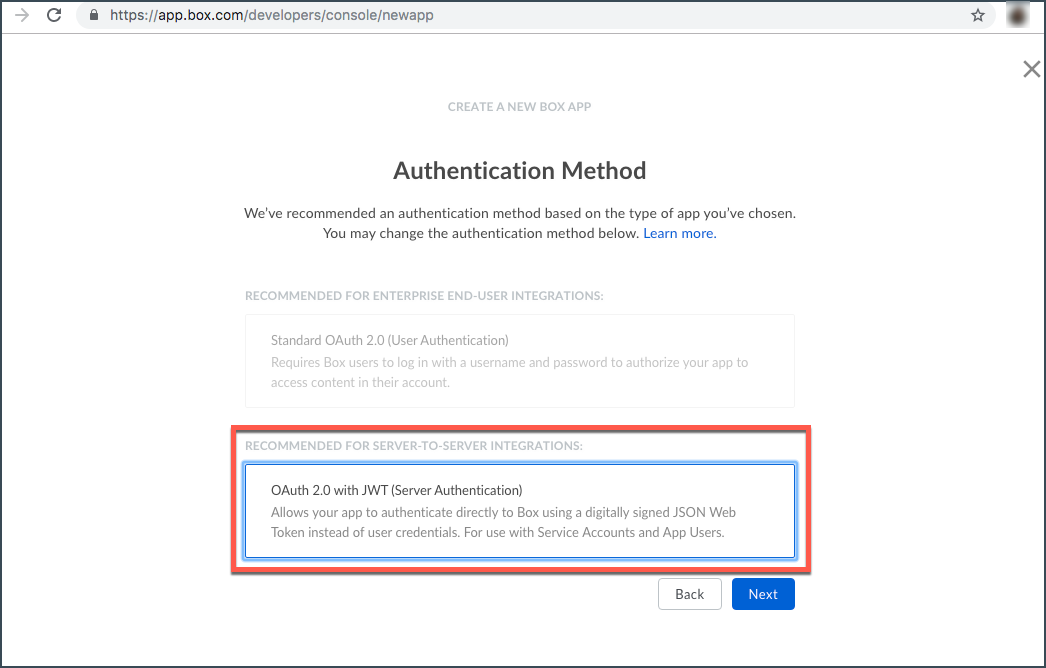
Figure 4. Screen with Authentication Method
6. Provide the name of the application (the name should be unique) and click Create App.
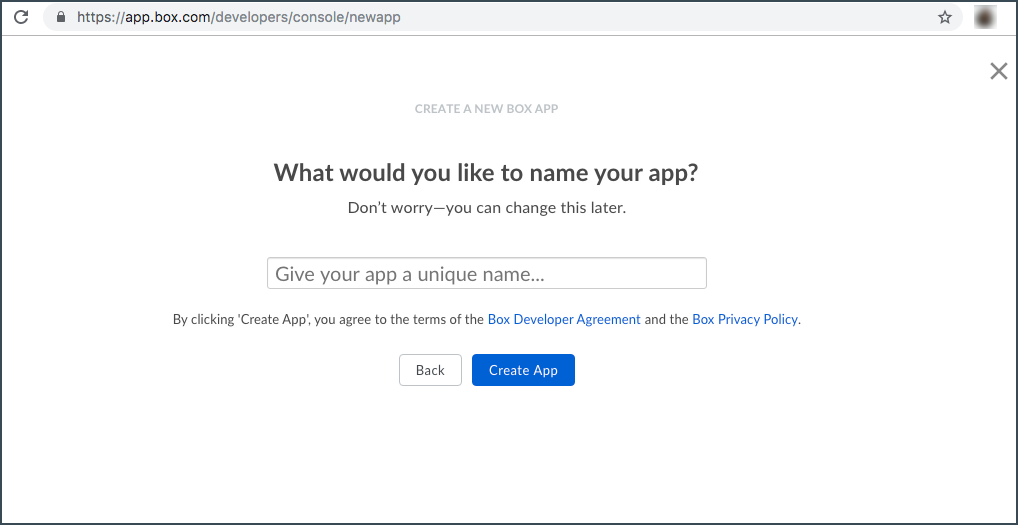
Figure 5. Screen for User to Create Box App Name
Once the unique app name is provided, the following confirmation page is displayed:
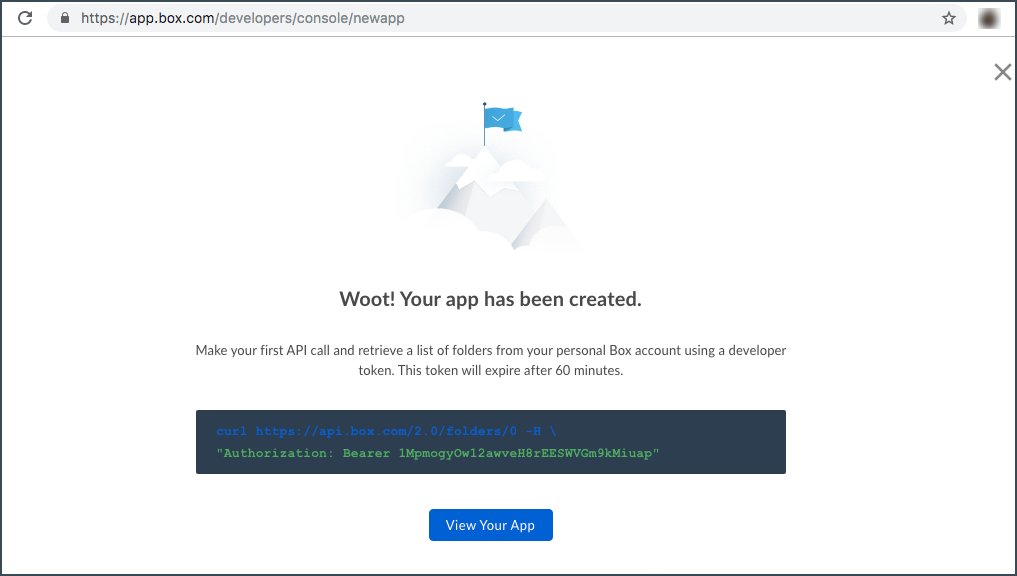
Figure 6. Box App Creation Confirmation Page
You are also provided with the developer token, which remains valid for one hour and can be used to make the first API call for a new app.
7. Click View Your App. This will take you to the App Configuration page. It includes the same developer token shown on the previous page, which can be used for testing the app.
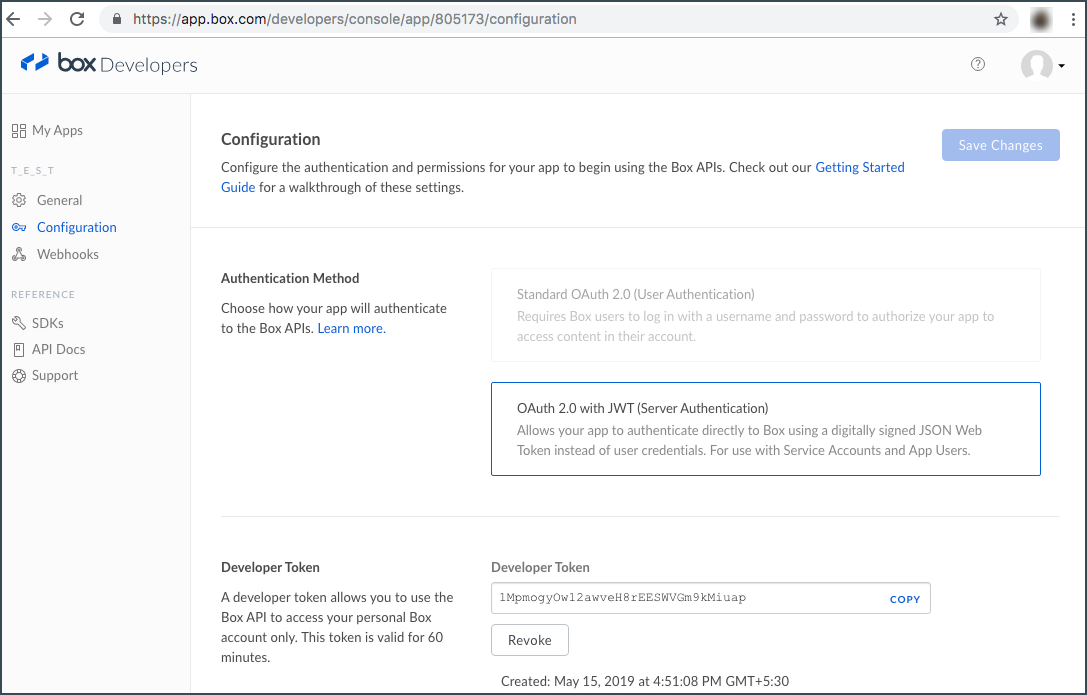
Figure 7. App Configuration Page
8. Under the Application Access, select Enterprise.
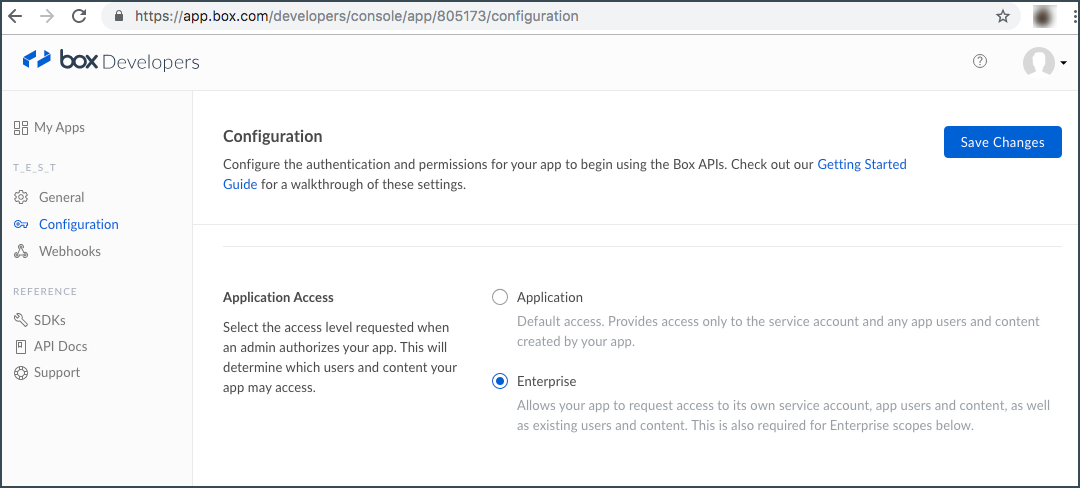
Figure 8. Screen with Enterprise Enabled
9. Under the Application Scopes, confirm that the properties are defined as shown in the snapshot below.

Figure 9. Application Scopes with Selected Properties
10. Under the Advanced Features, enable both options: Perform Actions as Users and Generate User Access Tokens.

Figure 10. Enable Perform Actions as Users and Generate User Access Tokens
11. Under the Add and Manage Public Keys section, click Generate a Public/Private Keypair.
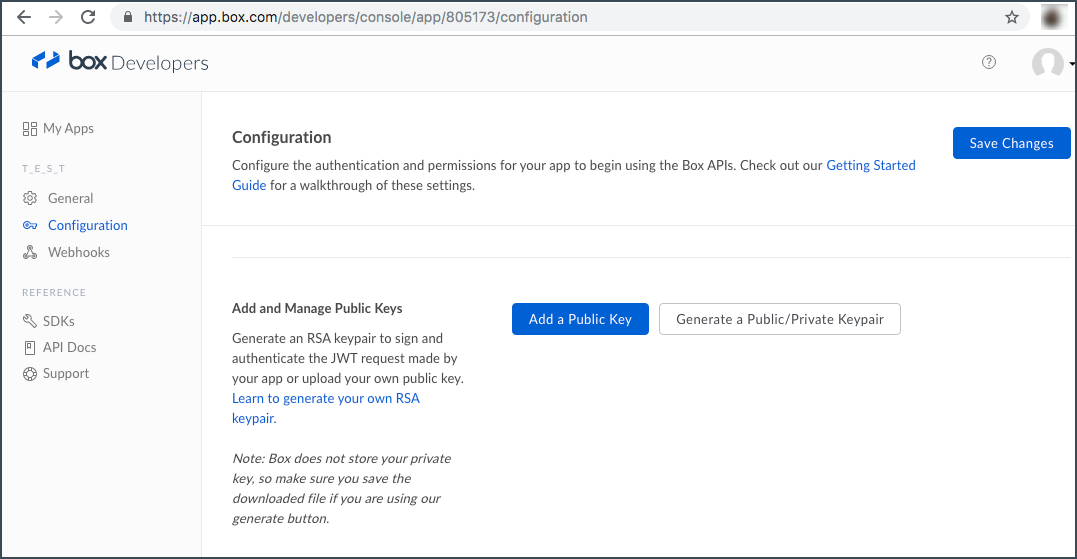
Figure 11. Configuration Screen to Generate A Public/Private Keypair
This downloads a JSON file with the Box connection details (which will be used in Ephesoft Transact during the Box plugin configuration), and the following confirmation message is displayed:
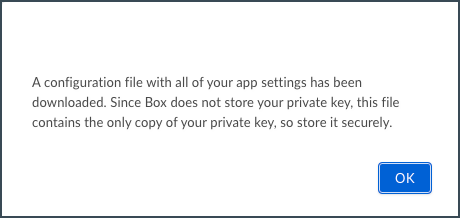
Figure 12. Example of Confirmation Message
This JSON file contains the following Box app settings:
- clientID
- clientSecret
- publicKeyID
- privateKey
- passphrase
- enterpriseID
Note: You may be prompted to complete a 2-step verification with one-time password being sent to the phone number you used to register. You can set up 2-step verification using the steps found in the Enabling 2-Step Verification section of this document.
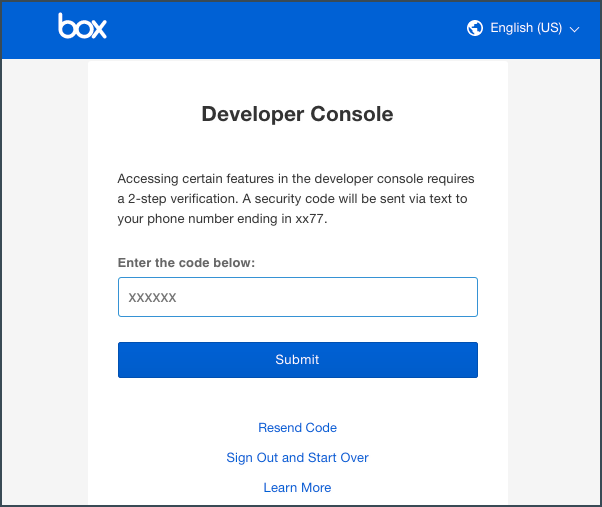
Figure 13. Prompt for 2-Step Verification
12. Click Save Changes.
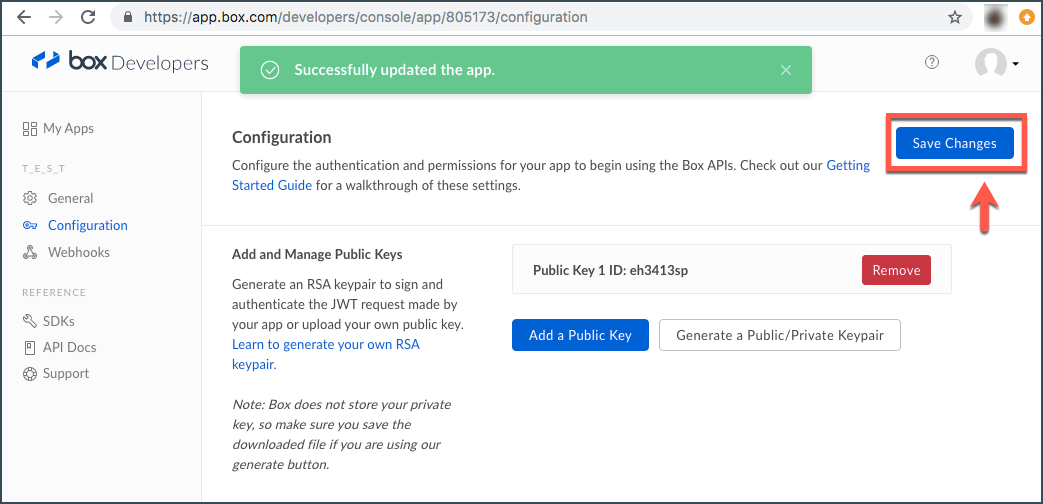
Figure 14. Save Changes Option in Configurations Screen
Authorizing the Box Developer Application for Access from API
Once the Box application is created and configured with the previous steps, the Box administrator must also authorize the application to be able to use it.
Without authorization, the following message appears in the Ephesoft Transact UI when trying to access the app:
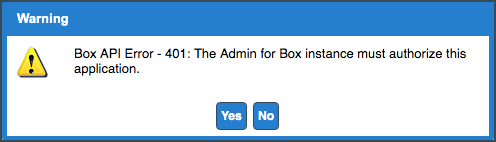
Figure 15. Example of Authorization Error Message
To authorize the app:
1. On the navigation panel, select the Admin Console (https://app.box.com/master) and click Enterprise Settings.
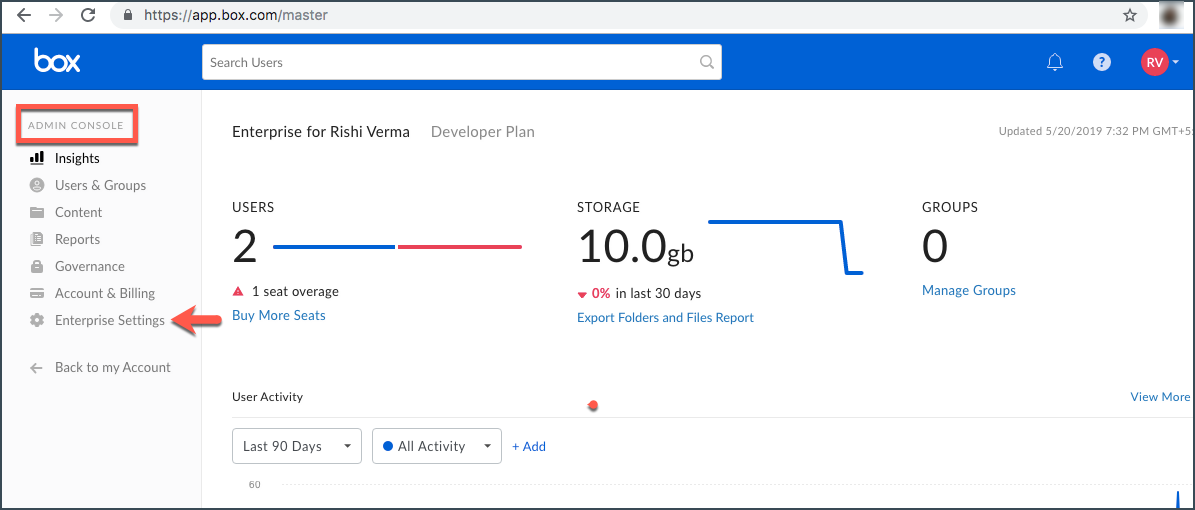
Figure 16. Admin Console on Navigation Panel
2. Navigate to the Apps section, scroll down to Custom Applications and click Authorize New App.

Figure 17. Authorize New App in Custom Applications Section
A dialog box appears in which you must provide the clientID from the JSON file downloaded earlier.
3. Enter the clientID value in the API Key field and click Next.
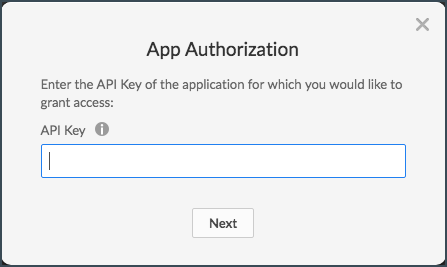
Figure 18. App Authorization
4. In the App Authorization pop-up, click Authorize. If all configurations have been done correctly earlier, the authorization should be granted to All Users.
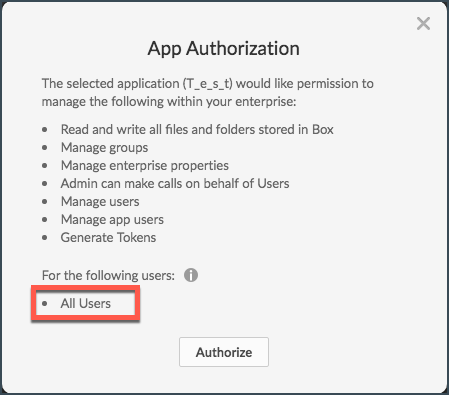
Figure 19. App Authorization for All Users
If you get the Only App Users of this App option instead, review the steps above and update the settings that require modifications.
Important: If you make any changes to your dev app, you need to reauthorize it. To reauthorize your app, click ellipses (…) button under Actions for the corresponding app and select Reauthorize app.
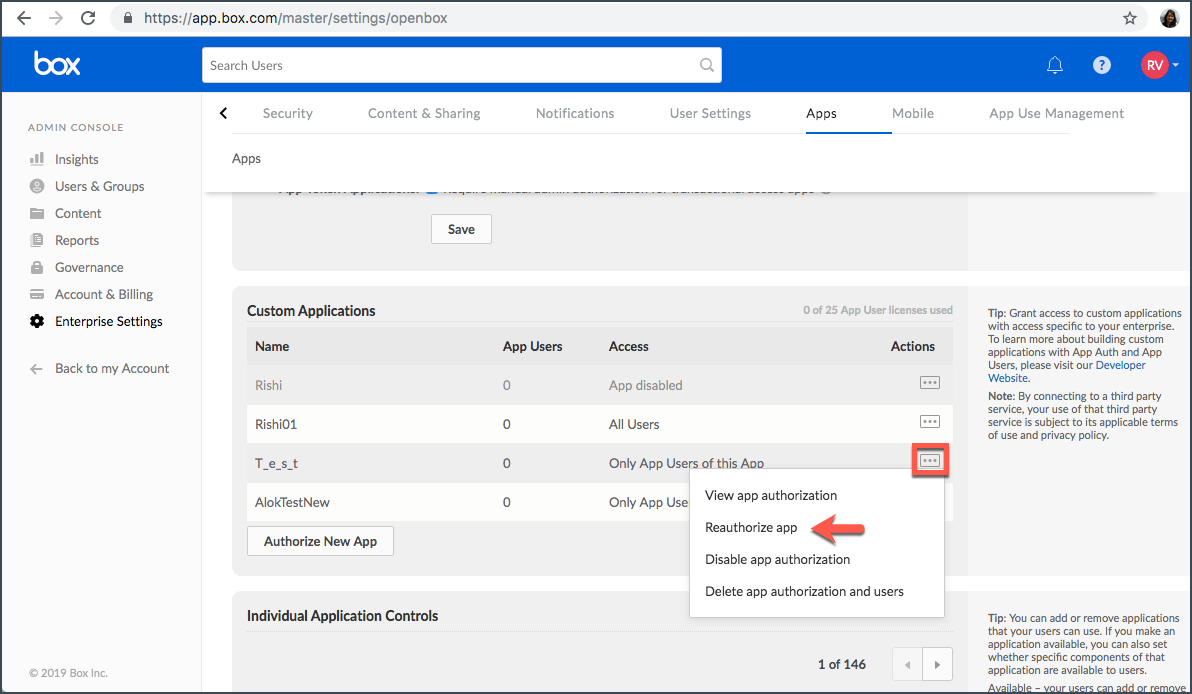
Figure 20. Reauthorization of Application in Custom Applications Screen
Enabling 2-Step Verification
1. On the Navigation panel, click Settings to open the Account Settings screen.
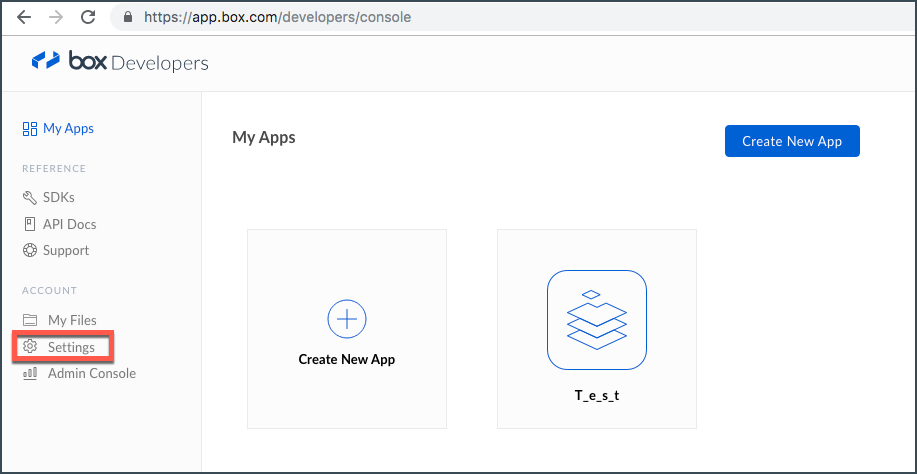
Figure 21. Settings Option in Navigation Panel
2. Under the Authentication section, enable Require 2-step verification for unrecognized logins.

Figure 22. Authentication Screen to Enable 2-Step Verification
3. When the Enable Login Verification dialog appears, provide the required information and click Continue.
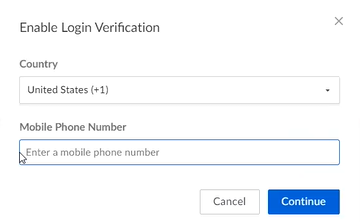
Figure 23. Enable Login Verification Dialog Screen
4. Enter the Confirmation Code and click Continue.
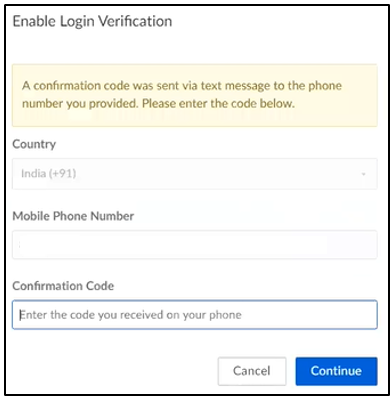
Figure 24. Screen with Confirmation Code Prompt
The system returns to the Account Settings screen.
5. Click Save Changes.
Configurations: Ephesoft Transact
Configuring the BOX_PLUGIN Plugin
To configure export from Ephesoft Transact to the Box repository:
1. Create or open your batch class.
2. Configure document types and index fields.
3. In the Export module, add the BOX_PLUGIN plugin. You can drag and drop it from the Associated Plugins to the Selected Plugins list, or use the right arrow to move the selected plugin to the Export module.
Important: Ensure to place BOX_PLUGIN plugin before the CLEANUP plugin and click Apply to save the changes.
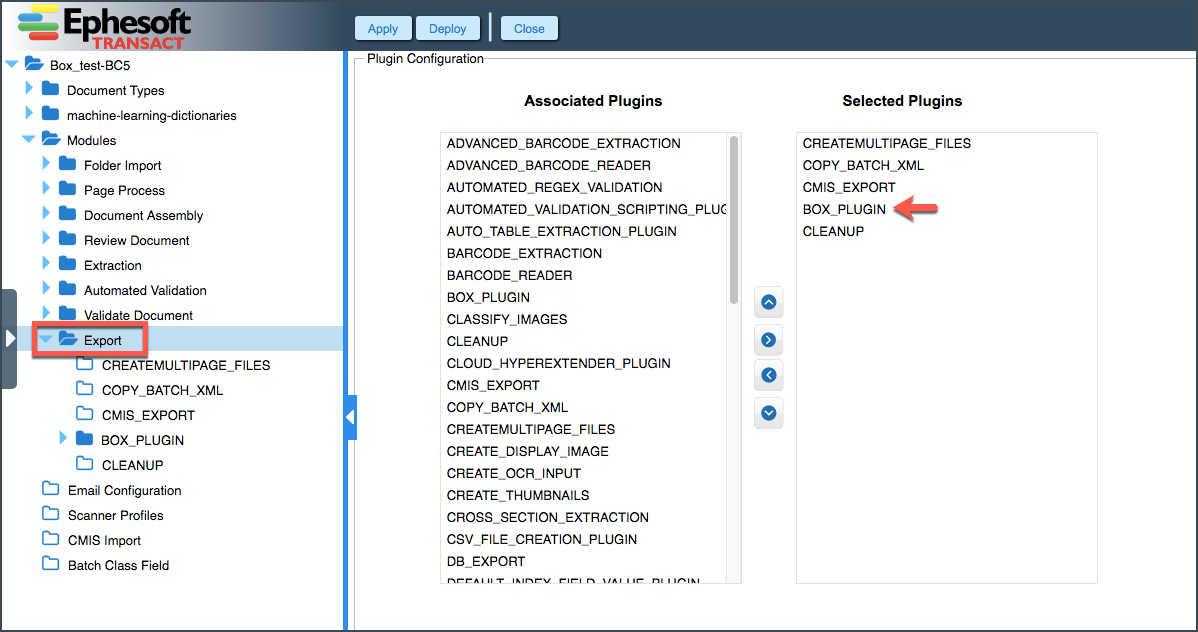
Figure 25. Place BOX_PLUGIN before CLEANUP Plugin
4. On the BOX_PLUGIN Configuration screen, select ON.
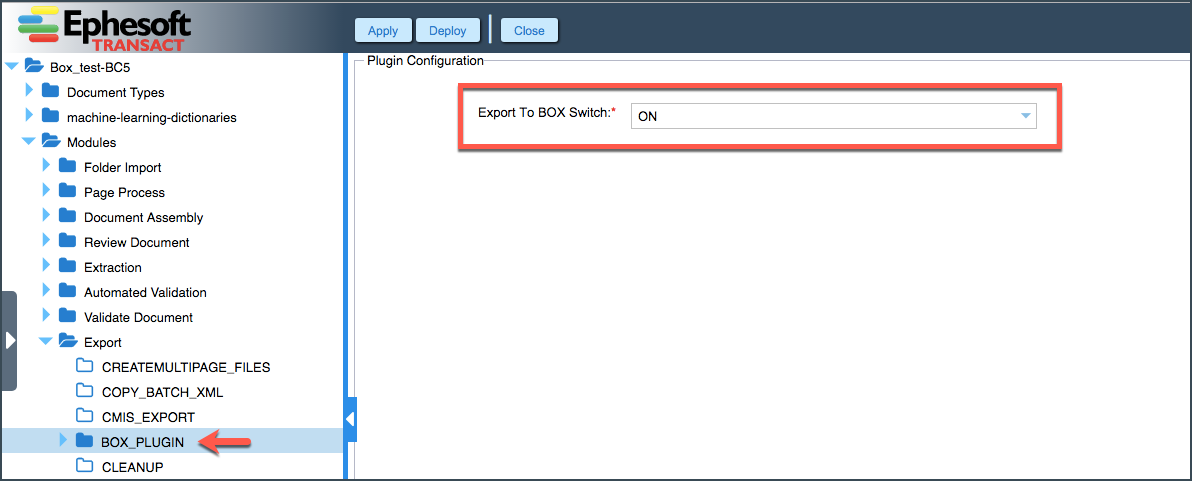
Figure 26. BOX_PLUGIN Configuration Screen
5. Expand the BOX_PLUGIN drop-down and select Configure.
6. To add a new configuration, click Add.
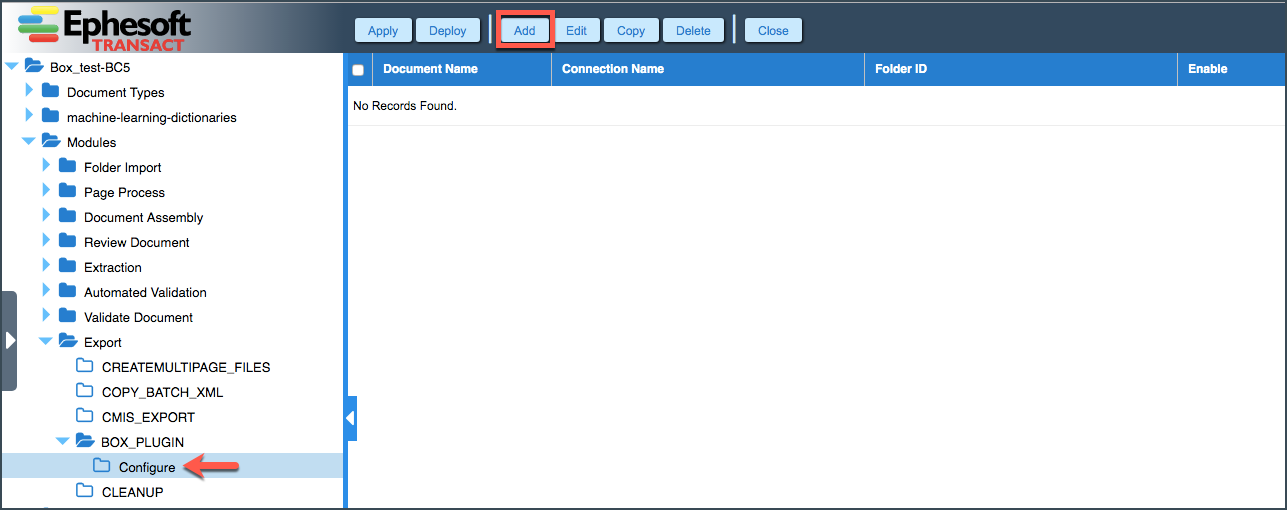
Figure 27. Adding a New Configuration
This opens the Box Mapping Configurations screen.
7. In the first section, select the Document Type and Connection Type. Note that the Connection Type options become enabled only after you select the Document Type.
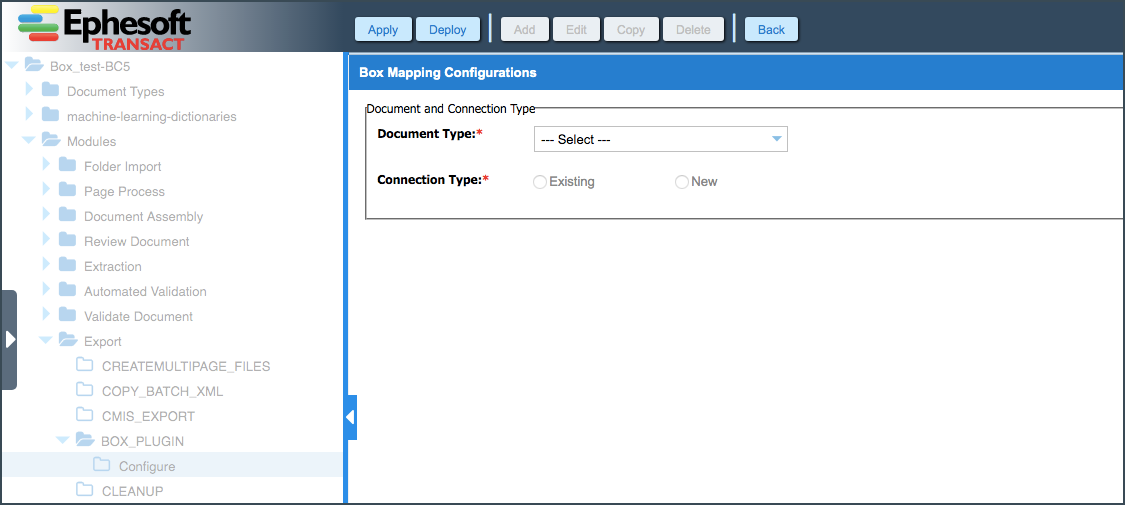
Figure 28. Box Mapping Configurations Screen
8. Once the Connection Type is selected, the Connection Details section opens. Provide your connection details here.
This section offers two types of environments:
- 0 – Production (default)
- 1 – Test
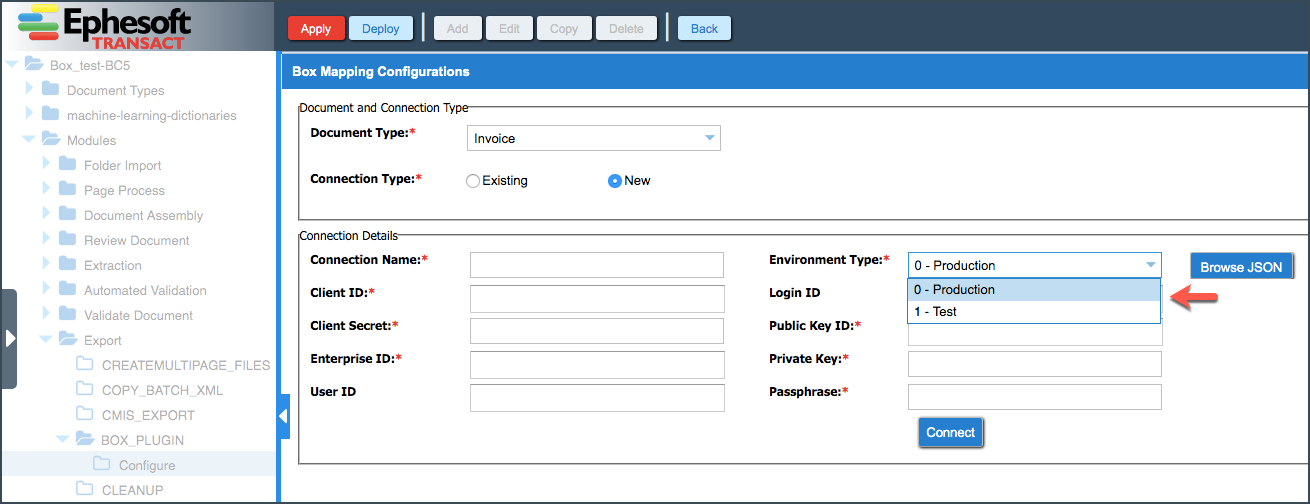
Figure 29. Two Environment Types
Environment Type – Production
In a production environment, Ephesoft Transact uses the JSON file obtained from the Box platform, which contains all required details for a secure connection. This connection is configured and established on a permanent basis as required for production.
- Select 0 – Production as your environment type.
- Provide the Connection Name.
- Click Browse JSON and upload the JSON file generated by Box when creating the dev app. Client ID, Client Secret, Enterprise ID, Public Key ID, Private Key, and Passphrase fields will be automatically populated once the file is uploaded.
Provide either your Login ID (email address you use to log in to Box) or the User ID (see Box > My Apps > <Your App> > General > App Info). - Click Connect.
If all provided details are correct, the confirmation message is displayed, and the Export Details and Document Attributes sections become available.
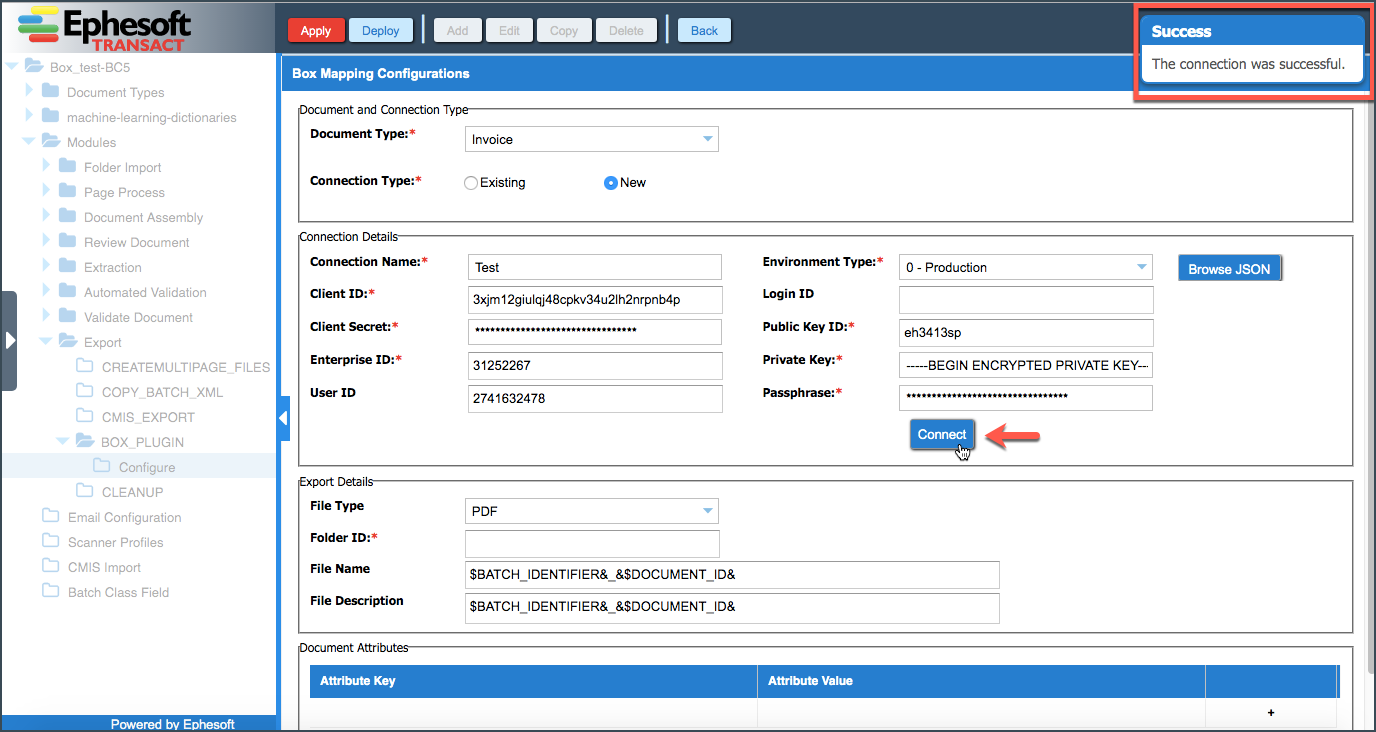
Figure 30. Screen with Confirmation Message
Environment Type – Test
In a test environment, Ephesoft Transact uses the developer token generated by Box for a selected application. This token is valid only for one hour. Thus, this configuration is temporary and is provided to test the connection and Box export functionality.
- Select 1 – Test as your environment type.
- Provide the Connection Name.
- Provide the Developer Token (see Box > My Apps > <Your App> > Configuration > Developer Token > Generate Developer Token)
- Click Connect.
If the provided details are correct, the confirmation message is displayed, and the Export Details and Document Attributes sections become available.
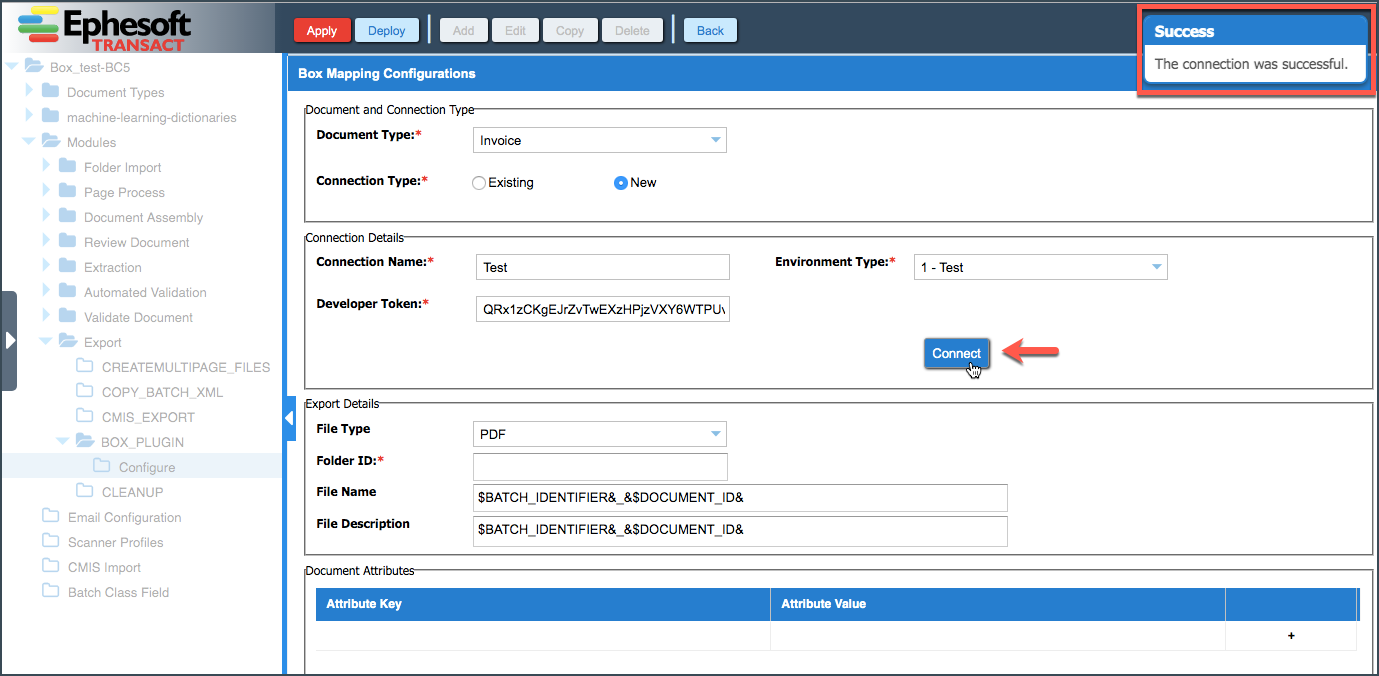
Figure 31. Example of a Displayed Confirmation Message
9. Fill in the Export Details section.
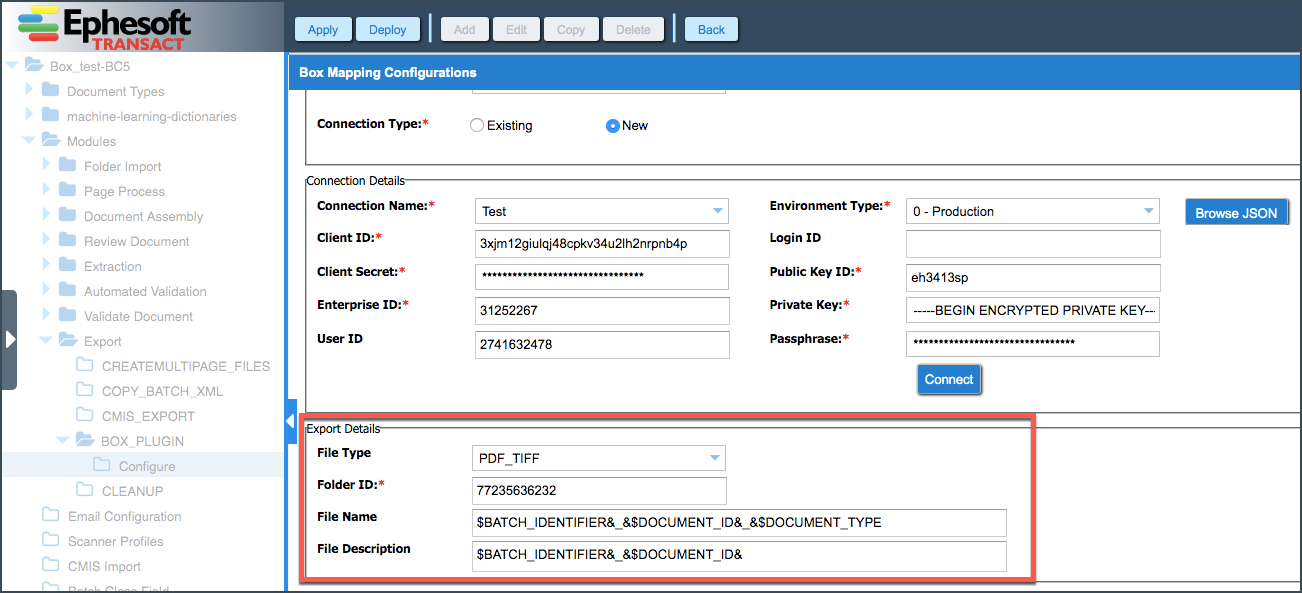
Figure 32. Export Details Section
| Configurable Property | Description |
| File Type | The type of the files to be exported. Available options are: PDF (default), TIFF, PDF_TIFF.
Set this value so that it matches the value of the Multipage File Creation Type property in the CREATEMULTIPAGE_FILES plugin. This property must be set to the same value in both the plugin and this screen. |
| Folder ID | The target folder number as defined in the Box repository.
The folder ID value can be seen in the browser URL when the user is inside the desired folder.
Figure 33. Example of Target Folder Number Set this value to 0 if you want to export the files to the root directory. |
| File Name | The name of the exported file (as it will appear in the Box repository).
The name can be static or dynamic. To define the dynamic name, select available option(s) by using the dollar sign ($) and &<symbol>& as a separator, for example, &_&. The file name should always end with an ampersand (&). |
| File Description | The description of the exported file (as it will appear in the Box repository).
The description can be static or dynamic. To define the dynamic name, select available option(s) by using the dollar sign ($) and &<symbol>& as a separator, for example, &_&. The file description should always end with an ampersand (&). |

The following example demonstrates that both static and dynamic values can be combined in the file name/description. “Lorem Ipsum” can be any static text combined with dynamic placeholders:
- Lorem Ipsum&_&$BATCH_IDENTIFIER&_&$DOCUMENT_ID&
- $BATCH_IDENTIFIER&_&Lorem Ipsum&_&$DOCUMENT_ID&
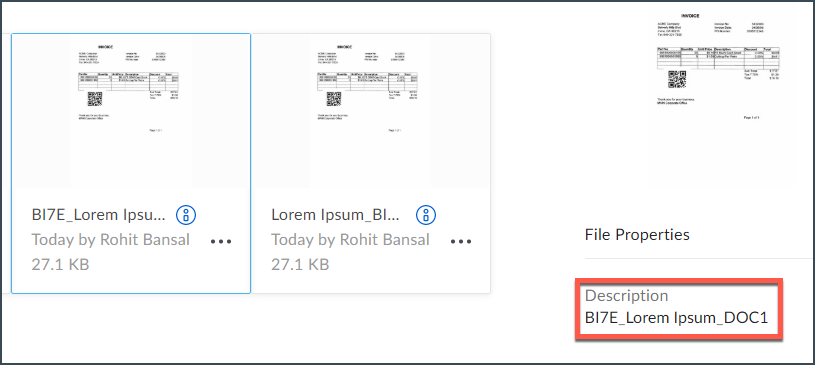
Figure 34. Example of a Combination of Static and Dynamic Values
10. Fill in the Document Attributes section.

Figure 35. Document Attributes Section in Box Mapping Configurations
| Configurable Property | Description |
| Attribute Key | The name of the custom metadata field in Box*. |
| Attribute Value | The value to be exported into the custom metadata field in Box*.
This value can be static or dynamic. To see the list of available options, expand the drop-down or enter a dollar sign ($) in the field. |
*Metadata details can be viewed in the bottom-right corner, after the file is opened in Box:
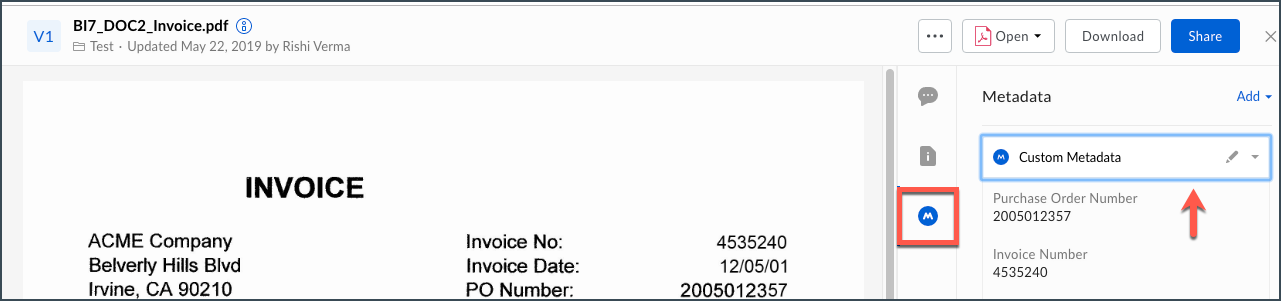
Figure 36. Metadata Details
11. Click Apply to save your changes.
Managing BOX_PLUGIN Configurations
All saved configurations are displayed on the Configuration screen:
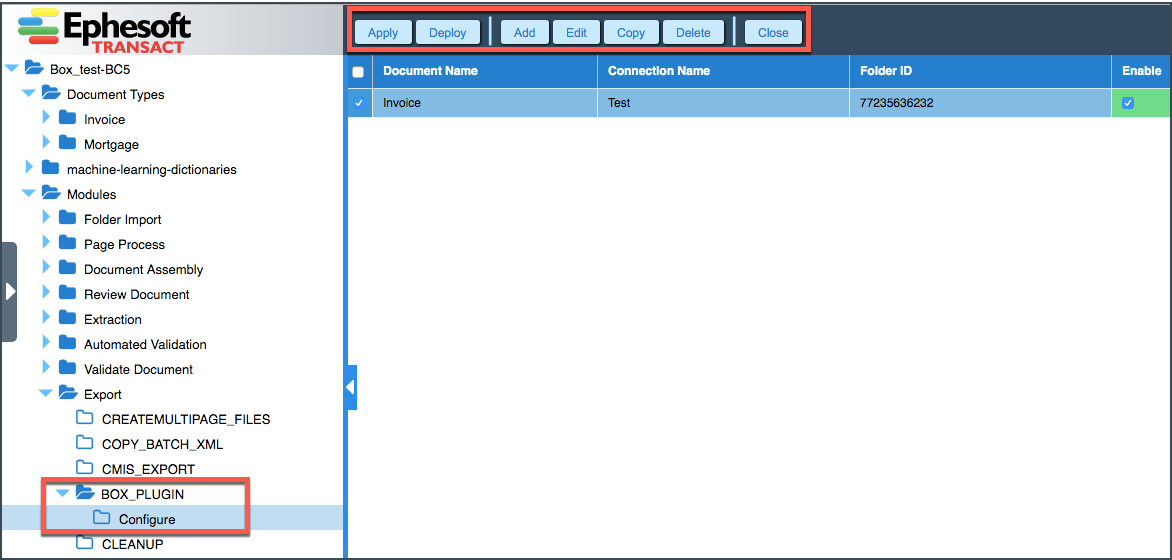
Figure 37. Configuration Screen
- To add a new configuration, click Add.
- To edit an existing configuration, select it and click Edit.
- To copy an existing configuration and use it for another document type, select it, click Copy and choose the document type from the drop-down list:
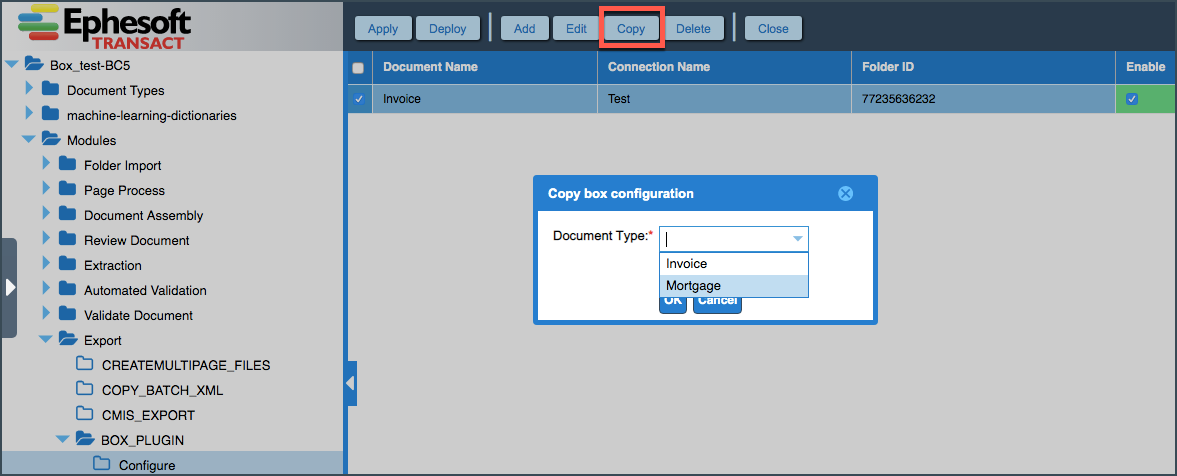
Figure 38. Example of Copying an Existing Configuration
- To delete any configuration, select it and click Delete.
- To exit the BOX_PLUGIN Configuration screen, click Close.
Use Cases
Exporting Files to Multiple Box Folders
To export files and metadata to multiple Box folders:
1. Create a BOX_PLUGIN configuration record as explained above.
2. In the Configuration screen, select the new configuration and click Copy.
3. Select the appropriate document type and click OK.
4. Open the copied configuration and change the Folder ID in the Export Details section as required.
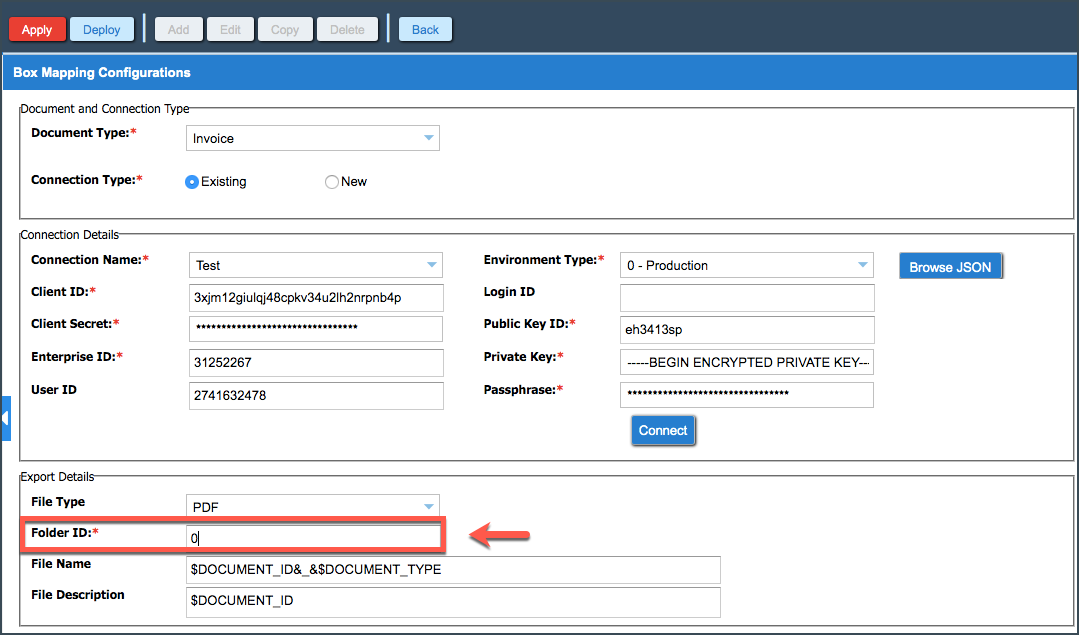
Figure 39. Folder ID on Box Mapping Configurations Window
5. Click Apply to save your changes.
Exporting Files with the Same Name to the Same Box Folder
The Box API supports version control. When a file is being exported to a Box folder which already contains a file with the same name, the exported file will be saved as a new version of the existing file.
When viewing a list of files in Box, a label is shown that displays the current version number of each document:
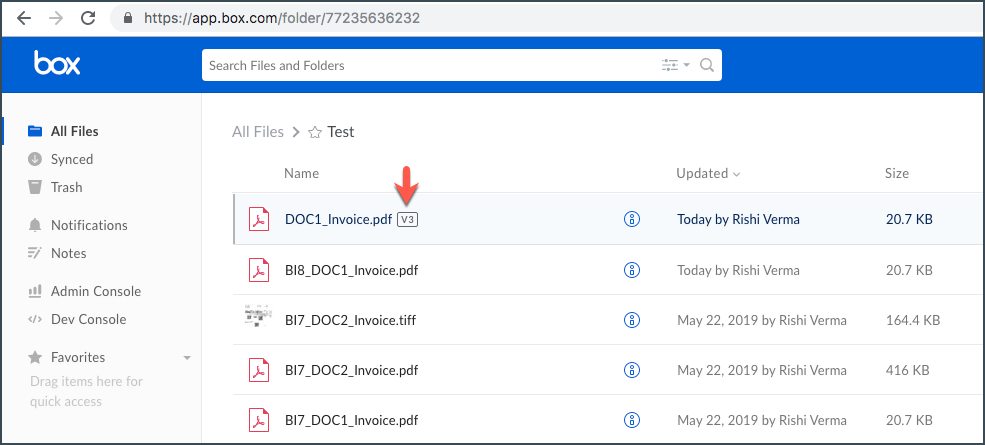
Figure 40. Example of Version Control with Files
Appendix
Box Error Codes
The detailed information about Box error codes and solutions is available on the Box website.
Troubleshooting
Fixing 400 System Error
If there is a discrepancy between the time zone settings for the Ephesoft Transact system and the Box repository, the user may receive the following error message: 400 – invalid_grants.
When the Box Java SDK generates a request for the App User access token, it uses the current UTC time as part of this request. If the Unix time on your local machine and the Box server are out of sync, you will see this error.
To fix this error, follow the steps below:
- Update the Unix time on your machine to match the Unix time available at the Unix Time Stamp website.
- Retry your request to generate the App User access token.
Box API Retry Functionality
Ephesoft Transact supports a configurable retry mechanism for some error codes received from the Box API.
The configuration is accessible from the following location:
<Ephesoft Installation Directory>/Application/WEB-INF/classes/META-INF/dcma-box-plugin/dcma-box-plugin.properties
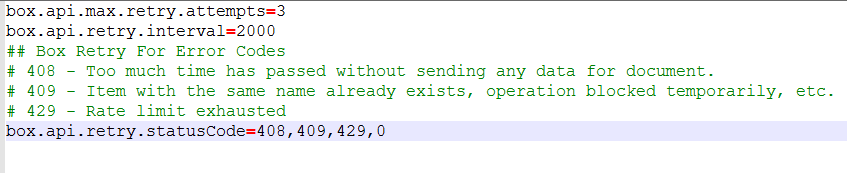
| Configurable property | Description |
| box.api.max.retry.attemps | The number of retries the system will perform to export the documents and metadata to Box if it encounters errors specified in the box.api.retry.statusCode parameter below. The default value here is 3. |
| box.api.retry.interval | The interval between the retry attempts in milliseconds. The default value of this parameter is 2000. |
| box.api.retry.statusCode | The list of error codes for the retry mechanism. Four error codes have been provided by default (408, 409, 429 and 0), however, this parameter can be modified as needed to account for any other possible errors listed on the Box website. |