This article describes how to register an application for email import configuration in Ephesoft Transact using Office 365 with OAuth2 as an authentication type. This will generate a client secret and client ID to be used in Email Configuration.
Register App on Azure AD
Follow the steps below to register an App to allow email ingestion in Ephesoft Transact using OAuth2:
Note: The permissions may require authorization from an administrator.
- Sign in to the Azure Portal using your credentials.
- From Azure services, locate and open Azure Active Directory (also known as Azure AD).

Figure 1. Azure Active Directory Icon
- Under the Manage section, select App registrations.
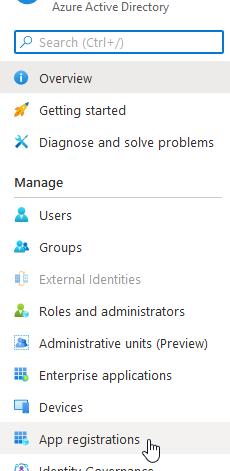
Figure 2. Select App registrations
- In the App registrations screen, click + New registration.
![]()
Figure 3. Add New Registration
- The Register an application screen displays. Enter the user-facing display name for the App in Name.

Figure 4. Enter App Name
- Select one of the following account types depending on your needs:
-
- Accounts in any organizational directory (Any Azure AD directory – Multitenant) and personal Microsoft accounts (e.g. Skype, Xbox)

Figure 5. Supported Account Types
-
- Accounts in any organizational directory (Any Azure AD directory – Multitenant)
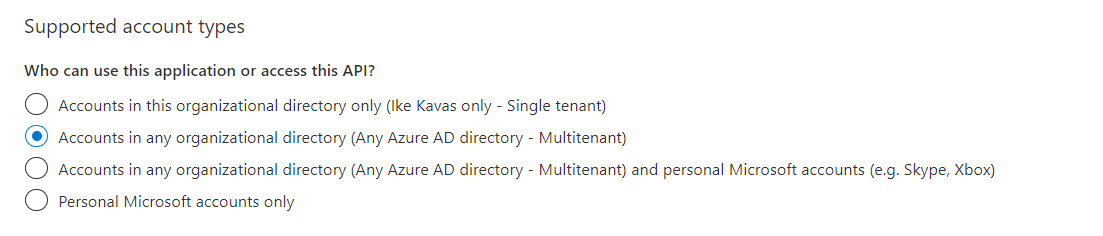
Figure 6. Support Account Types
- Leave the option Redirect URI (optional) as is.
- Click Register to complete the App registration. This will return you to the screen for the new App.

Figure 7. Register Button
- In the App screen, locate the Application (client) ID. Copy it to be used when configuring email ingestion for Ephesoft Transact.
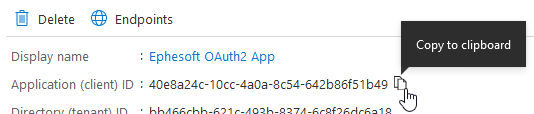
Figure 8. Sample Client ID
- From left panel, select Certificates & secrets:

Figure 9. Certificates & secrets
- In the Certificates & secrets screen, click on + New client secret button under Client secrets section:
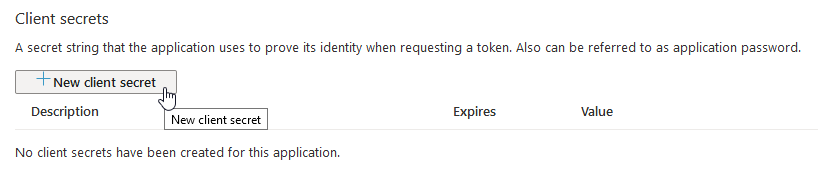
Figure 10. Add New Client Secret
- In the Add a client secret dialog box, click the Add button:
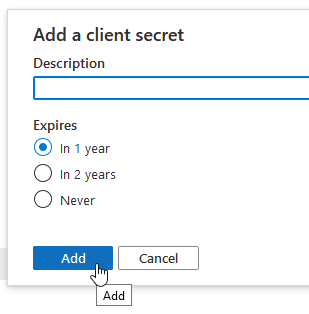
Figure 11. Add Button
It is recommended to fill in a description to identify this secret among many (as of now the limit is 2 secrets per App).
Note: Select this expiration date according to your company policy. Once expired, a new client secret will need to be created and specified for each email configuration where it was used previously.
- The newly generated client secret will be visible. Copy this client secret to be used when configuring email ingestion for Ephesoft Transact

Figure 12. Copy Client Secret
Important: Ensure that you have copied the client secret as the client secret will not display again once it is closed.
- Select Authentication on the left panel. This will present the Authentication screen on the right-hand side.
![]()
Figure 13. Authentication Option
- In the Advanced settings section, click Yes for Default client type.
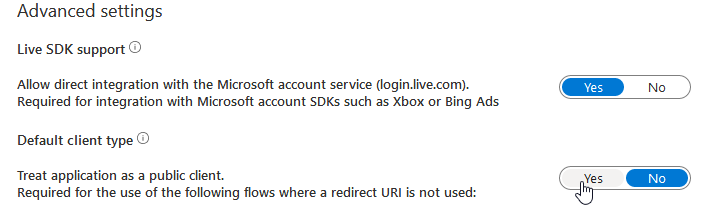
Figure 14. Advanced settings Menu
- Click Save to confirm changes.
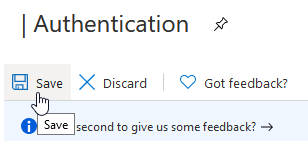
Figure 15. Save Authentication
- Select API permissions on the left panel. This will present the API permissions screen.
![]()
Figure 16. Edit API Permissions
- By default the User.Read permission from Microsoft Graph is present, leave this as is.

Figure 17. User.Read Permission
Note: This is a required permission. If this permission is not available, then add the permission with the steps mentioned below for Mail.ReadWrite permission.
- Click + Add a permission.This will open the Request API permissions panel.
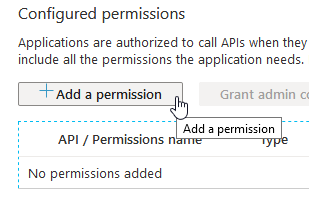
Figure 18. Configured Permissions
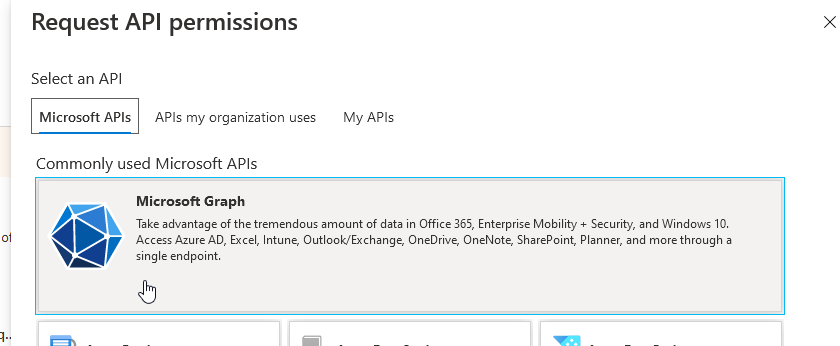
Figure 19. Request API Permissions
- Click Microsoft Graph.
- From the two sub-categories, select Delegated permissions.
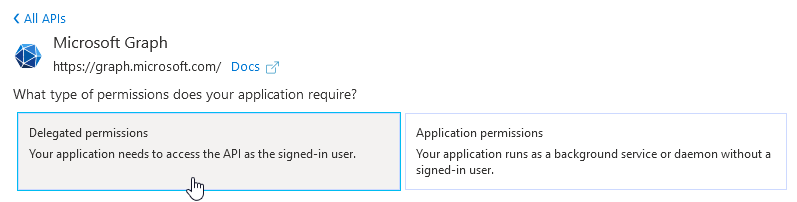
Figure 20. Microsoft Graph
- Type Mail.ReadWrite in the search box. Select the Mail.ReadWrite checkbox for the permission.
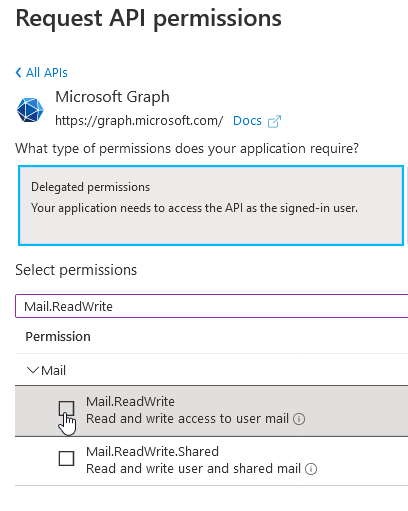
Figure 21. Mail.ReadWrite Permissions
- This will enable the Add permissions button at the bottom of the panel. Click Add permissions.
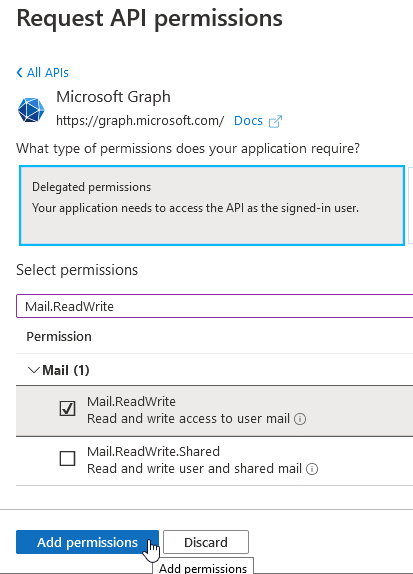
Figure 22. Add permissions Button
- This will add the Mail.ReadWrite permission to the list of Configured permissions for the App.
Note: Administrator permissions may be required. The administrator will have to authorize the App for using these permissions. If this authorization is pending, then the errors in dcma.all.log would suggest it. Once authorized the granted status will be indicated as follows:
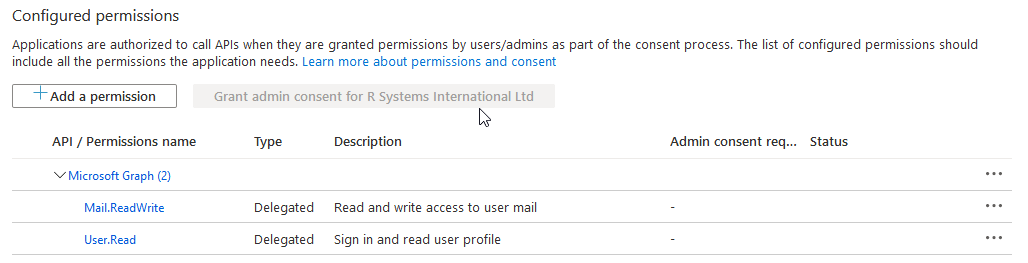
Figure 23. Configured Permissions
This concludes the steps for App registration for Ephesoft Transact email ingestion using OAuth2.
Configure Email in Transact
- Follow the steps described in Email Configuration.
The following is an example of an email configured with OAuth2 after adding the Client ID (step 9) and Client Secret (step 13):
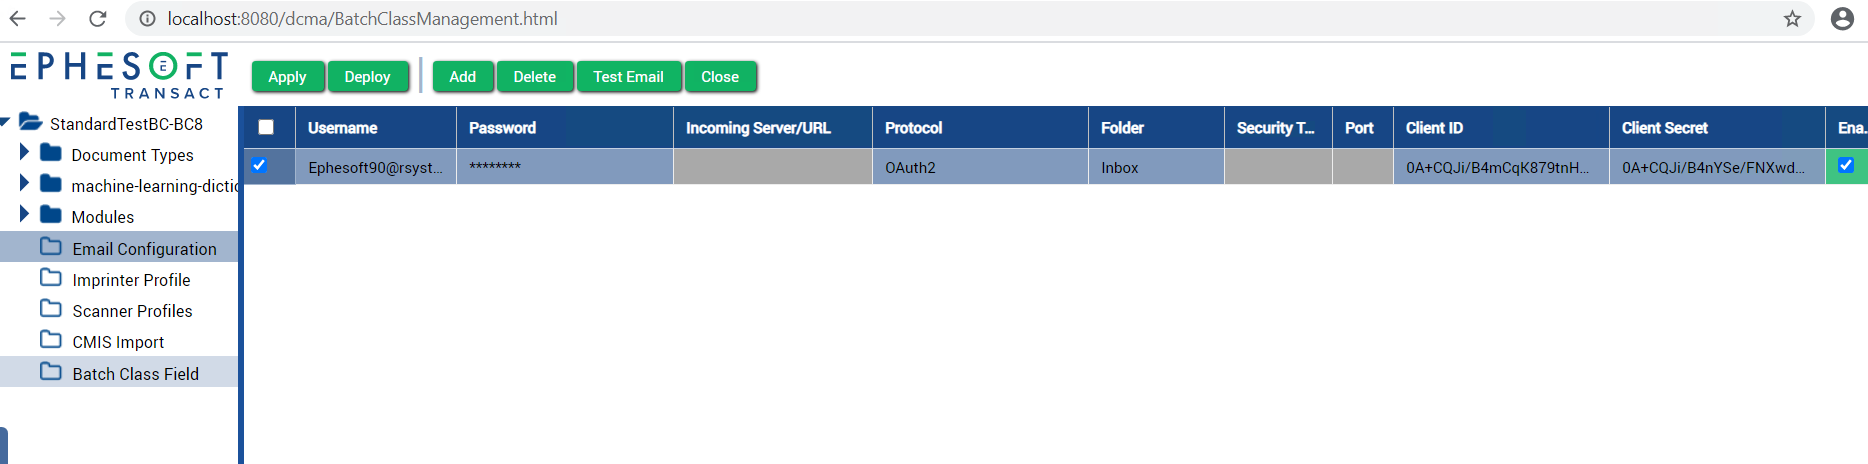
Figure 24. Email Configuration Screen
- Click Test Email to validate the email configuration. You should see the pop-up “Email configuration validated successfully”.
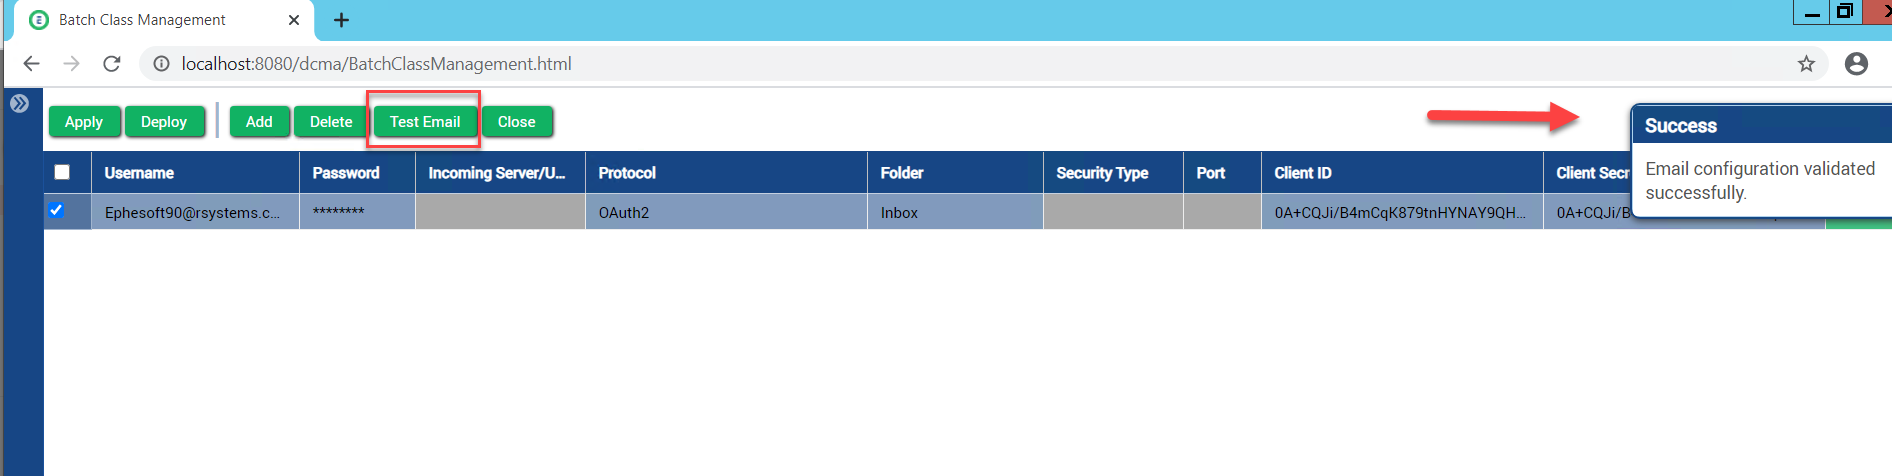
Figure 25. Success Message
This concludes the steps for configuring Transact email ingestion using OAuth2.