Introduction
Identification (ID) Extraction quickly extracts ID document type information from your batch classes without setting up extraction rules. The ID Extraction plugin is available as part of our QuickScreen solution. Please contact your sales representative for more details on how to purchase this.
The following article is applicable for Ephesoft Transact 2020.1.02 or above on Windows OS.
Note: This plugin supports a single page of an ID at a time. To process the front and back side of an ID, the images need to be split into two documents. The returned data from each side must be merged using a custom script.
Prerequisites
Licensing
To check if the feature is enabled in your Ephesoft Transact environment, follow these steps:
- Go to System Configuration > Licensing Details.
- Ensure the Identification Extraction Switch switch is set to ON.
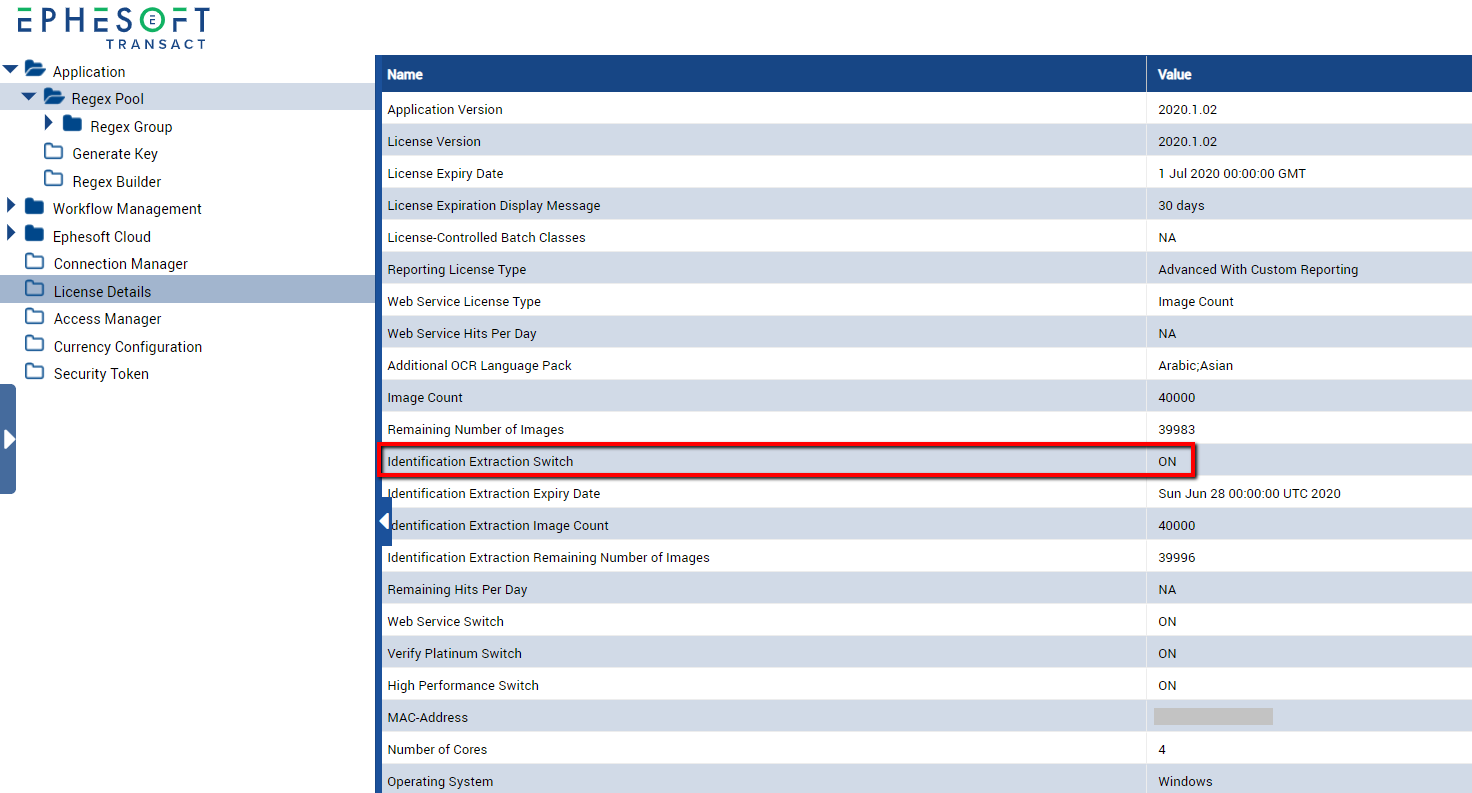
Figure 1. Identification Extraction Switch in License Details
ID Extraction Document Type Library Batch Class Setup
Ephesoft Transact provides a document type library that includes document type information for supported countries and ID types, allowing quick integration with the ID Extraction plugin.
Each document type will contain preset index fields that are mapped to the returned data from the ID Extraction plugin.
Note: The ID extraction document type library batch class is not meant to process batch instances. Export the selected document types to a new or separate batch class.
- Download the IDExtractionLibraryBC.zip file from the Customer Support Portal Downloads page.
- Import the IDExtractionLibraryBC.zip file as a batch class. Refer to Importing and Exporting Batch Classes for steps to import the identification extraction library.
Exporting the Document Type
- To use a specific country and ID type in your batch class, open the identification extraction library from step 2.
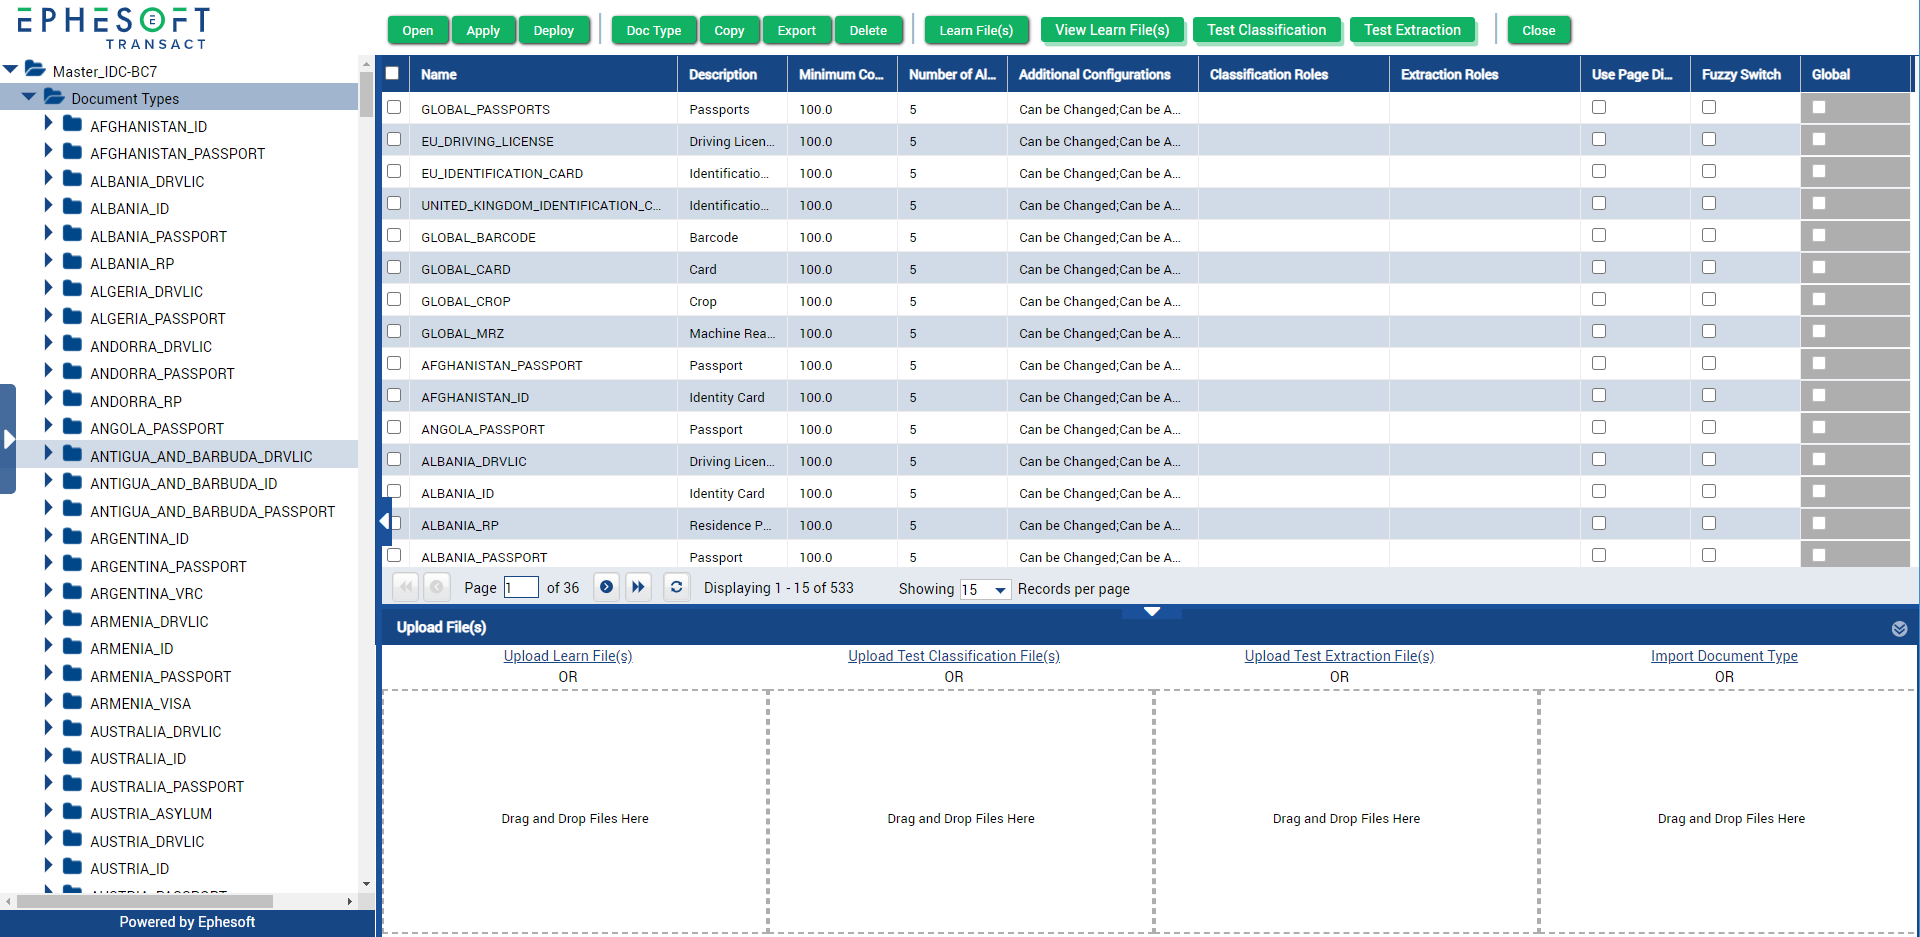
Figure 2. Identification Extraction Document Type Library
- In the Document Types folder, select the country and ID type. An example is “UNITED_STATES_PASSPORT”.
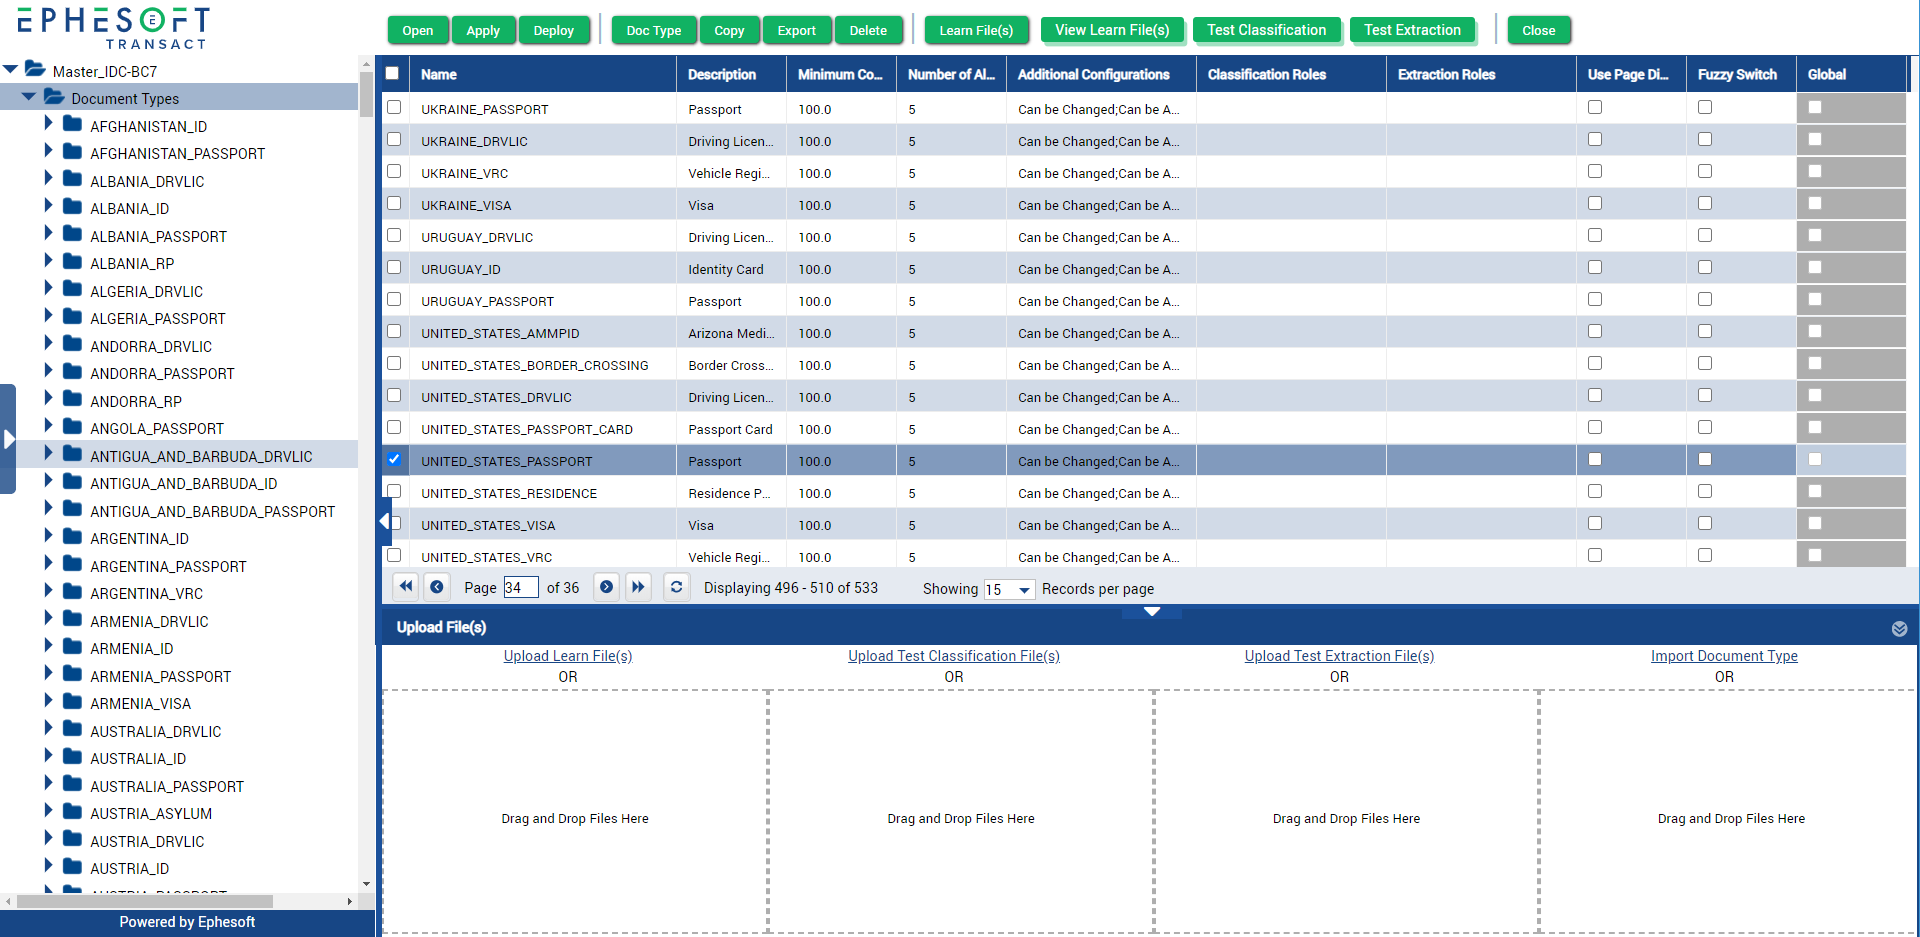
Figure 3. Select A Document Type
- Click Export to save the exported .zip file. This .zip file contains the information of your selected document type. There may be a wait time when exporting the document type.
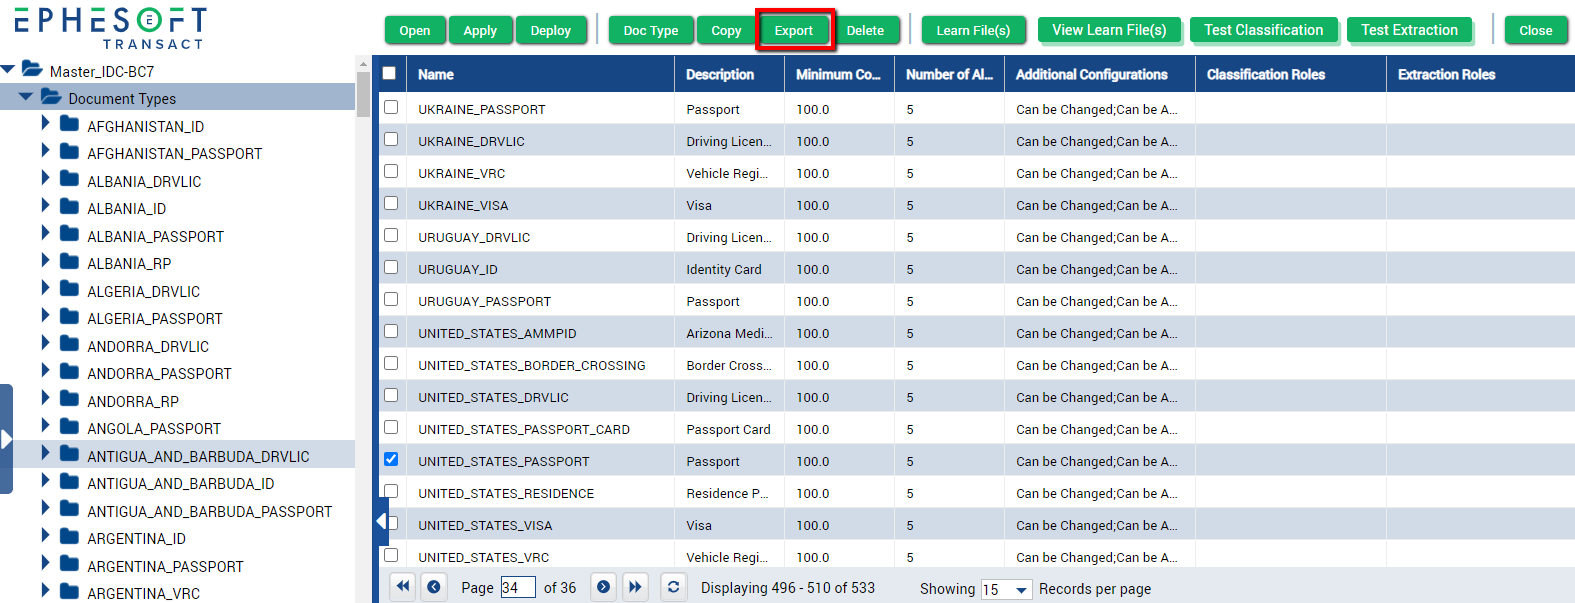
Figure 4. Export Button
- Click Close to exit the document type batch class.
Importing the Document Type
- To use the country and ID type in your batch class, open the batch class that will use the ID Extraction plugin.
Note: When a document type is used in any batch class before making it a global document type, then extraction pauses. It is recommended to not use a document type from the identification extraction library as a global document type.
- Select the Document Types folder.
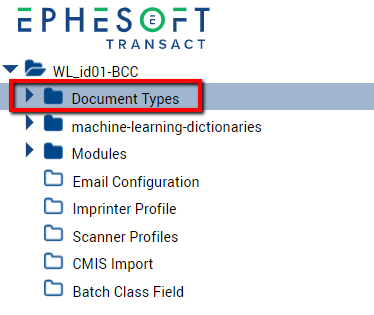
Figure 5. Document Types Folder
- Drag and drop the exported document type .zip file from step 5 in the Upload File(s) section.
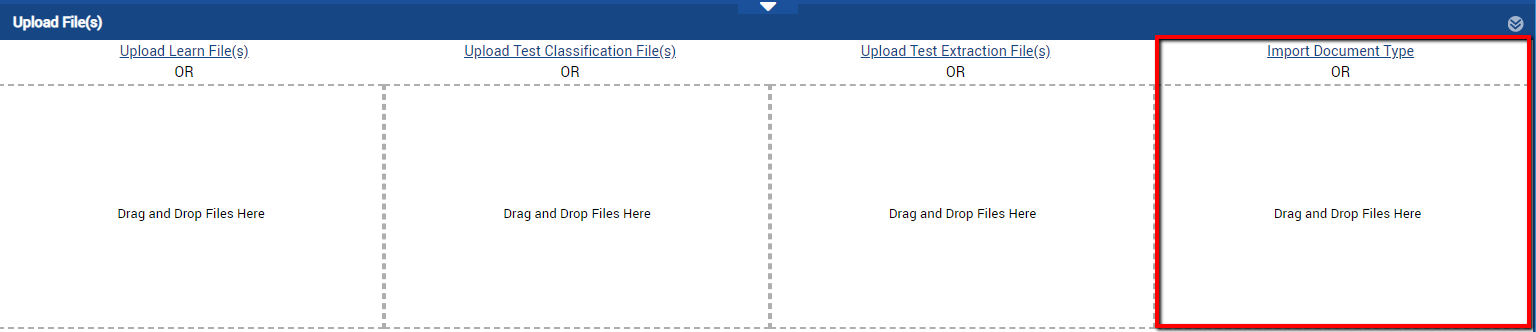
Figure 6. Import Document Type
- The following dialog box will display. Click OK.
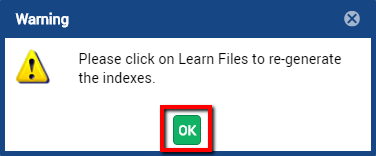
Figure 7. Dialog Box
You can edit the values for the index fields such as the name, description, category, or field order. The following figure is an example of the index fields in the GLOBAL_PASSPORTS document type.
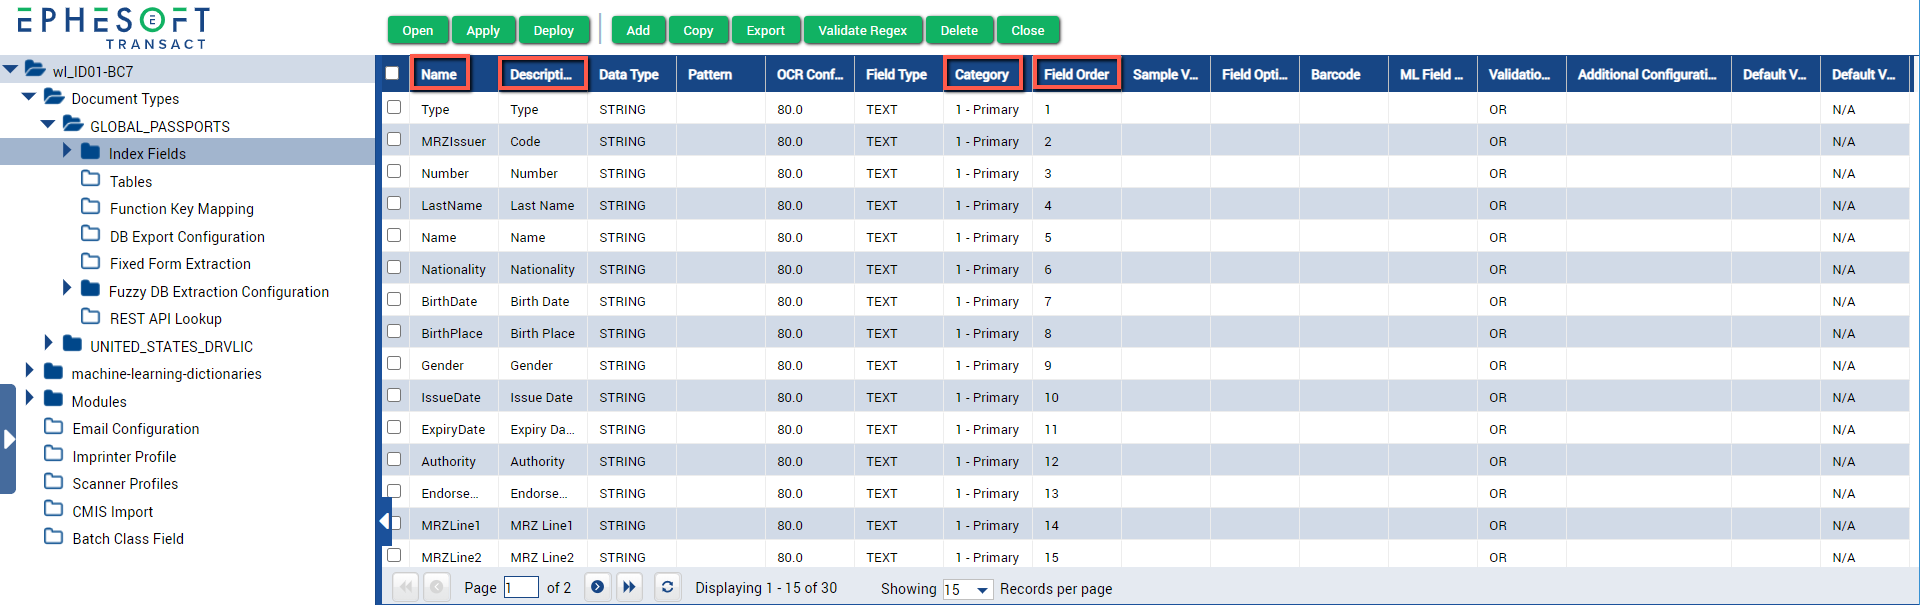
Figure 8. Dialog Box
Note: Index fields can be exported and imported between ID document types of similar country and ID type.
You have successfully set up the ID extraction document type library and imported a specific country and ID document type into your batch class. Continue to Adding the ID Extraction Plugin for steps to add the plugin to your batch class.
Adding the ID Extraction Plugin
To add the ID Extraction plugin to your batch class workflow, follow these steps:
- In your selected batch class, go to Modules > Extraction.
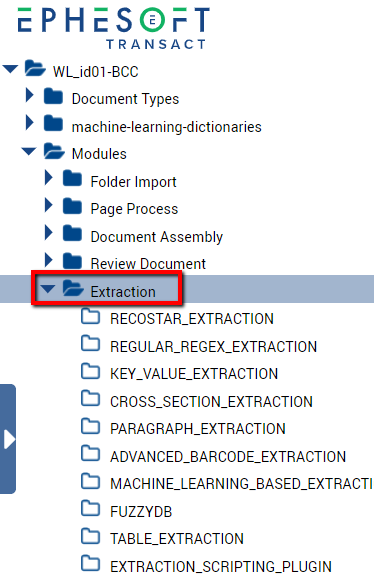
Figure 9. Extraction Module
- In the Associated Plugins column, select IDENTIFICATION_EXTRACTION.
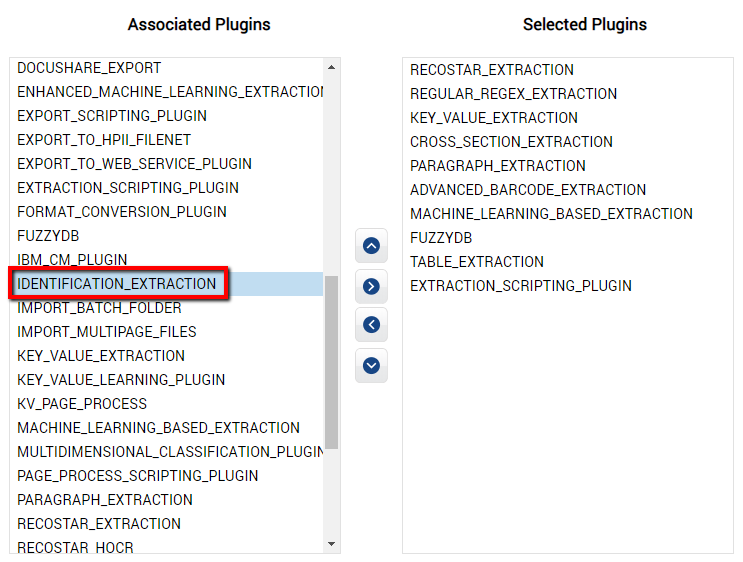
Figure 10. IDENTIFICATION_EXTRACTION Plugin
- Click the right arrow to add the plugin to the Selected Plugins column.
Note: Ensure that IDENTIFICATION_EXTRACTION is listed above EXTRACTION_SCRIPTING_PLUGIN.
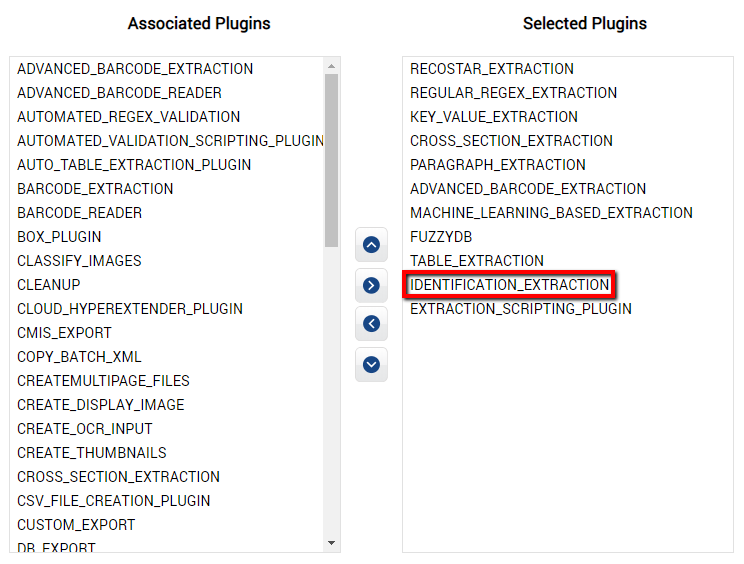
Figure 11. Add to Selected Plugins
- Click Apply > Deploy.
- Select the Extraction module > IDENTIFICATION_EXTRACTION.
- Ensure the Identification Extraction Switch is set to ON.
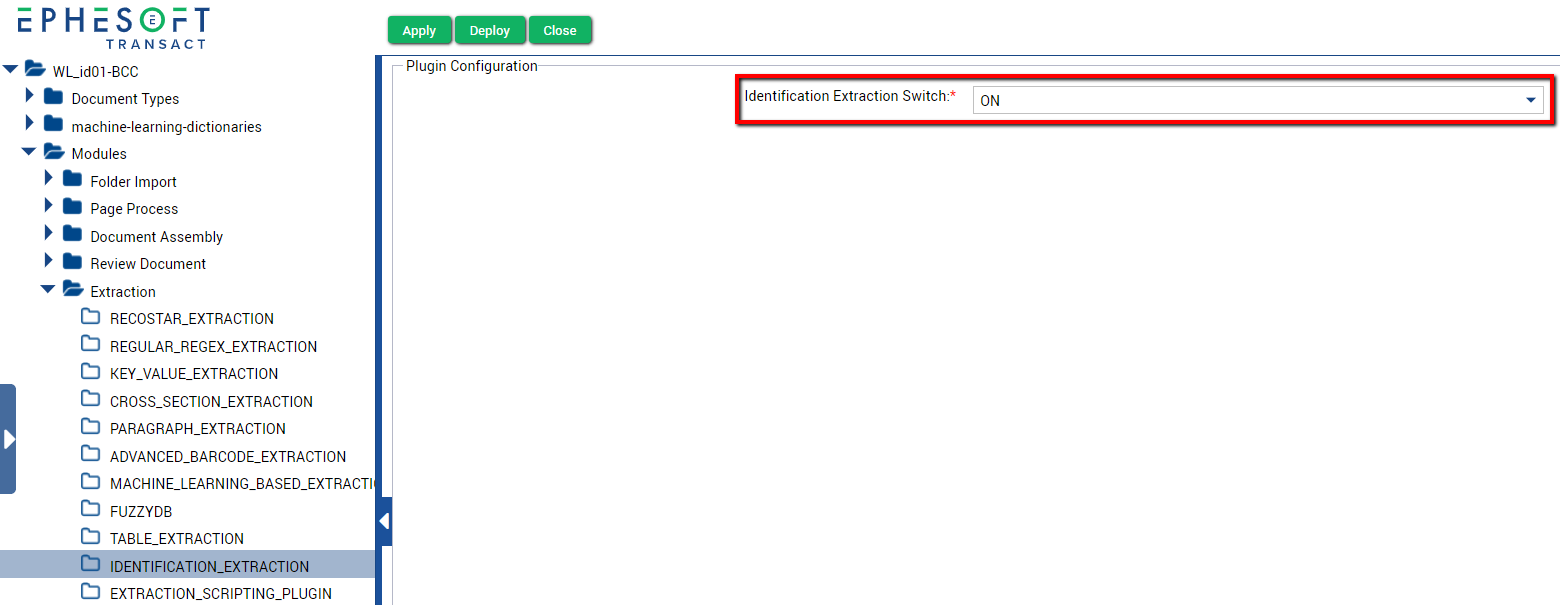
Figure 12. Identification Extraction Switch
- Click Deploy.
You have successfully added the ID Extraction plugin to your batch class workflow. You can send documents through your batch class and review the results in the Review and Validation screen.
Note: The ID Extraction plugin does not provide classification capabilities. Build the classification rules for the type of ID you want to process in order to train Transact to recognize the different document types.
Recommended Plugin Configuration
If batch instances are stopped in the Ready for Validation state, there may be index fields that are not extracted using the ID Extraction plugin. Add the Default Index Value plugin to your batch class workflow to set a default “N/A” value for these index fields. This plugin automatically processes and provides default values to the document level index fields to prevent manual approval.
Refer to Default Index Field Value Plugin for configuration steps