This document provides an overview of table validation rules in Ephesoft Transact. This information is intended for Transact administrators.
For information about validation rules for index fields, refer to Validation Rules.
Prerequisites
To create and configure table validation rules, the following prerequisites must be in place:
- You will need a batch class with a document type configured. For detailed steps, refer to Add New Document Type.
- The TABLE_EXTRACTION plugin must be added to the Extraction module and turned on.
- You will need a table with table columns configured. For help, refer to Table Extraction.
Overview
Table validation rules use regular expressions to determine if extracted table data is correct, or as a way to force operator review under certain conditions.
When table data is extracted from a document, Transact will run the extracted value against the rules for that column. If the extracted value satisfies the conditions of the table validation rule, the value will be automatically validated. If it doesn’t satisfy the table validation rule, the value will be flagged for review.
These rules are set at the document type level.
Configuring Table Validation Rules
This section describes how to create and configure table validation rules.
- From the Batch Class Management screen, select and open your batch class.
- Go to Document Types > <your document type> > Tables ><your table> > Table Validation Rules.
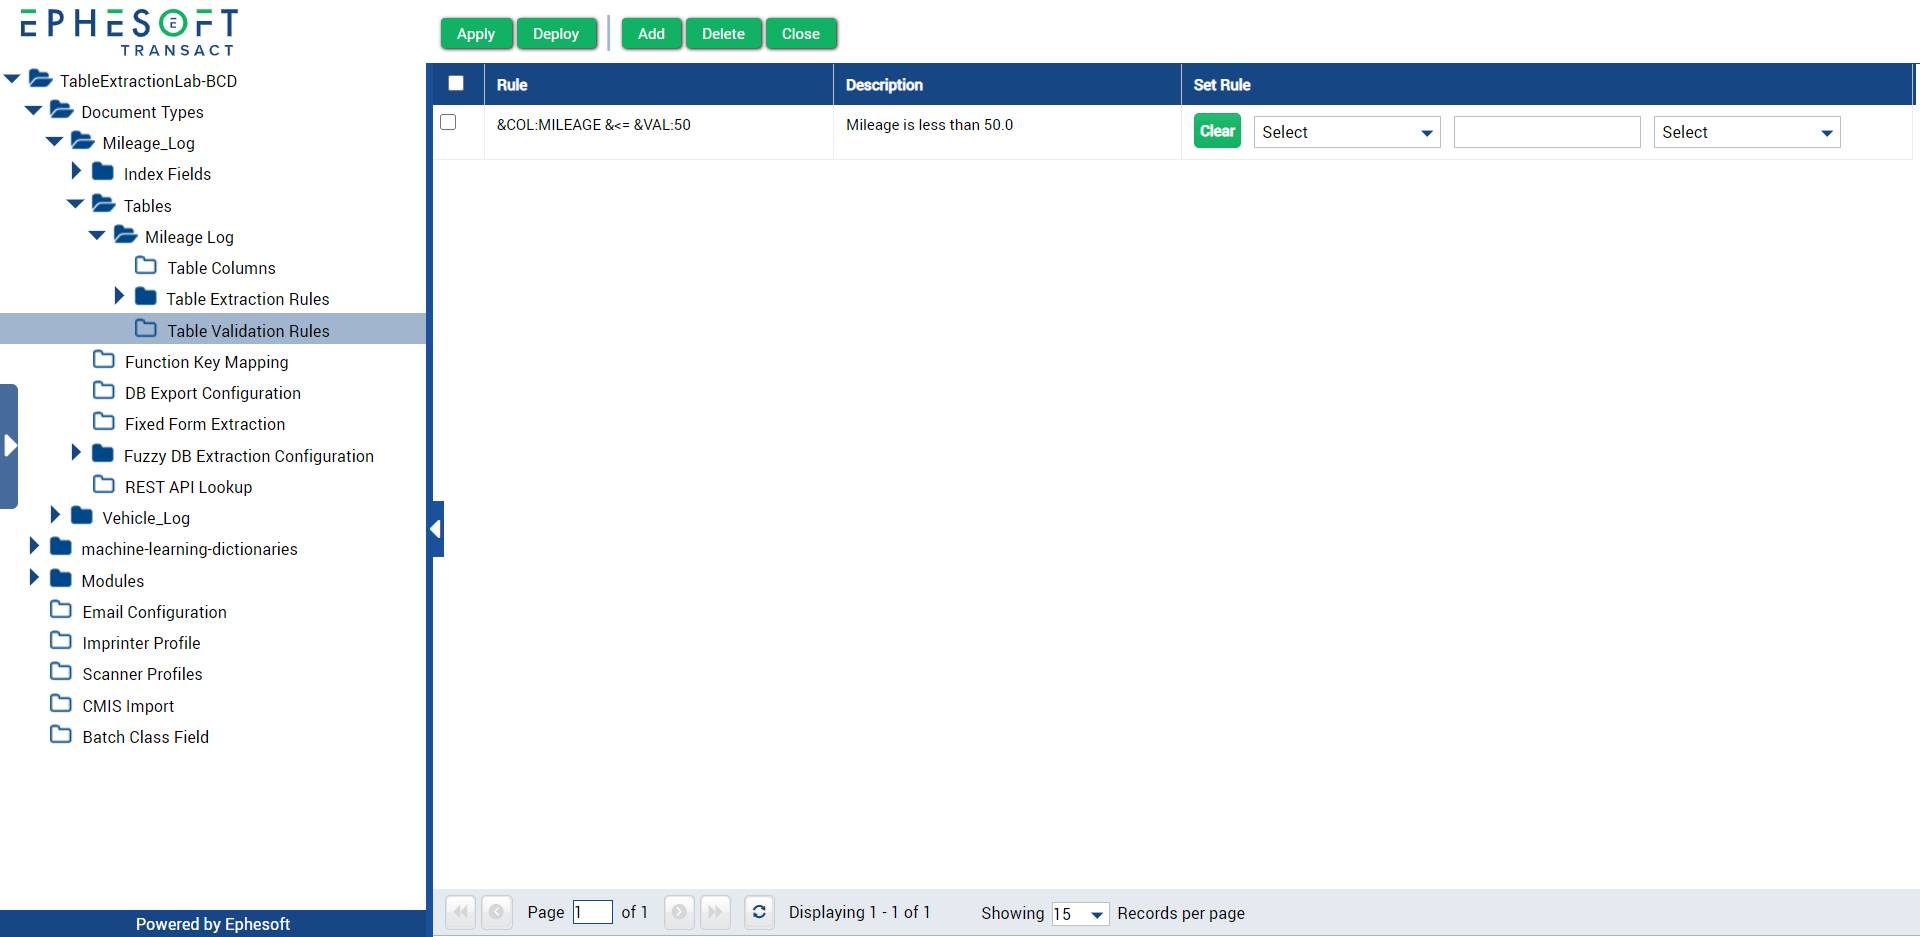
- Click Add.

A new rule will be added as a row on the grid. The grid is broken up into three columns:
| Column | Description |
| Rule | This field displays the rule as you are creating it. This field is view-only and cannot be edited. |
| Description | This mandatory field is where you describe the validation rule, limited to 255 characters. |
| Set Rule | This field contains an interactive editor.
|
- Create the rule in the Set Rule field.
- In the left drop-down, select a column. If Enter Value is selected, enter a value in the middle text field.
- In the right drop-down, select a logical operator.
- Repeat to refine the validation rule.
- Enter an intuitive description in the Description field.
- When you’re satisfied, click Apply.
Configuring the Validation Rule Operator
When creating multiple table validation rules, you can specify whether all rules must be satisfied for a field to be validated, or only one rule. To do so, change the Validation Rule Operator on the Tables page.
- With your batch class open, go to Document Types > <your document type> > Tables.
- Select the Validation Rule Operator for your table.
- AND — All rules must be satisfied (default).
- OR — Only one rule must be satisfied.
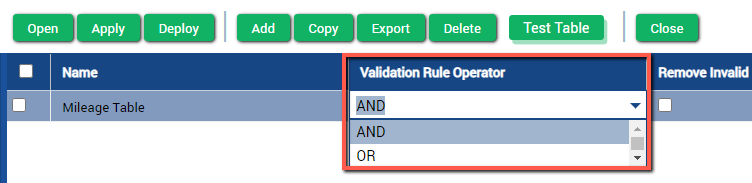
- Click Apply.
Best Practices
- Create and test table validation rules in a non-production environment, to prevent disrupting the workflow.
- After creating table validation rules, do not rename your Table Columns. This will require reconfiguring the rules.
- Be careful not to create too many validation rules. Always ask: Is the rule a “need to have” or “nice to have”? When in doubt, it’s best not to overcomplicate the validation process
- Remember to notify operators when you create or modify table validation rules.
Example Table Validation Rules
This section shows how to create table validation rules using a sample mileage log, below.

Use Case
In this scenario, we are creating table validation rules for a mileage log. Our goal is to create two validation rules:
- A rule to confirm that the Total Mileage is equal to the difference between the odometer start and end.
- A rule to flag any entries over 50 miles for approval.
The first rule is to ensure that the drivers have entered their mileage correctly, while the second is to cover a specific business need that requires a manager to approve entries over 50 miles.
Pre-configurations
In this scenario, we have already configured the following:
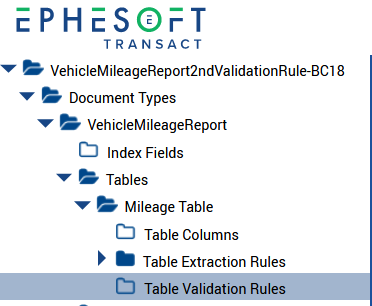
- Created a document type: VehicleMileageReport
- Created a table: Mileage Table
- Mapped columns in Table Columns
- Created an extraction rule in Table Extraction Rules
Creating the Rules
First, we need to create the table validation rules.
- Open the batch class and go to Document Types > VehicleMileageReport > Tables > Mileage Table > Table Validation Rules.
- Click Add.

- For the Description, we used “Total Mileage equals difference between odometer start and stop”.
- Create the rule under Set Rule.
- In the left drop-down, select Odometer Stop.
- In the right drop-down, select – (minus).
- In the left drop-down, select Odometer Start.
- In the right drop-down, select == (equals).
- In the left drop-down, select Mileage Total.
- Repeat this process for the second validation rule. For the Description, we used “Total mileage must be less than 50”.
- Create the second rule under Set Rule.
- In the left drop-down, select Mileage Total.
- In the right drop-down, select <= (less than or equal to).
- In the left drop-down, select Enter Value.
- In the middle field, enter “50”.
- Click Apply.
Configuring the Validation Operator
Finally, we need to determine the Validation Rule Operator. In this scenario, we want both of these table validation rules to be satisfied with our tables. Therefore, we want to use the AND operator.
Because the AND operator is the default, no changes are required.
Example Validation Flags
Refer to the following excerpt from our table:

With our table validation rules, Transact will flag two fields for validation.

- Row two fails our first validation rule. Tim J. probably entered his Odometer Start or Odometer End incorrectly.
- Row three fails our second validation rule. John H. logged over 50 miles and needs manager approval.
Conclusion
This completes an overview of how to configure table validation rules in Ephesoft Transact.