This page describes how to configure and enable SSO in Ephesoft Transact when using Active Directory Federation Services (ADFS) in Azure.
Prerequisites
Before performing the steps on this page, ensure that you have created custom Users and Groups in Azure AD that will be used with your SSO configuration.
Configure Azure Active Directory
To configure SSO in Azure AD, perform the following steps:
Create SAML SSO in Azure AD
Perform the following steps to add SAML SSO in Azure AD.
- In Azure, go to your Azure Active Directory console.
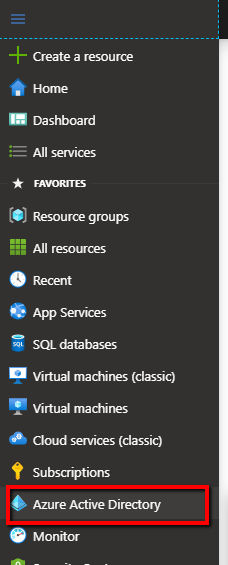
Figure 1. Azure Active Directory
- In the left panel, click Enterprise applications.
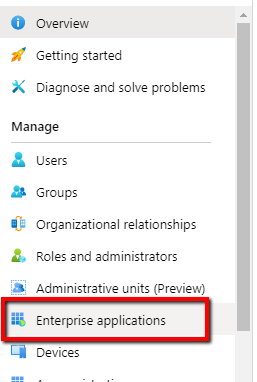
Figure 2. Enterprise Applications
- Click + New application.
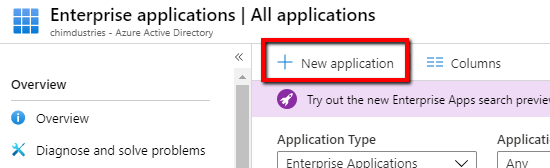
Figure 3. Create New Application
- Click + Create your own application.
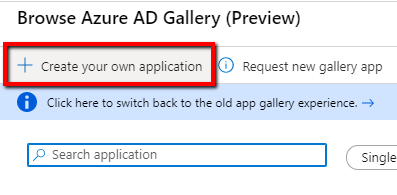
Figure 4. Create New Application (cont)
- Enter a name for your application. Keep the remaining default selections.
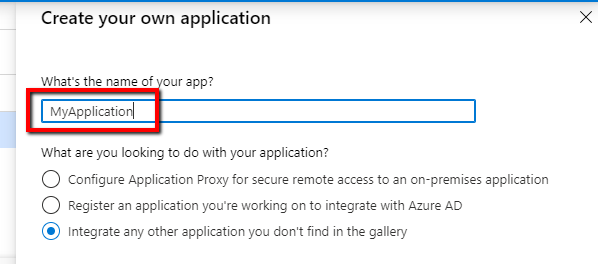
Figure 5. Name Application
- Click Create.
Assign Users to the SSO Configuration
Next, assign users or groups to the SSO configuration.
Important: You should already have created users and groups in Azure AD. If you don’t have any users or groups, create them now before proceeding.
- Under Getting Started, click 1. Assign Users and Groups.
- Click + Add user.
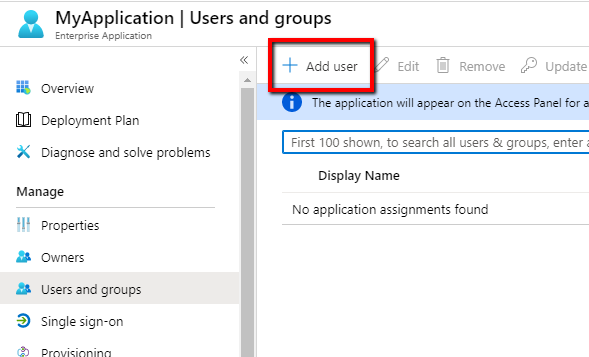
Figure 6. Add User
- Select the users and groups you want to assign to this SSO configuration. These users will be able to authenticate Transact using SSO.
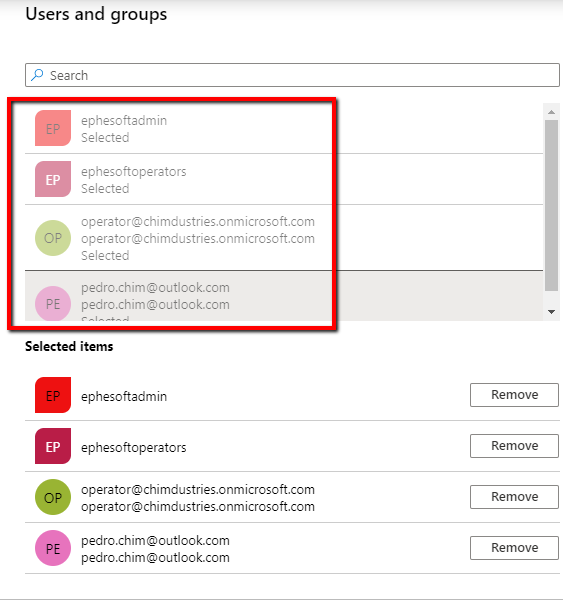
Figure 7. Select Users
- Click Select.
- When you’re satisfied with your selection, click Assign.
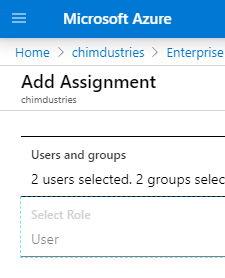
Figure 8. Assign Users
Figure 9. Assign Users (cont)
- Go to the Groups view list and find the assigned groups.
- Take note of the Object Id for these groups. You will need the Object Id to configure groups in Transact.
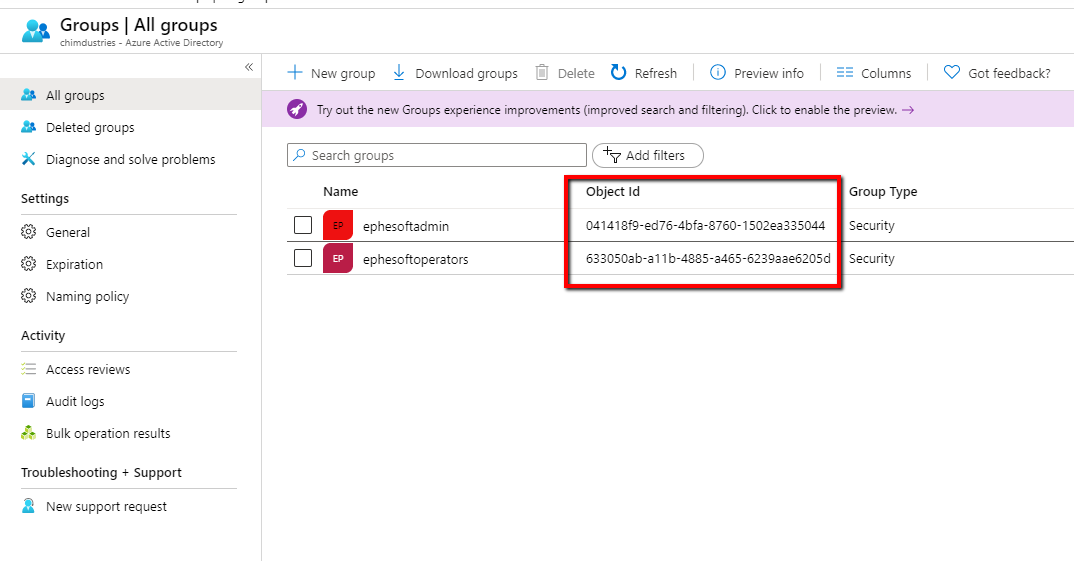
Figure 10. Group Object IDs
Set up SSO in Azure
Next, you need to finish setting up single-sign on in Azure.
- In the left panel, click Single sign-on.
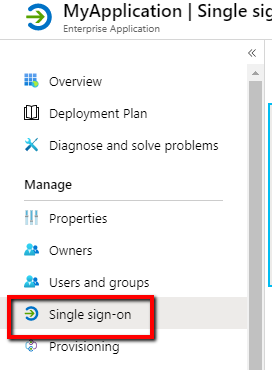
Figure 11. Single Sign-On
- Click SAML.
Figure 12. SAML Card
- Click Upload metadata file.
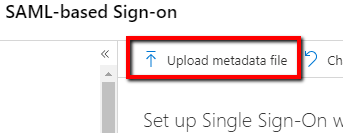
Figure 13. Upload Metadata File
- Upload the Transact Spring-Framework_metadata.xml. Use the following URL format to get the file:
https://<URL>:<PORT>/dcma/saml/metadata
Note: For more information, refer to Manually Configure SAML 2.0 SSO.
- Edit the Basic SAML Configuration.
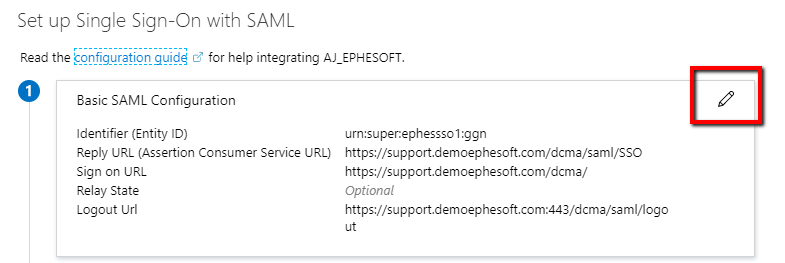
Figure 14. Basic SAML Configuration
- Add the SAML/SSO endpoint to the configuration in Azure. For example:
https://<ServerURL>/dcma/saml/SSO
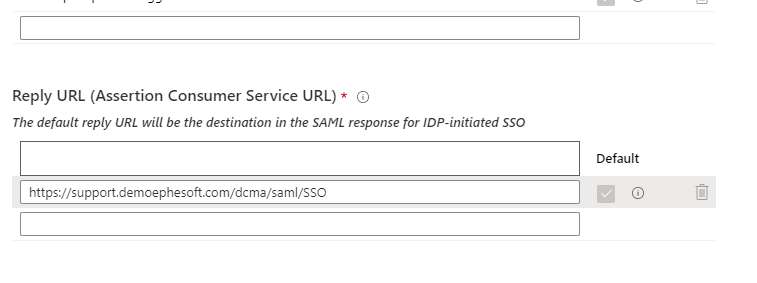
Figure 15. SAML/SSO Endpoint
- Enter the appropriate URL for the Sign on URL and Logout URL fields.
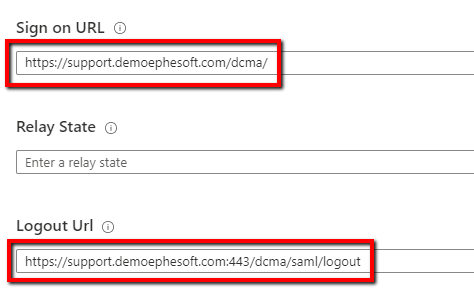
Figure 16. Sign-on URL and Logout URL
- Click Save.
- Edit the User Attributes & Claims.
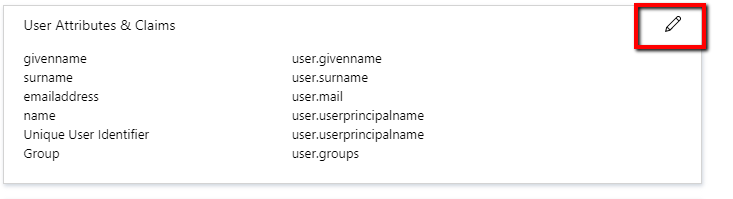
Figure 17. Edit User Attributes and Claims
- To define your user base, we recommend using the default emailaddress or surname claims URL path.
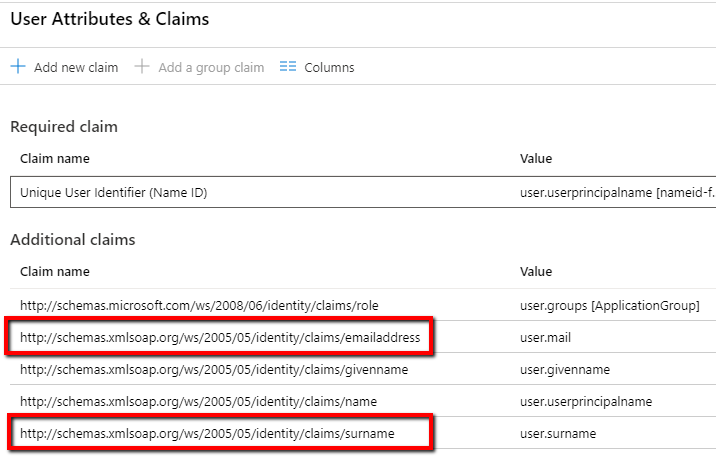
Figure 18. Edit User Attributes and Claims (cont)
- Click + Add a group claim.

Figure 19. Add Group Claim
- Select Customize the name of the group claim and Emit groups as role claims.
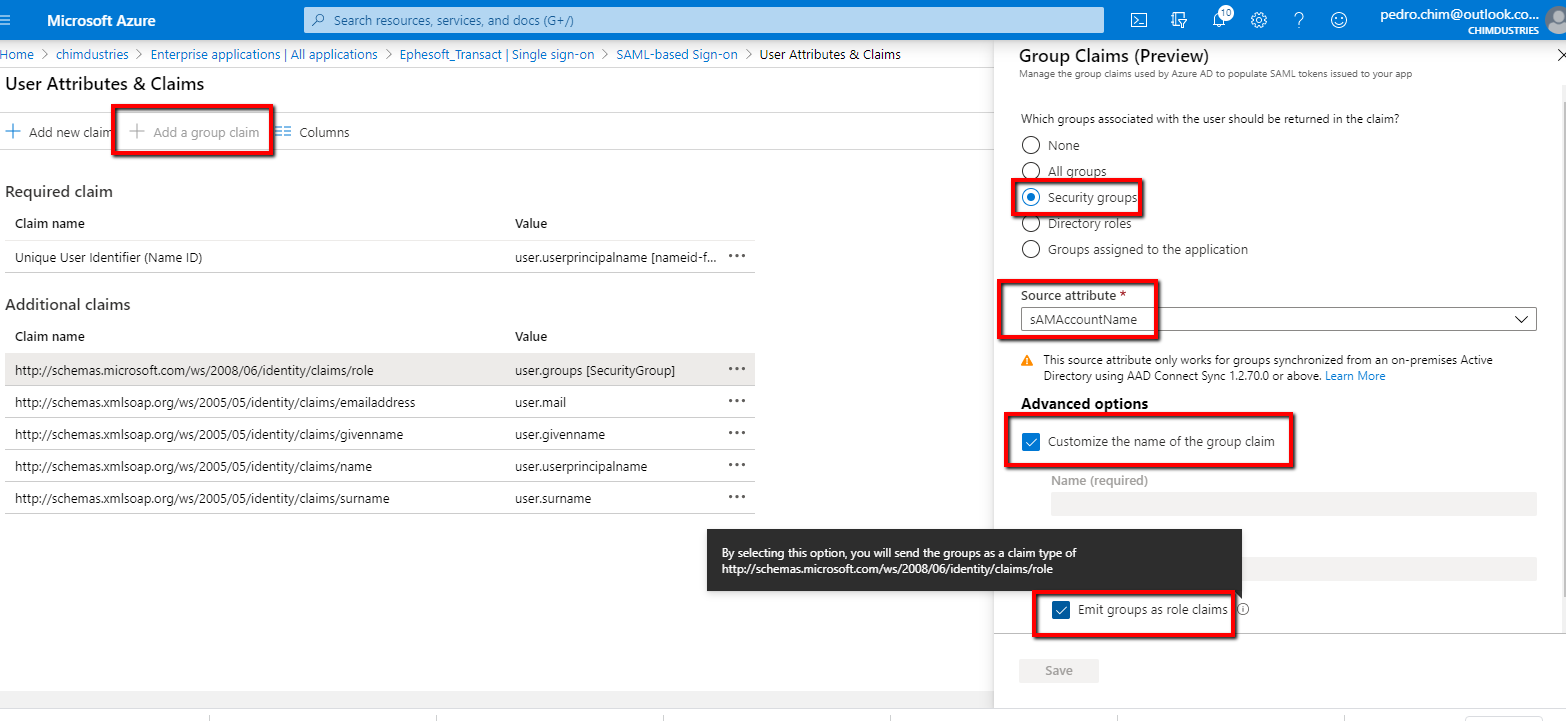
Figure 20. Select Group Claims Options
- Click Save.
- Take note of the new role claims URL. For example:
http://schemas.microsoft.com/ws/2008/06/identity/claims/role - Download the newly generated signing Certificate (Raw) and Federation Metadata XML.
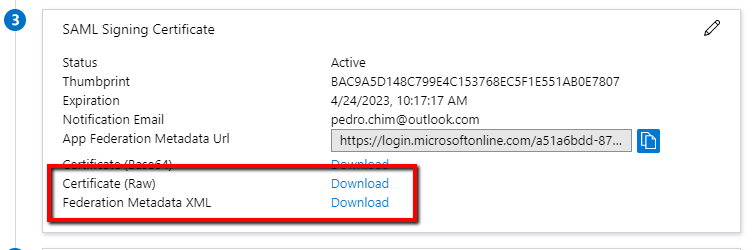
Figure 21. Download Files
Configure Ephesoft Transact
To configure SSO in Ephesoft Transact, perform the following steps:
Configure SAML SSO
Important: Before proceeding, ensure all SSL certificates are signed and valid certificates.
Refer to Manually Configuring SAML 2.0 SSO and follow the instructions provided to configure SAML SSO.
Configure the Azure AD Group ObjectIDs in your SSO Configuration
This section describes how to configure the Azure AD group ObjectIDs in your SSO configuration. These changes will be made in the following places:
- web.xml file
- application.properties file
- applicationContext-security.xml
- Database tables
- Access Manager
If desired, download the sample files as a reference when adjusting the settings according to your Azure AD configuration.
web.xml
This file is where you will configure the admin and operator groups.
- Open the web.xml file, located at [Ephesoft_Directory]\Application\WEB-INF.
- Set isMultipleGroupsAllowed to TRUE.
- Set the AdminGroups and OperatorGroups to the object IDs created in step 7 of Assign Users to the SSO Configuration.
- Set the groupNameDelimiter to a semicolon “;“.

Figure 22. Web.xml File
Note: Ensure the appropriate filters are commented out, including the <security-constraint> filters. Refer to the sample files provided above.
application.properties
This file is where you will configure the super-admin group.
- Open the application.properties file, located at [Ephesoft_Directory]\Application\WEB-INF\classes\META-INF.
- Set the user.super_admin and user.ephesoft_super_admin_role to the object ID created in step 7 of Assign Users to the SSO Configuration.
- Set the update_super_admin_group to true.

Figure 23. Application.properties File
applicationContext-security.xml
- Open the applicationContext-security.xml file, located at [Ephesoft_Directory]\Application\WEB-INF\classes\META-INF.
- Locate the
epheSamlFilterbean. - In the
epheSamlFilterbean, set the secondconstructor-argentry to “true”:
<constructor-arg index="2" value="true"/>
- For Transact 2019.2 or below, proceed to Database Tables.
Additional Configurations for 2020.1 and Above
This section includes additional configurations required in the applicationContext-security.xml for Ephesoft Transact 2020.1 and above.
- Add the following
constructor-argentry after the secondconstructor-arg:
<constructor-arg index="3" value=""/>
Note: The value field must be blank.
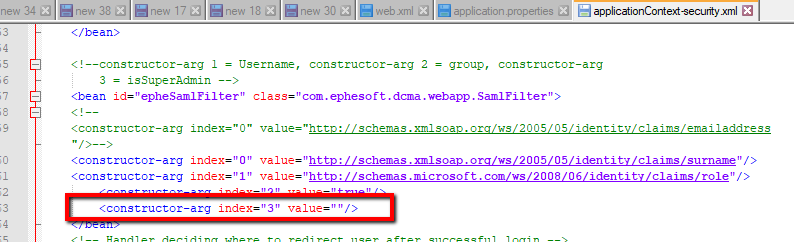
Figure 24. Additional Configuration
- Locate the
epheBootstrapbean. - In the
epheBootstrapbean, add the following property attribute to enable SHA-256 encryption:
<property name="signatureAlgorithmURI" value="http://www.w3.org/2001/04/xmldsig-more#rsa-sha256" />
<property name="digestAlgorithmURI" value="http://www.w3.org/2001/04/xmlenc#sha256" />

Figure 25. Additional Configuration (cont)
Database Tables
This section includes steps on how to map the groups created in Azure to your database.
- Log in to your database.
- Download the sample SQL files.
- Update the sample SQL with the object IDs collected in step 7 of Assign Users to the SSO Configuration. This will add the groups to the following tables:
- resource_authorizer
- security_groups
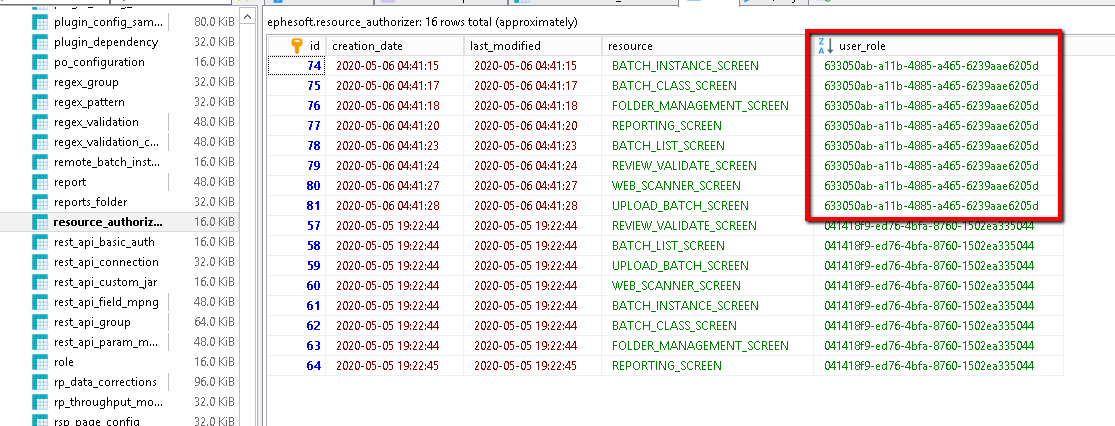
Figure 26. Update Object IDs (part one)
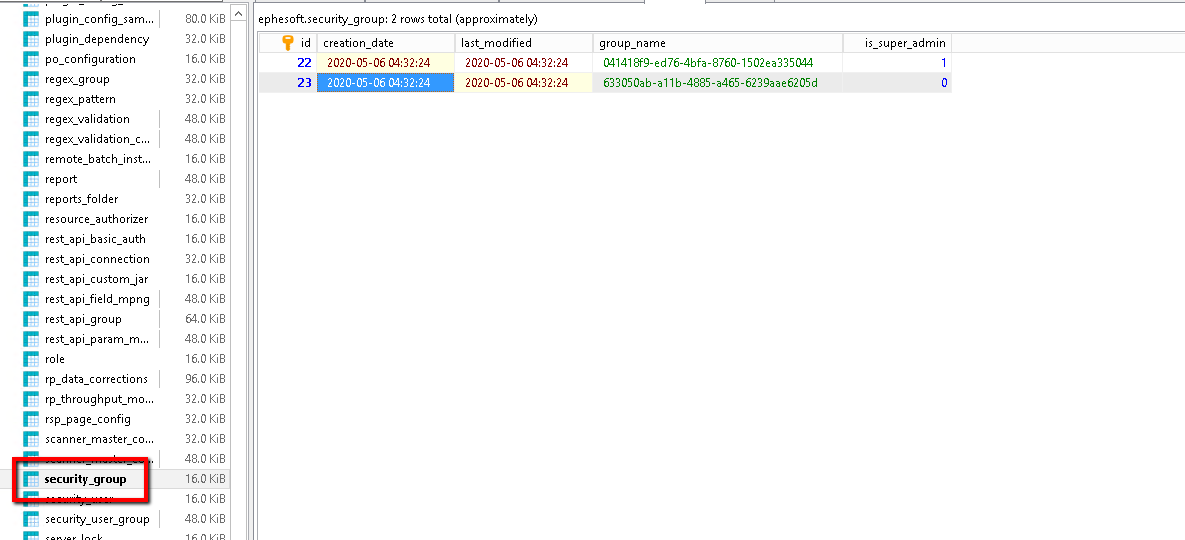
Figure 27. Update Object IDs (part two)
Access Manager
- Log in to Transact.
- Go to System Configuration > Access Manager.
- Adjust all other group permissions in the Access Manager as super-admin.
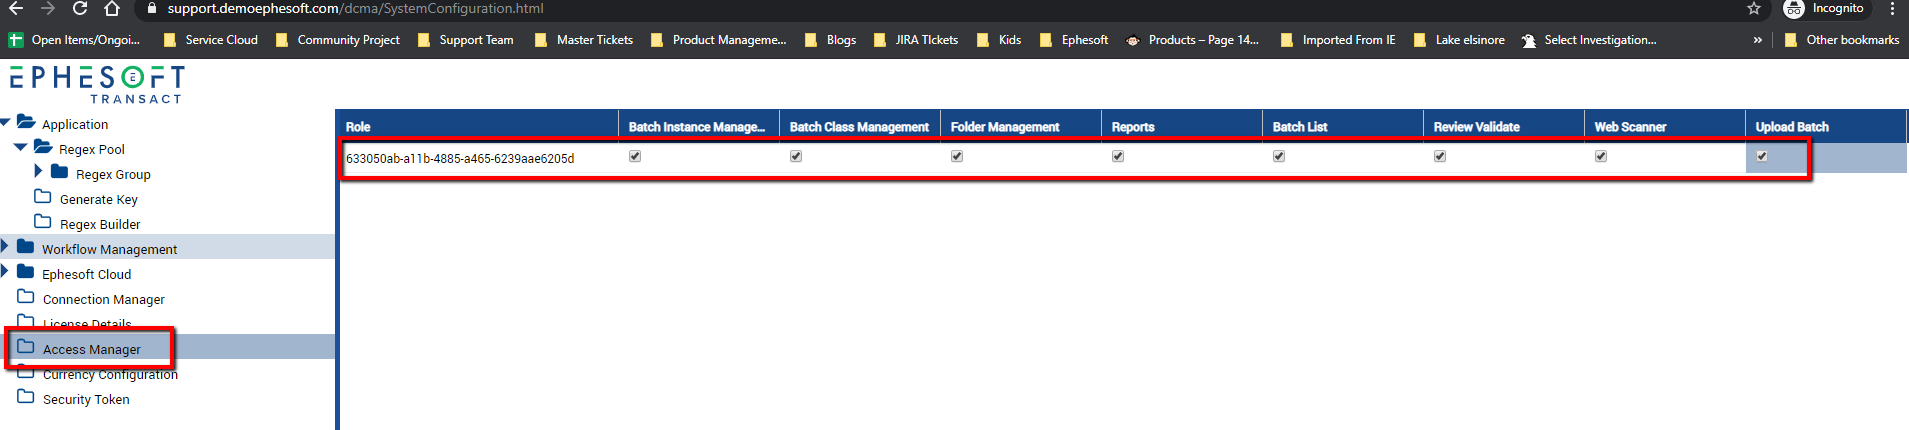
Figure 28. Access Manager
- Restart Ephesoft Transact.
Conclusion
This completes an overview of how to set up and configure SSO with Azure ADFS in Ephesoft Transact.