Introduction
Applies to: Transact version 2022.1.00 or newer. Table support applies to Transact versions 2022.1.01 or newer.
Availability: Windows and Linux on-premise or cloud.
This article describes how to configure and use Universal Document Automation for Ephesoft Transact. Universal Document Automation uses the Semantik Artificial Intelligence (AI) Engine to analyze any document, automatically recognizing and extracting: key-value pairs and simple tables
This technique differs from the standard Transact approach, where batch class designers build document types to model the documents that a batch class is expected to process. Universal Document Automation uses a batch class, but it only requires a single document type with no required index fields, tables, extraction rules, or validation rules. This single document type can process any document.
Universal Document Automation for Ephesoft Transact uses the Semantik AI Engine, SRE_KEY_VALUE_EXTRACTION plugin, and SRE_TABLE_EXTRACTION plugin.
Note: See Functional Limitations for more information on what is not currently supported.
This feature supports all languages that are supported by Transact. For a list, see Supported Languages.
Use Cases
Universal Document Automation is useful when:
- You want to extract data from documents without defining the document type.
- You need to process documents that you haven’t seen before and can’t model using document types (see Configure a Batch Class with the Hybrid Model).
Licensing
Universal Document Automation is included as part of the standard Transact license. There are no additional fees or licensing requirements.
Functional Limitations
- Universal Document Automation does not extract checkboxes. The Key-Value output field names and values are determined by the OCR text from the document.
- For Transact versions prior to 2022.1.01, Universal Document Automation does not work with encrypted batch classes in Linux.
- Computer vision is used to identify Key-Value pairs and is language agnostic. The Semantik AI engine is trained primarily with invoice-type documents and mixed results may occur with other document types. Best results are obtained when Key-Value pairs are in close proximity to one another.
- Simple tables are supported. Complex tables (those that include, but are not limited to, attributes such as multi-row headers and nested tables) may yield unexpected results.
- Tables may be falsely detected or not at all detected because of the nature of machine-learning models.
- Tables that span multiple pages of a document are considered to be separate tables.
- There are no options to exclude columns or to select specific tables when using Semantik AI Engine.
- Semantik AI Engine identifies tables by searching for visual elements such as headers, rows or visible/invisible boundaries, and other table-like structures.
- Universal Document Automation does not support Table Extraction in Transact 2022.1.00.
- Table extraction results from Universal Document Automation and Document Design Accelerator may not match. Universal Document Automation uses the extraction results from the Semantik AI Engine. Document Design Accelerator aids in the creation of conventional table extraction rules.
Prerequisites
Before you configure and use Universal Document Automation:
- Install Transact version 2022.1.00 or newer. For table extraction, install Transact 2022.1.01 or later.
- Download and install the Semantik AI Engine.
Note: The SRE_KEY_VALUE_EXTRACTION plugin and SRE_TABLE_EXTRACTION plugin are included in the Semantik AI Engine installation.
Configure Universal Document Automation
Here’s an overview of how to set up Universal Document Automation:
- Create a batch class with one new document type.
- Configure the Document Assembler plugin to change “Unknown” documents to the Universal document type that you just created.
- Add the SRE Key-Value Extraction plugin and configure as necessary.
- Add the SRE Table Extraction plugin and configure as necessary.
Step 1: Configure the Batch Class
- From the Batch Class Management screen, select your batch class and click Open.
- Create a new document type. You can use any name, but we recommend using “Universal.” For help, see Add New Document Type. Note: Index fields are not required for this document type.
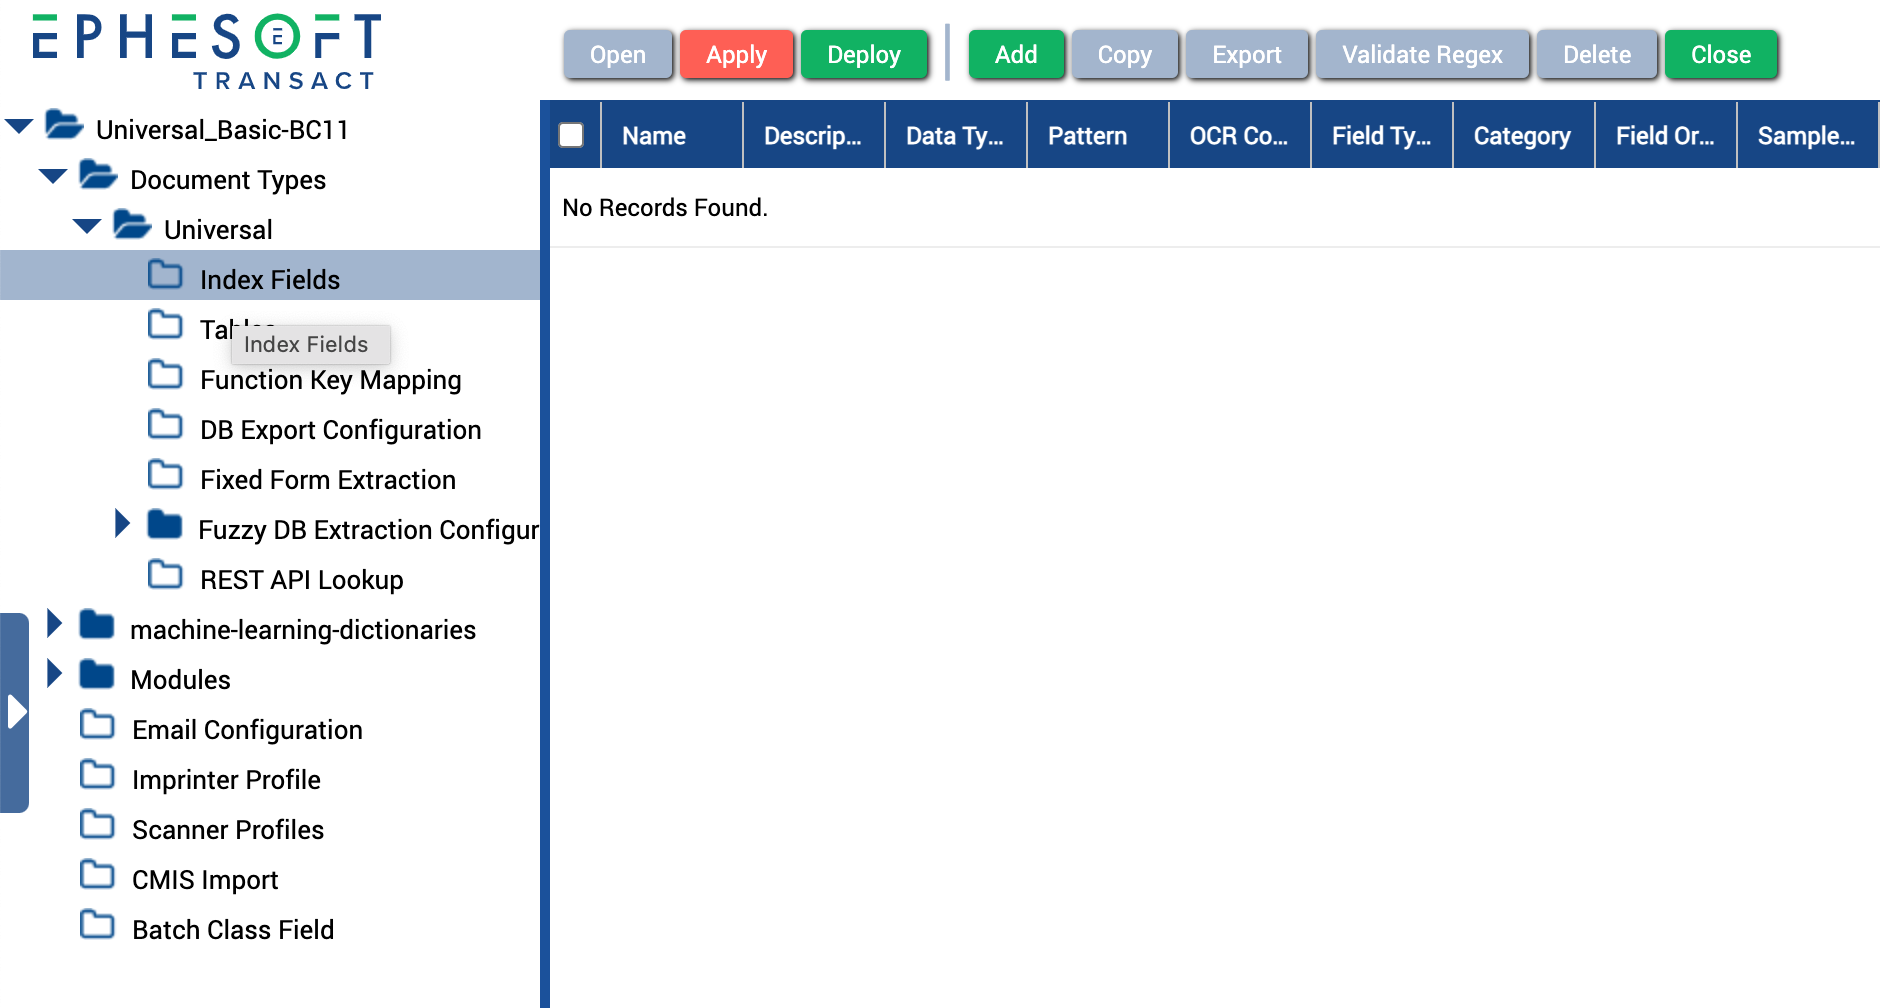
Figure 1. Universal Document document type with no index fields.
- Set the Minimum Confidence Threshold value to 0.
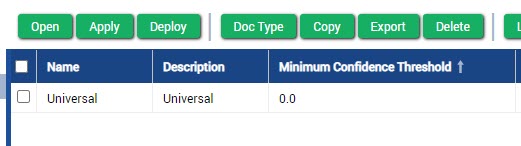
Figure 2. Minimum Confidence Threshold set to 0.
Step 2: Configure the Document Assembler Plugin
- If not already added, add the DOCUMENT_ASSEMBLER plugin to the Document Assembly module.
- Click Deploy.
- In the DOCUMENT_ASSEMBLER plugin configuration, configure the following parameters:
- Change Unknown Document Type Switch: ON
- Change Unknown Document To Document Type: [Name of your Universal document type]
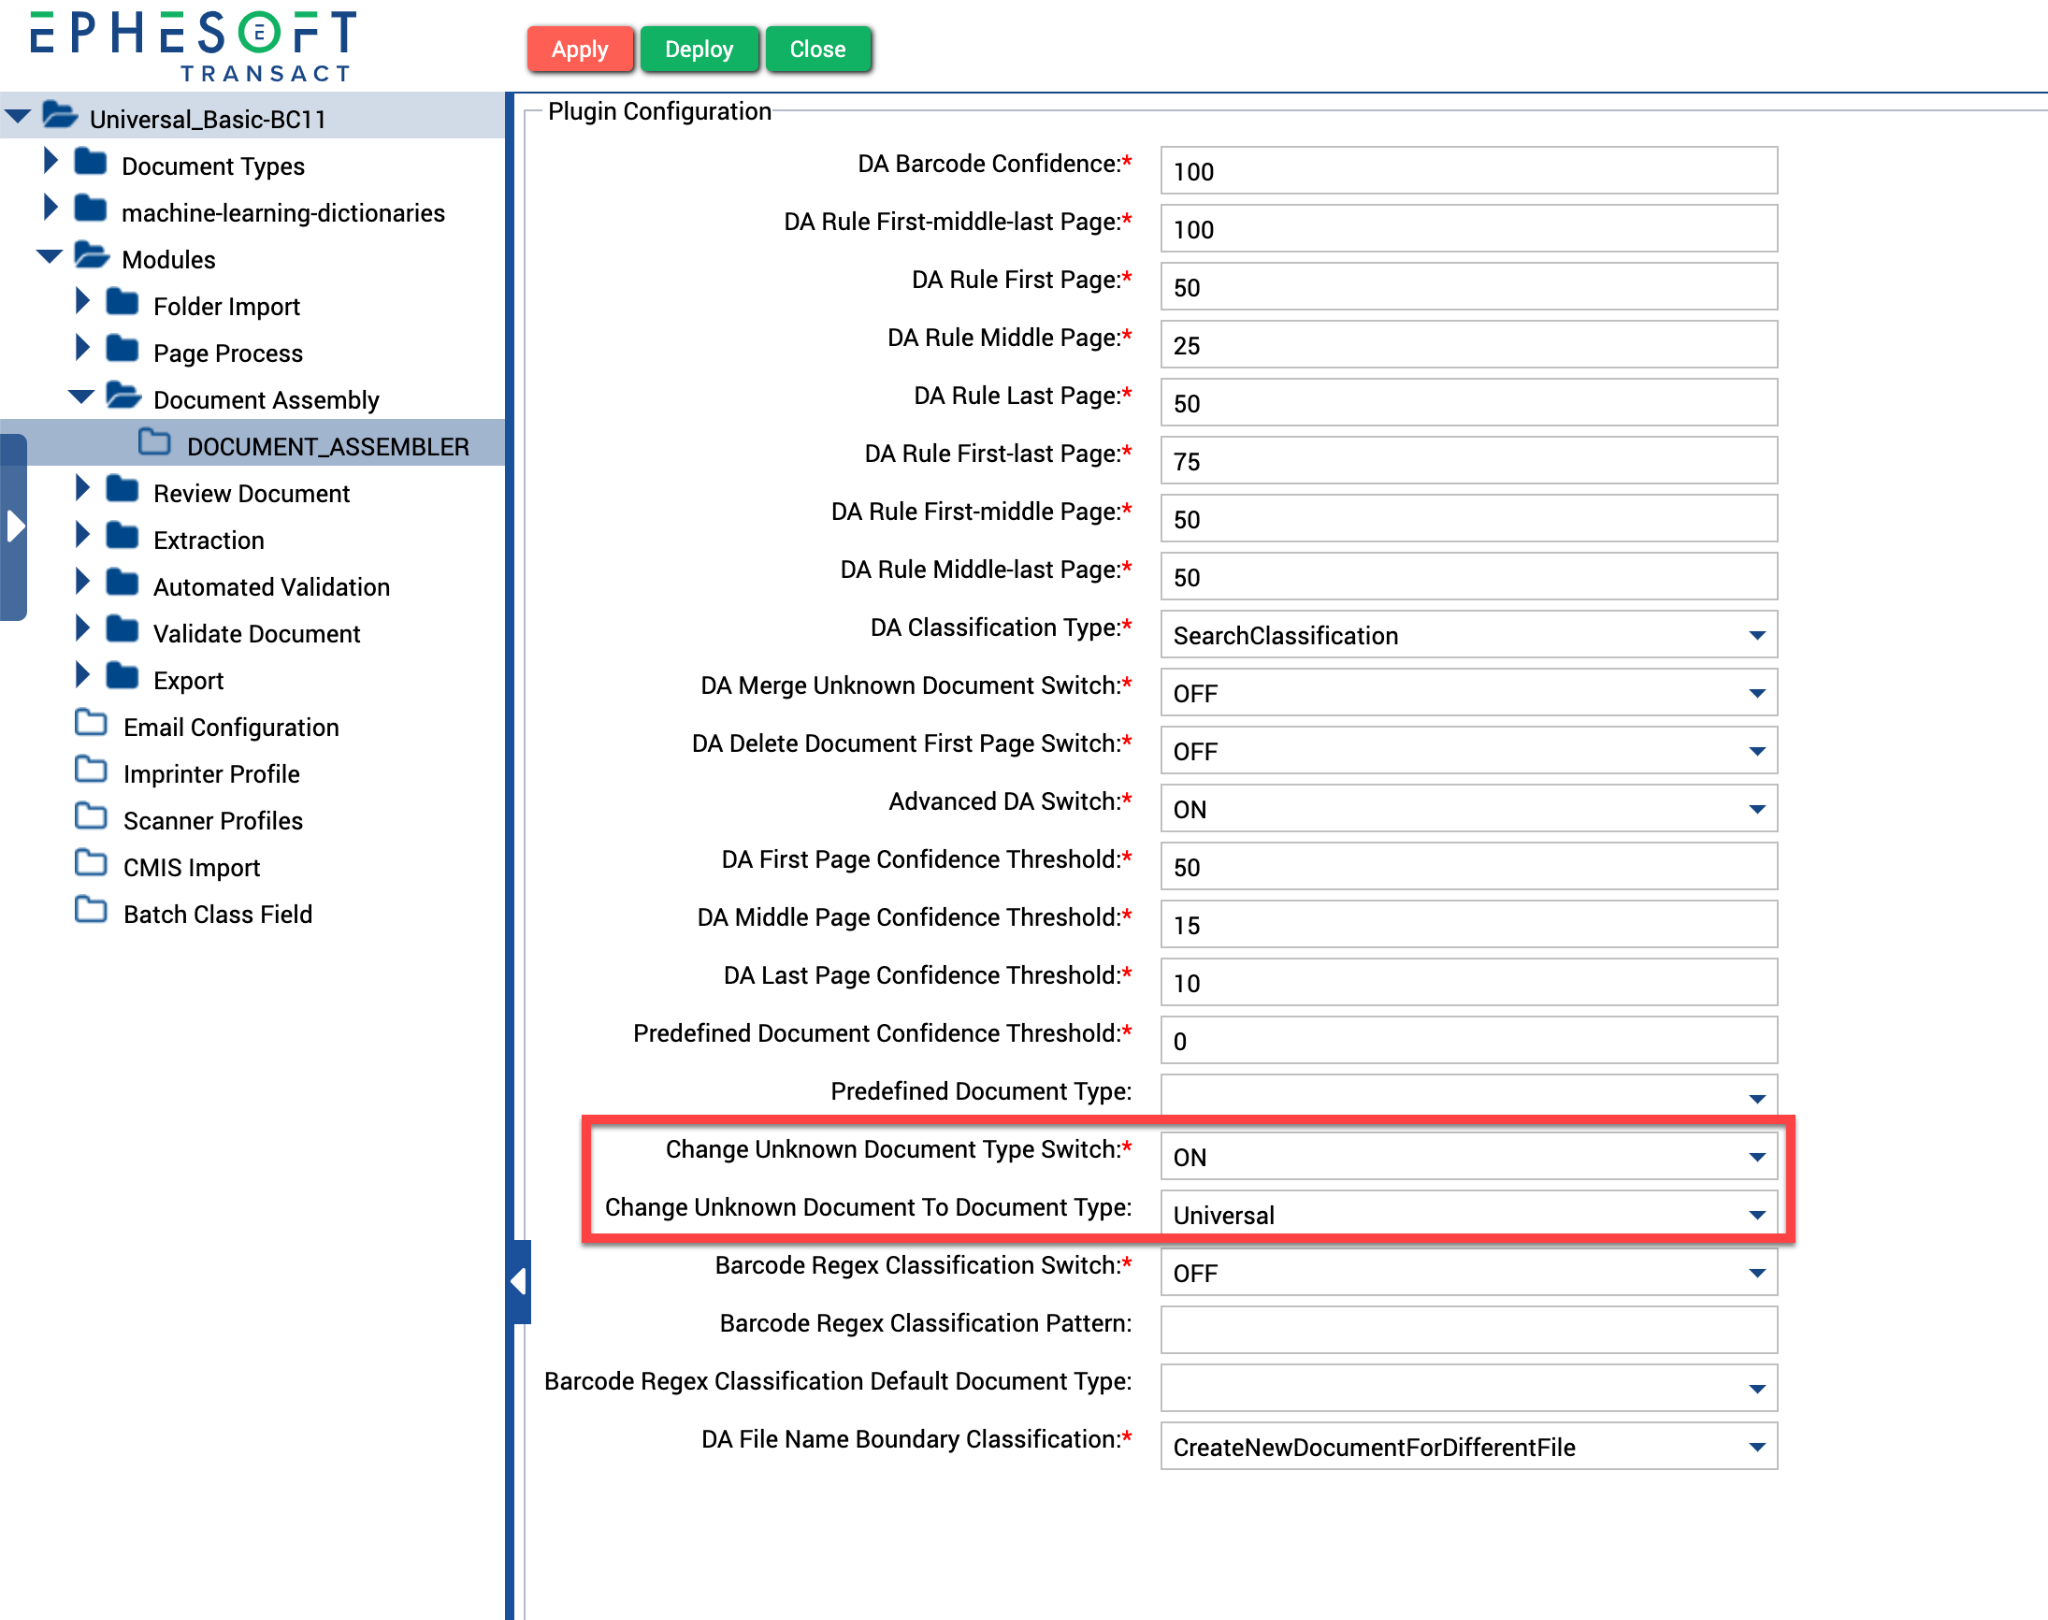
Figure 3. Document Assembler plugin configuration.
Step 3: Add and Configure the SRE Key-Value Extraction Plugin
- In the Extraction module, add the SRE_KEY_VALUE_EXTRACTION plugin.
Note: For most uses, the plugin order is not important. If you want to use this plugin in combination with other extraction plugins, then it’s best to position it after the other extraction plugins.
- Click Deploy.
- Configure the SRE_KEY_VALUE_EXTRACTION plugin according to your workflow needs. Refer to the following table for more information on configuration properties.
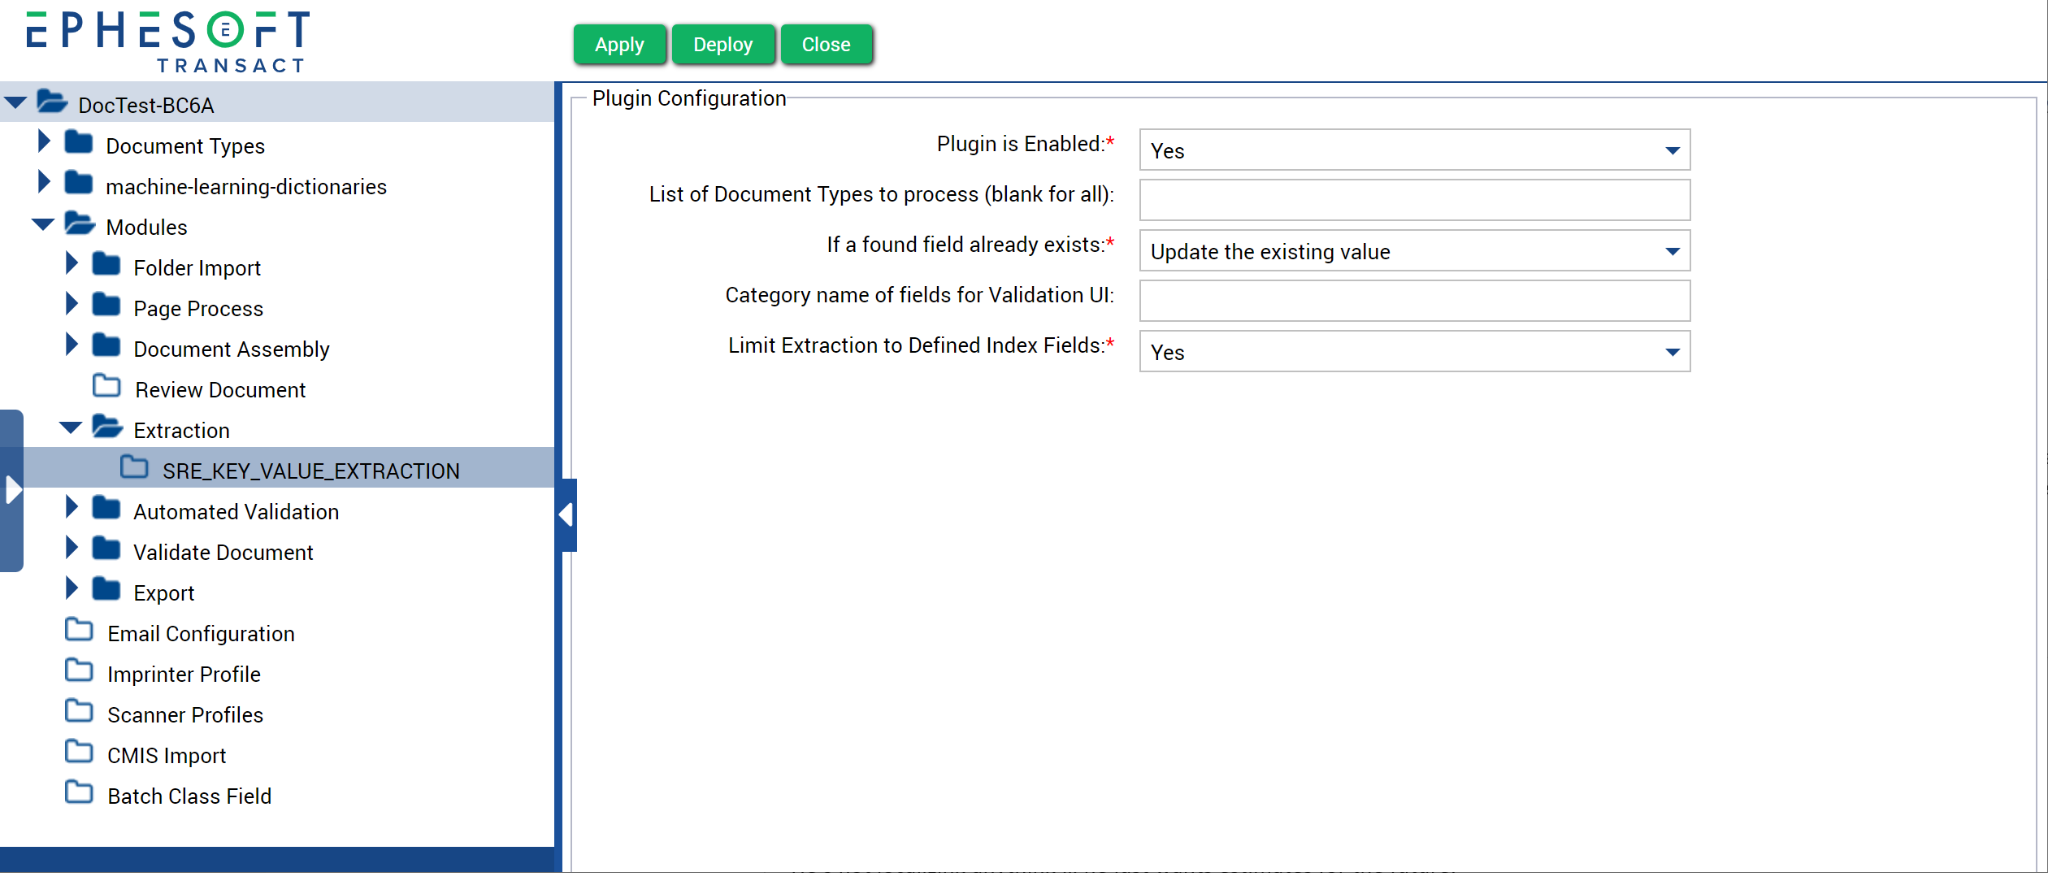
Figure 4. SRE Key-Value Extraction plugin configuration.
| Configurable Property | Options | Description |
| Plugin is Enabled |
|
This property enables the plugin. |
| List of Document Types to Process (blank for all) | N/A | This property specifies which document types the plugin will process. If a document type is not specified, the plugin will skip those documents. If left blank, the plugin will process all documents in the batch class. Note: This option is only needed when you have multiple document types in a batch class and you don’t want to use the Semantik AI Engine for some of them.
Separate the document types with pipes (|) with no spaces. (Example: DocType1|DocType2|DocType3) Commas can be used as separators if document type names do not contain commas. (Example: DocType1,DocType2,Doc,Type3 can lead to unexpected results.) |
| If a found field already exists |
|
This property applies when you’re using the SRE Key-Value Extraction plugin with another extraction plugin on the same document, or if the same key is found more than once on a document. This may result in overlap of the key-value pairs between the custom fields defined in the document type and what the Semantik AI Engine finds.
The options define what the Semantik AI Engine will do if it finds a field that already exists. |
| Category name of fields for Validation UI | N/A | This property will group all the fields that the Semantik AI Engine finds on a separate tab in the Validation UI. The input field defines the name of the tab.
If left blank, fields will be added to the default Transact group (Group 1). |
| Limit Extraction to Defined Index Fields* |
|
If set to Yes, the data is extracted only for the index fields defined for the document type. If set to No (default), all data is extracted for any index field that is defined by document type and new index fields found by Semantik AI Engine.
Note: If set to Yes and no index fields have been defined for the document type, the limit rule is not applied and new index fields found by Semantik AI Engine are added. |
* Available in Transact 2022.1.01 and newer.
- Click Apply.
Step 4: Add and Configure the SRE Table Extraction Plugin
This step applies to Transact 2022.1.01 and newer.
- In the Extraction module, add the SRE_TABLE_EXTRACTION plugin.
Note: For most uses, the plugin order is not important. If you want to use this plugin in combination with other extraction plugins, then it’s best to position it after the other extraction plugins.
- Click Deploy.
- Configure the SRE_TABLE_EXTRACTION plugin according to your workflow needs. Refer to the following table for more information on configuration properties.
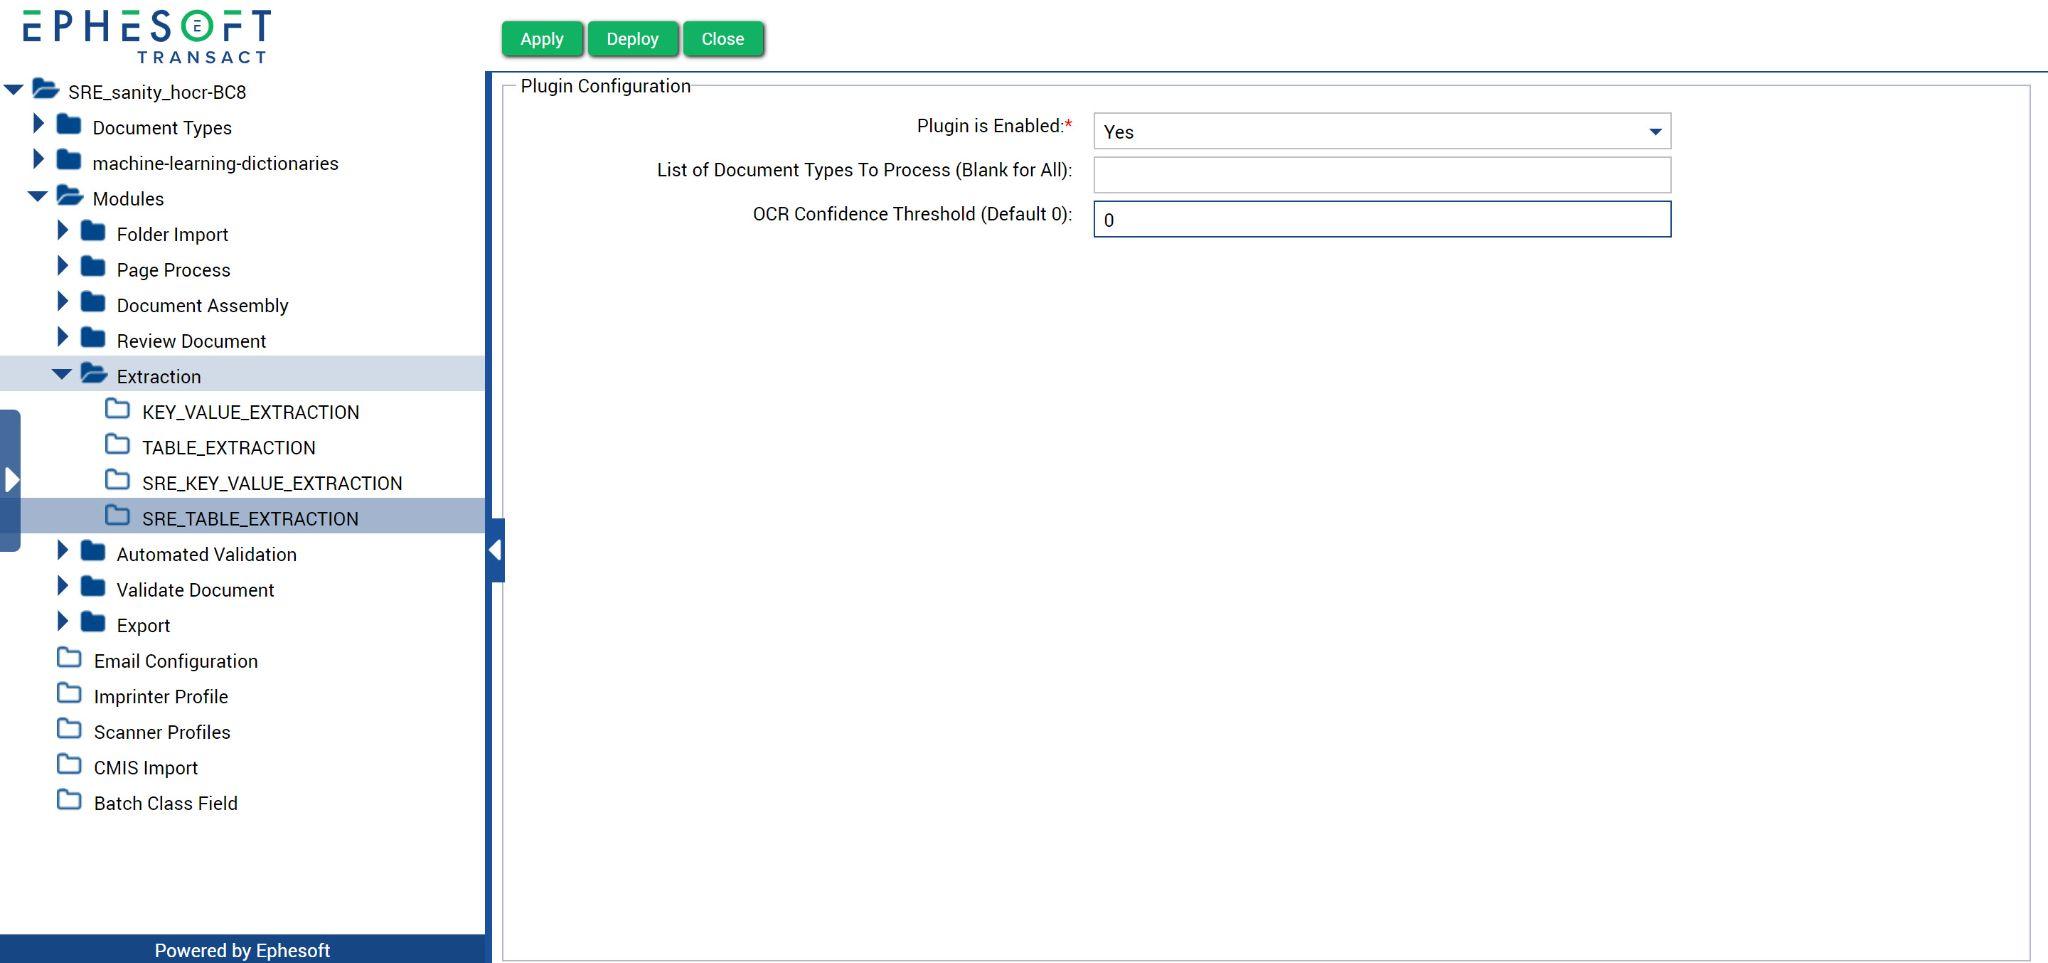
Figure 5. SRE Table Extraction plugin configuration
| Configurable Property | Options | Description |
| Plugin is Enabled |
|
This property enables the plugin. |
| List of Document Types to Process (Blank for All) | N/A | This property specifies which document types the plugin will process. If a document type is not specified, the plugin will skip those documents. If left blank, the plugin will process all documents in the batch class. Note: This option is only needed when you have multiple document types in a batch class and you don’t want to use the Semantik AI Engine for some of them.
Separate the document types with pipes (|) with no spaces. (Example: DocType1|DocType2|DocType3) Commas can be used as separators if document type names do not contain commas. (Example: DocType1,DocType2,Doc,Type3 can lead to unexpected results.) |
| OCR Confidence Threshold (Default 0) | N/A | A number between 1 and 100, defines the OCR confidence threshold that is used to determine whether a table cell requires manual validation. If the OCR confidence is below this level, it will be marked for operator validation. You may need to test and refine this number for best results.
The default value is 0, which allows all table cells to pass without requiring manual validation. Example: A value of 70 would automatically validate a field with 75% confidence, but a field with 65% confidence will be marked for manual validation. |
- Click Apply.
To process your batch instance, continue to Process a Batch Instance with Universal Document Automation.
If you need to add custom document types to your batch class, continue to Configure a Batch Class with the Hybrid Model.
Configure a Batch Class with the Hybrid Model
A hybrid batch class uses the Universal document type and custom document types in the same batch class. To configure a hybrid batch class, complete the steps in Set Up Universal Document Automation. Then, complete these additional steps:
- Create one or more custom document types. For help, see Add New Document Type.

Figure 6. Multiple document types in the Universal batch class.
- Configure the new document type(s) following the standard Transact workflow. For help, see Document Type Additional Configurations.
Important: Classification is critical in hybrid batch classes because Transact labels any documents that can’t be classified as “Unknown.” Part of the Universal Document Automation setup involves automatically changing Unknown documents to the Universal document. If your custom document type is not classified correctly, it will be processed as a Universal document type.
- In the SRE_KEY_VALUE_EXTRACTION plugin, configure the following parameter:
- List of Document Types to Process (blank for all): [Name of your Universal document type]
Note: This setting will send only the Universal document to the Semantik AI Engine, not the other document types.
- List of Document Types to Process (blank for all): [Name of your Universal document type]
- In the SRE_TABLE_EXTRACTION plugin, configure the following parameter:
- List of Document Types to Process (blank for all): [Name of your Universal document type]
Note: This setting will send only the Universal document to the Semantik AI Engine, not the other document types.
- List of Document Types to Process (blank for all): [Name of your Universal document type]
Process a Batch Instance with Universal Document Automation
- From the Batch Class Management screen, click Upload Batch in the left fly-out menu. Alternatively, import your documents using a different method.
- Upload your documents.
- Select the batch class and click Start Batch.
Note: Universal Document Automation does not need to stop for review or validation because there are no classification confidence levels or validation rules that will stop the workflow. To force the documents to stop for validation, see How to Force Validation.
The extraction results are exported via the standard Transact methods according to your export configuration. For more information on export plugins, see the Export Module documentation. Note: The output values, including dates and numbers, are returned as strings.
How to Force Validation
Universal Document Automation is designed to facilitate straight-through processing without the need to stop for validation. If you want your documents to stop for validation, here is one method to do so:
- Add an index field to the Universal document type. You can name this field anything; for this tutorial, we named it “Stop.”
- In the Additional Configurations column, select the Force Validation checkbox. Note: Select the Hidden checkbox if you want to hide this field from showing on the Validation screen.
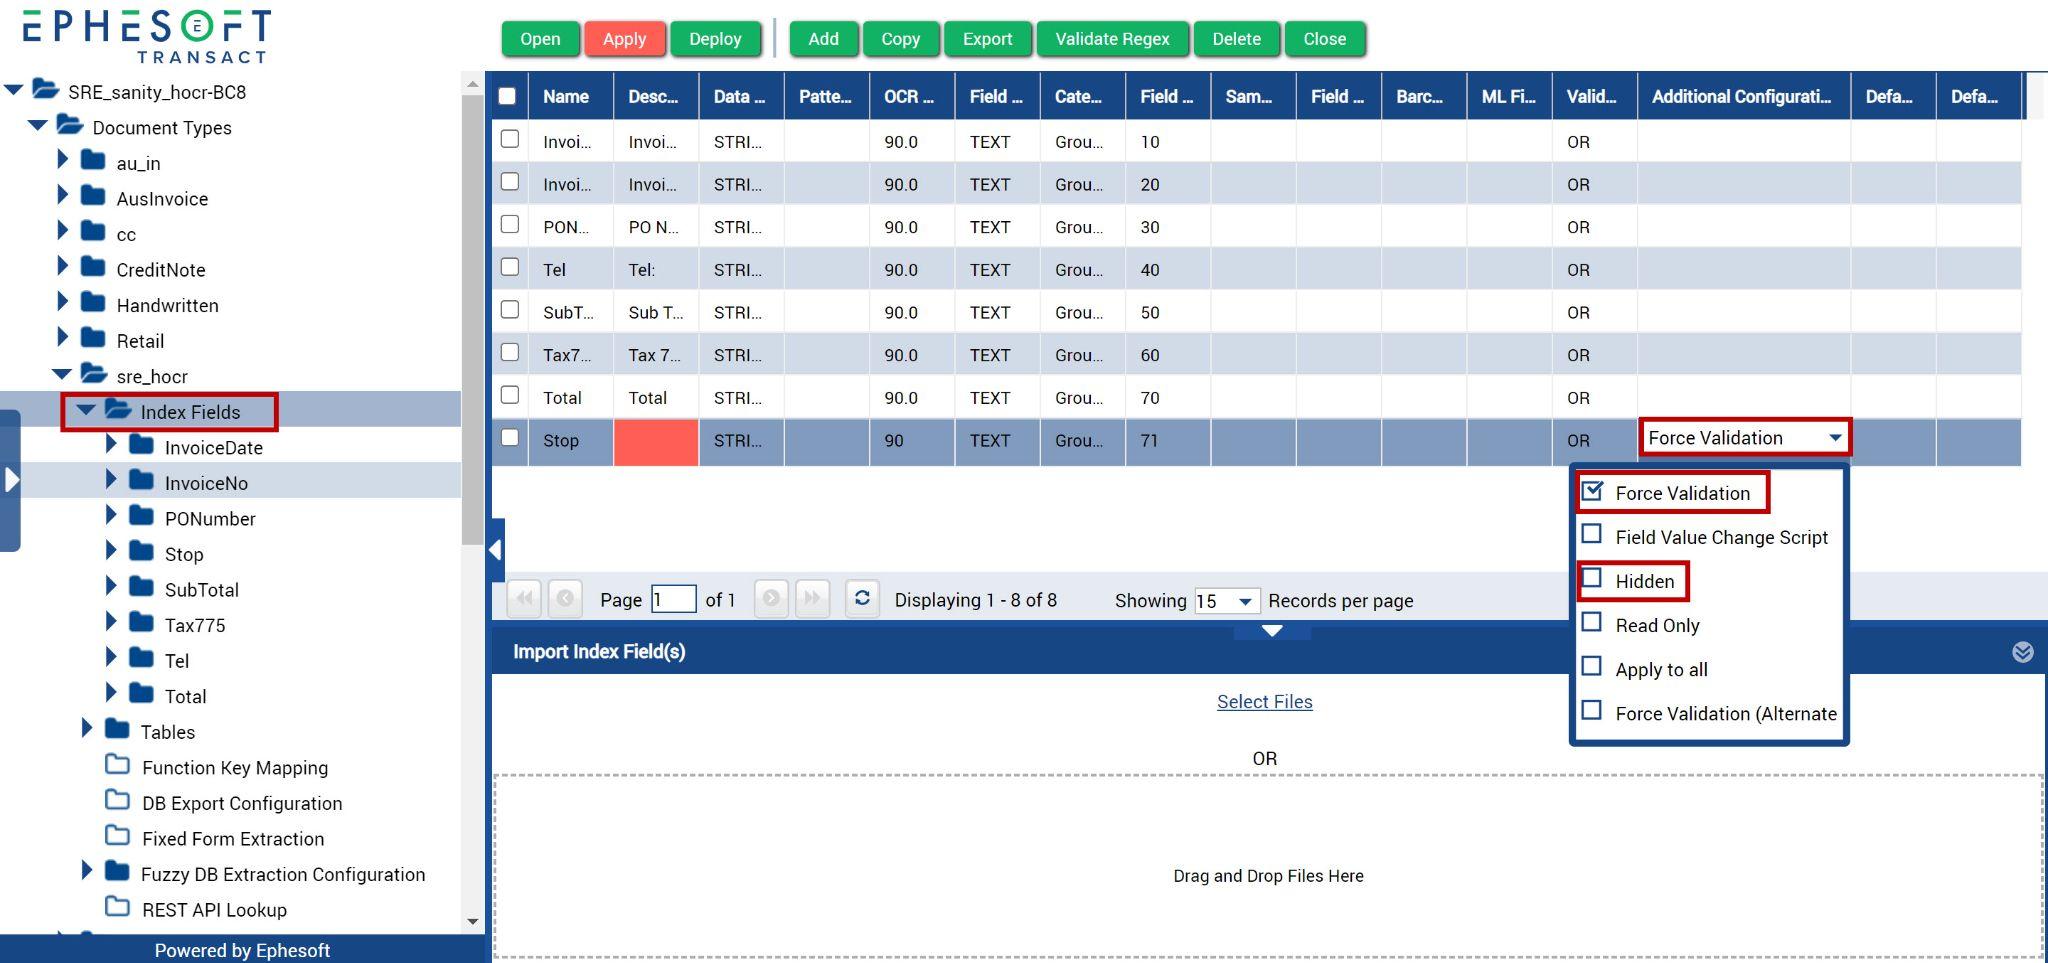
Figure 7. Force Validation and Hidden checkboxes.
- Click Apply.
This is an example of using the “Stop” index field to force validation (without the Hidden checkbox selected):
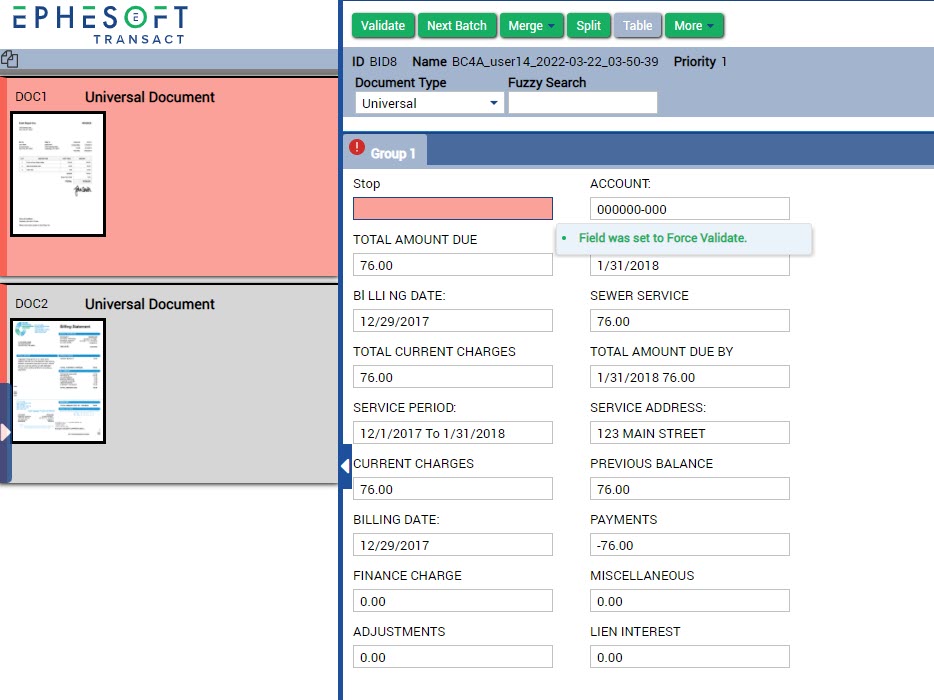
Figure 8. Force Validation example.
To force table validation, configure the SRE_TABLE_EXTRACTION plugin option OCR Confidence Threshold and set to 100 or an acceptable value that meets requirements.