Overview
The troubleshooting artifact download allows you to download or upload the selected artifacts. This feature creates a zipped file containing all selected artifacts and makes it available for download or upload.
The Troubleshoot section can be accessed by pressing the left arrow ( ◄ ) on the bottom right of the Batch Instance Management screen.
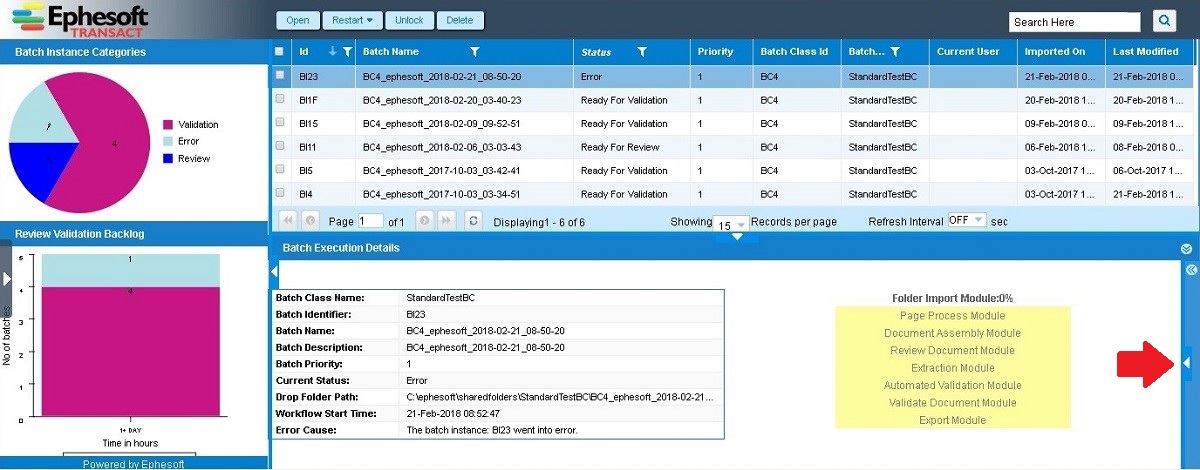
Figure 1: Batch Instance Management Screen
Artifacts
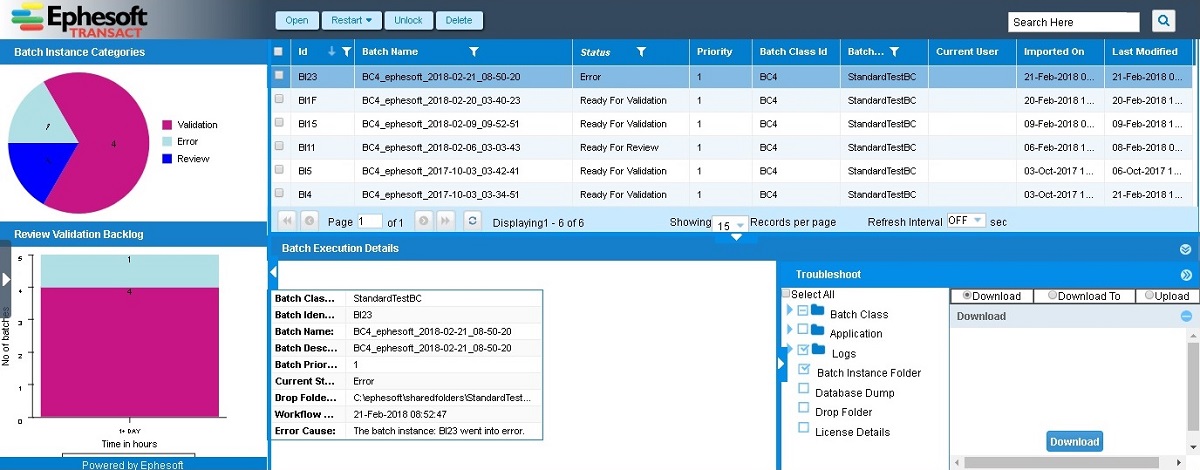
Figure 2: Troubleshoot Module
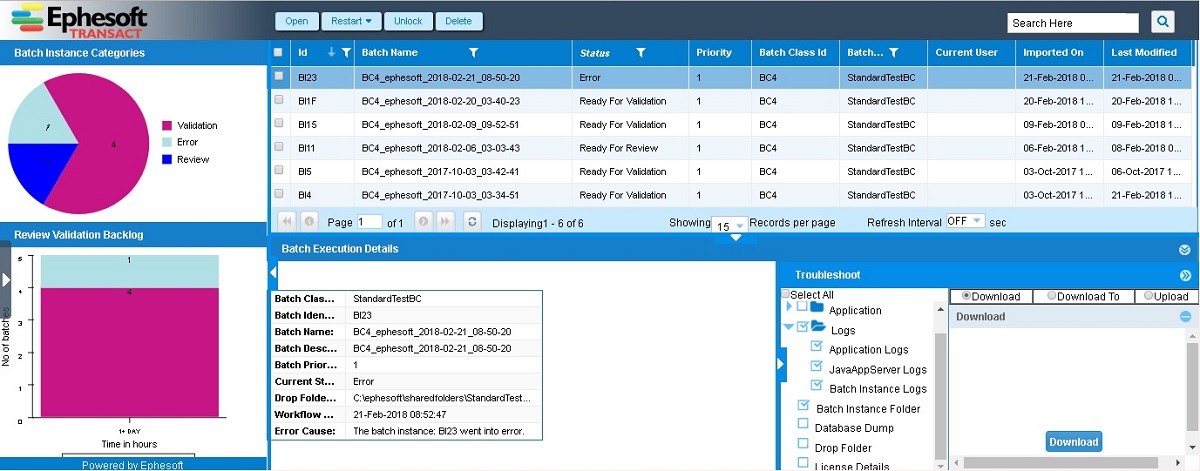
Figure 3: Download Troubleshoot Artifacts
The following artifacts will be included in a zipped file upon clicking Download:
- Batch Class
- Default Exported Batch Class
- With Image Classification Sample
- With Lucene Classification Sample
- Application
- Lib
- META-INF
- Application Folder
- Logs
- Application Logs
- JavaAppServer Logs
- Batch Instance Folder
- Database Dump
- UNC Folder
- License Details
Batch Class
There are three options for including the batch class:
- Default Exported Batch Class: batch class excluding the Lucene and image classification sample folders.
- With Image Classification Sample: batch class including the image classification sample folder.
- With Lucene Classification Sample: batch class including the Lucene classification sample folder.
If you select all three options it will create a batch class including both Lucene and the image classification sample folder.
Application
There are three options for including artifacts related to the Application Folder:
- Lib: Include the lib folder only.
- META–INF: Include the META – INF only.
- Application: Application folder without native including both lib and META – INF.
Logs
There are three types of logs available for download/upload.
- Application: Includes the application logs in the zip file
- JavaAppServer: Includes the Application Server logs in the zip file.
- Batch Instance: Includes the batch instance logs in the zip file.
Batch Instance Folder
Includes the whole batch instance folder inside the zip.
Database Dump
Includes the database dump inside the zip.
UNC Folder
Includes the UNC folder of the selected batch instance’s batch class inside the zip.
License Details
Includes a file containing the license details like Max CPU count, License Expiry date, Number of cores used for OCRing, and web service switch status.
Options for Collecting Artifacts
- Download: Select this option for downloading the artifact zip on your machine.
- Download to: Select this option for downloading the zip to a specific location. The artifact zip can be downloaded to a network path using this option.
The below table describes the information required for downloading the artifacts on a network path:
| Information | Type of Value | Value Options | Description |
| Username | String | A valid username | The FTP account on which the artifacts are required to be uploaded |
| Password | String | Corresponding password for the configured username | Password for the configured FTP account |
| Server URL | String | A valid FTP server URL | The URL of the FTP server to which the configured user account belongs |
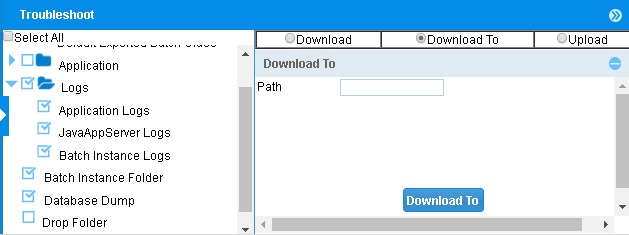
Figure 4: Download To Path Option
Steps of execution/working
- Click the arrow ( ◄ ) at the bottom right of the Batch Instance Management screen to open the Troubleshoot module.
- Select the artifacts you need to gather.
- Select any relevant items from the Download, Download to, and Upload tabs and enter the necessary information.
- A zip containing the select batch’s artifacts with the format <VersionNumber>_<BatchInstanceIdentifier>_troubleshoot_<mmddyyyy>_<CurrentTime> will be downloaded or uploaded (as specified in Step 3).
- If there no batches were available, then a zip with name <VersionNumber>_troubleshoot_<mmddyyyy>_<CurrentTime> will be uploaded or downloaded (as specified in Step 3).
Troubleshooting
How to Enable Batch Instance Logs
- Edit the dcma-batch.properties file located in <Ephesoft Installation Folder>/Application/WEB-INF/classes/META-INF/dcma-batch/
- Enable batch instance logging. Change batch.instance_logging=OFF to batch-instance_logging=ON.
- Restart Ephesoft Transact as a service on each server.
Common Error Messages
| Error Message | Possible Cause |
| Please select at least one option. | None of the artifact options are selected. |
| Please enter a path beginning with \ | The Download to option expects a network path where the artifacts can be downloaded. Provide a valid path. |
| The path provided does not exist. | The path entered on selected Download to does not exist. |
| Could not connect to the FTP client. Please enter valid credentials. | The credentials entered for uploading the artifacts are incorrect. |