Available: on-premises, cloud
Introduction
In this document, you will learn how to configure the DB Export plugin in Ephesoft Transact.
The DB Export plugin is responsible for saving the data of the document level fields for a particular batch instance to an external database. It uses a provided mapping file to create a SQL query to insert the mapped document level field into the mapped table.
Prerequisites
To configure and use the DB Export plugin, the following configurations must be in place:
- You will need a batch class with a document type configured. For detailed steps, refer to Add New Document Type
- You will need to add the DB_Export plugin to the Export module for the batch class. For more information on managing plugins, refer to Configuring Plugins.
- The document level field must have some extracted value.
- A database connection is configured in the System Configuration > Connection Manager.
Add and Configure DB Export Plugin
This section provides information on how to configure the DB Export plugin. This plugin only needs to be configured once per batch class.
To enable the plugin:
- Add the DB_Export plugin to the Export module for the batch class.
- Note: It must be added after the plugins that create your export file (typically the CREATEMULTIPAGE_FILE.) For more information on managing plugins, refer to Configuring Plugins.
- From the Batch Class Management screen, open your batch class.
- Go to Modules > Export > DB_Export.
- Set the Database Export Switch to “ON.”

Figure 1. Plugin Configuration
- Click Apply.
Configure DB Export for the Document Type
This section provides information on how to configure DB Export at the document type level. This must be configured multiple times per batch class, depending on how many document types you have.
To configure DB export:
- From your batch class, go to Document Types > [your document type] > DB Export Configuration.
- Map Document Level Fields.
- Map Tables.
Map Document Level Fields
You can map document level fields with the column of a database table to export the document level fields of a batch class.
- On the DB Export Configuration screen, select DLF Mappings.
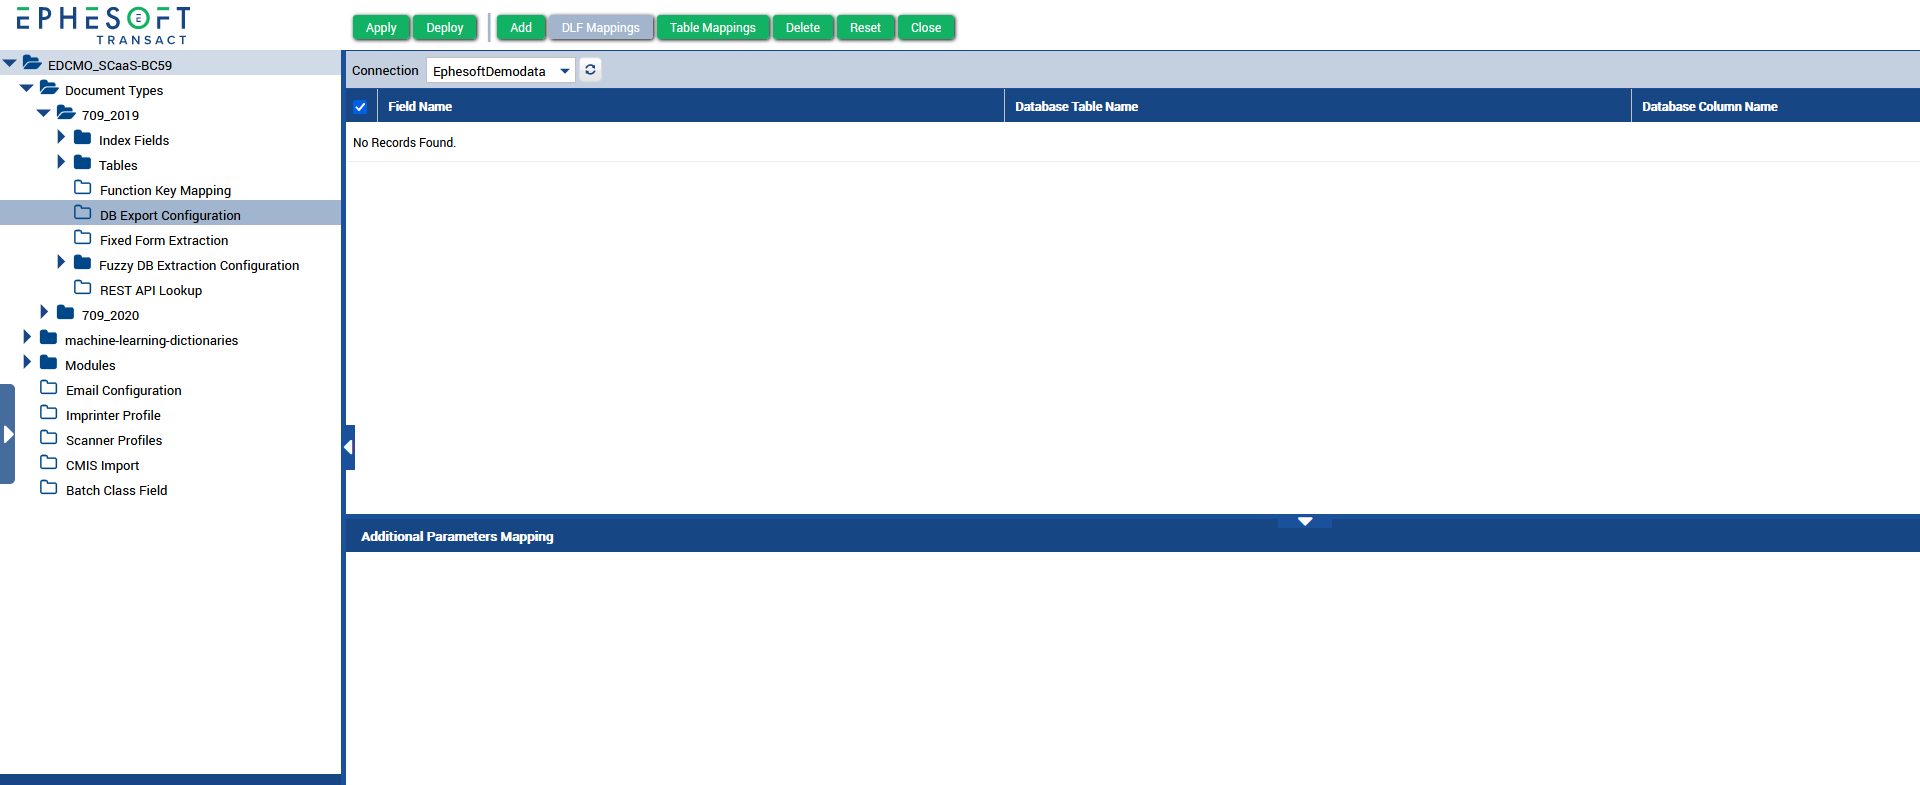
Figure 2. DLF Mapping
- Select your database connection from the Connection dropdown.
Note: This connection can be configured in the Connection Manager of System Configuration.
- Click Add.
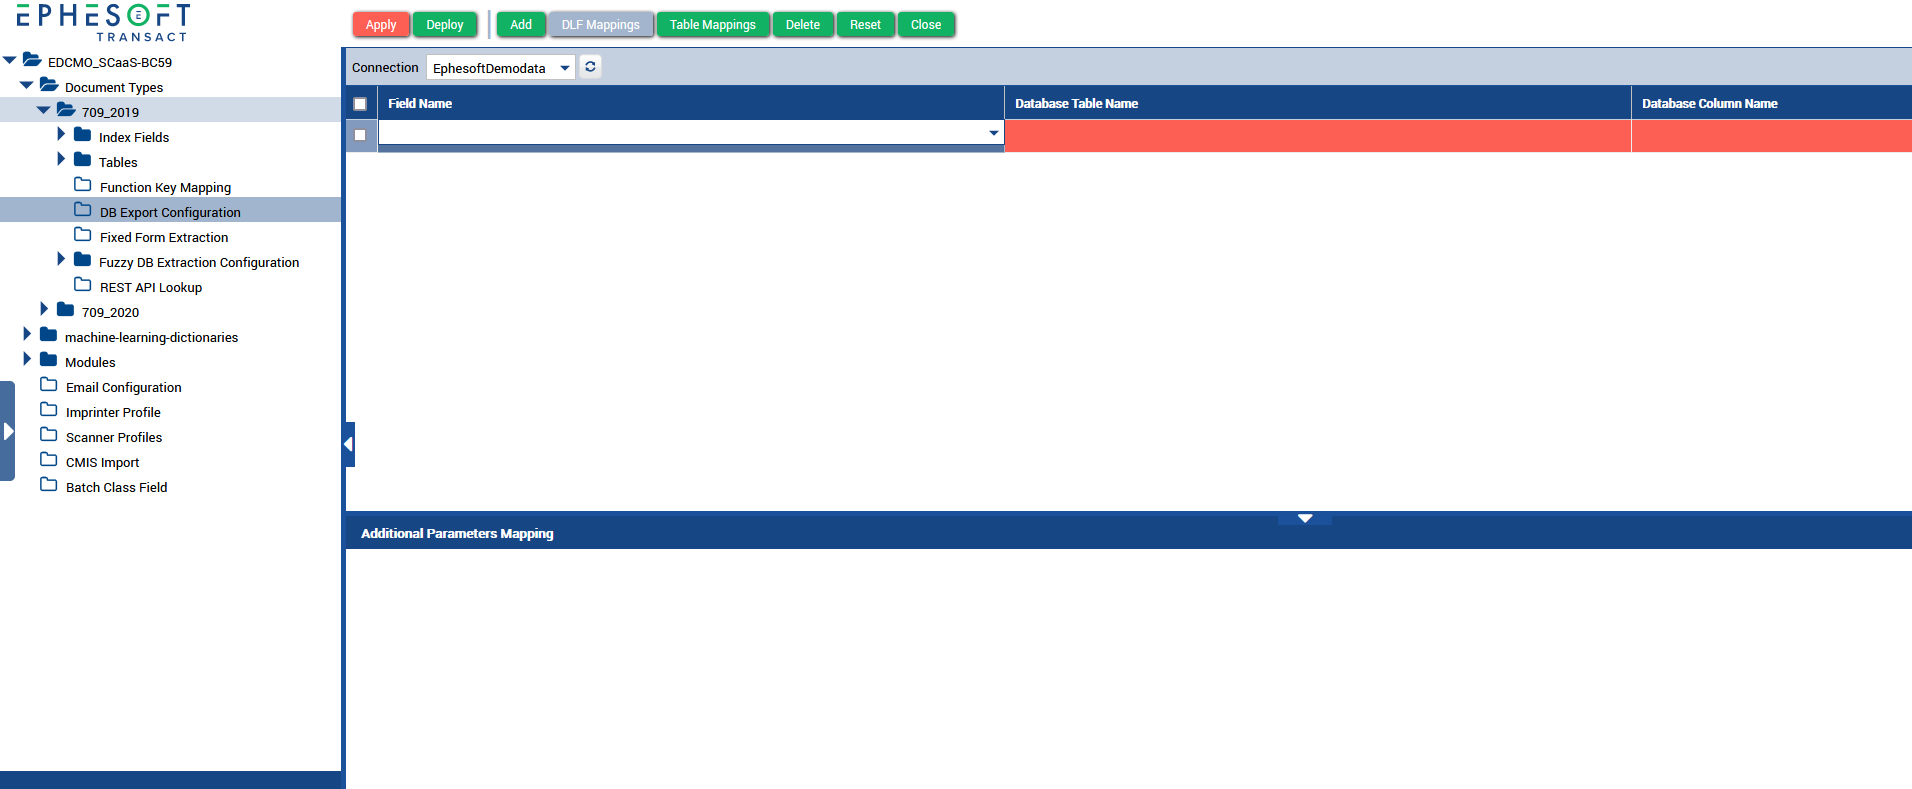
Figure 3. Add DLF Mapping
- In the Field Name dropdown, select a document level field.
- From the Database Table Name drop-down menu, select the appropriate database table name in which the extracted data should be filled.
- From the Database Column Name drop-down menu, select the appropriate database column name in which the extracted data should be filled.
- Map any additional parameters as needed.
- Click Apply.
Map Tables
You can export extracted table data by mapping a column of an extracted table with the column of a database table.
- In the DB Export Configuration screen, select Table Mappings.
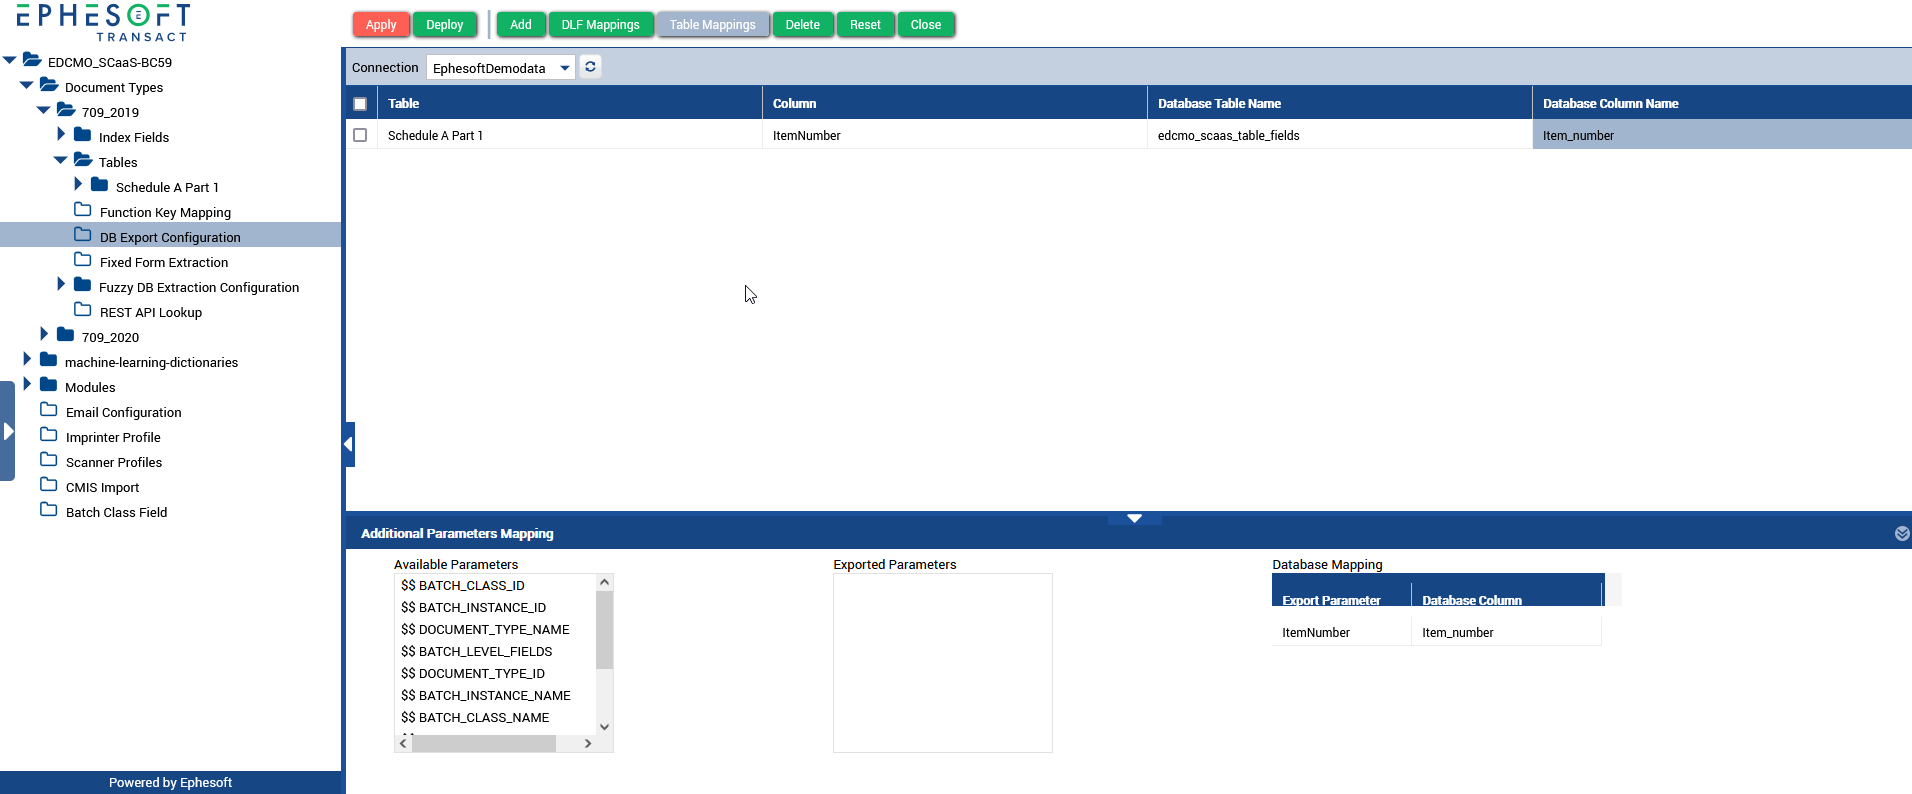
Figure 4. Add Table Mapping
- Select your database connection from the Connection dropdown.
- Click Add.
- Repeat steps 4–6 from the section Map Document Level Fields, above.
- In the Columns field, select the table column corresponding to the selected Field Name.
- Map any additional parameters as needed.
- Click Apply.
Additional Parameters Mapping
Additional parameters are available in the bottom panel of the DB Export Configuration page for a document type. This includes parameters such as batch class ID, document ID, and description.
If you want to export both index fields and tabular data, you will need to set up your relationship tables in the database, and join the tables together using the batch ID and document ID. To do so, set up an additional column in the database and use the batch instance ID ($$ BATCH_INSTANCE_ID) and document ID ($$ DOCUMENT_TYPE_ID) as the values.
Note: You will have to perform these steps twice: once for the DLF mapping, and again for the table mapping. Each database table needs to have columns to store the batch ID and document ID.

Figure 5. Additional Parameters – DLF Mapping

Figure 6. Additional Parameters – Table Mapping
Note: Additional Parameters Mapping doesn’t include the option to export the original file name. Exporting the original file name would require a custom script for the Export module.
To use the additional parameters:
- Select the row of the Database Table to which you want to add an additional parameter.
- Select the desired parameter in the Available Parameters column.
- Click and drag the selected parameter into the Exported Parameters list box. Note: This will create a new row in the database mapping.
- In the Database Mapping panel, select the Database Column Name from the drop-down menu where the available parameter should be mapped.
- Repeat Steps 3 – 4 as many times as necessary for how many Additional Parameters you want to use.
- Click Apply.
Conclusion
This concludes an overview of how to configure and use the DB Export Plugin.