Checklist: Minimum ADFS Configurations Requirements
This wiki article focuses on the basic configurations that are required at ADFS (Active Directory Federation Services) side in order to integrate it with Ephesoft to enable Single Sign On Feature.
Note: This article will provide you basic information on the ADFS configuration. In case of any issues you must connect with your ADFS / Windows / System Administrator to resolve any Issues as this needs to be taken care by experts in respective domains.
Where to see ADFS Logs ?
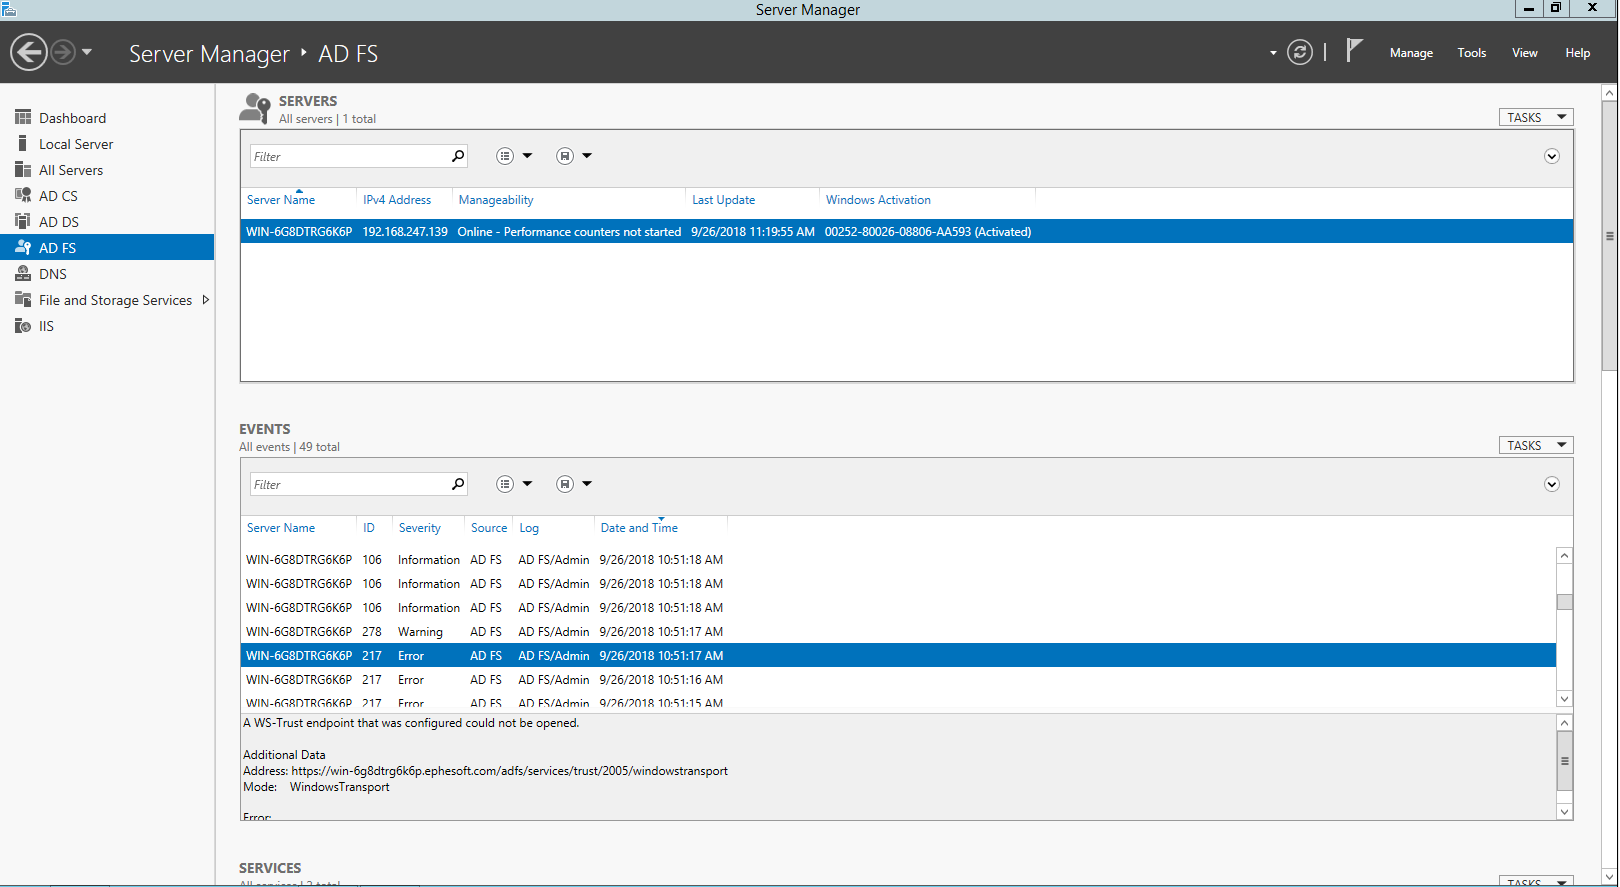
ADFS Logs can be seen on the Server Manager by selecting the ADFS option on the left window panel and then observing any errors in the Events Section. Below screenshot will help you to see any errors where Ephesoft is unable to connect to ADFS Server.
How to Open ADFS Management Screen ?
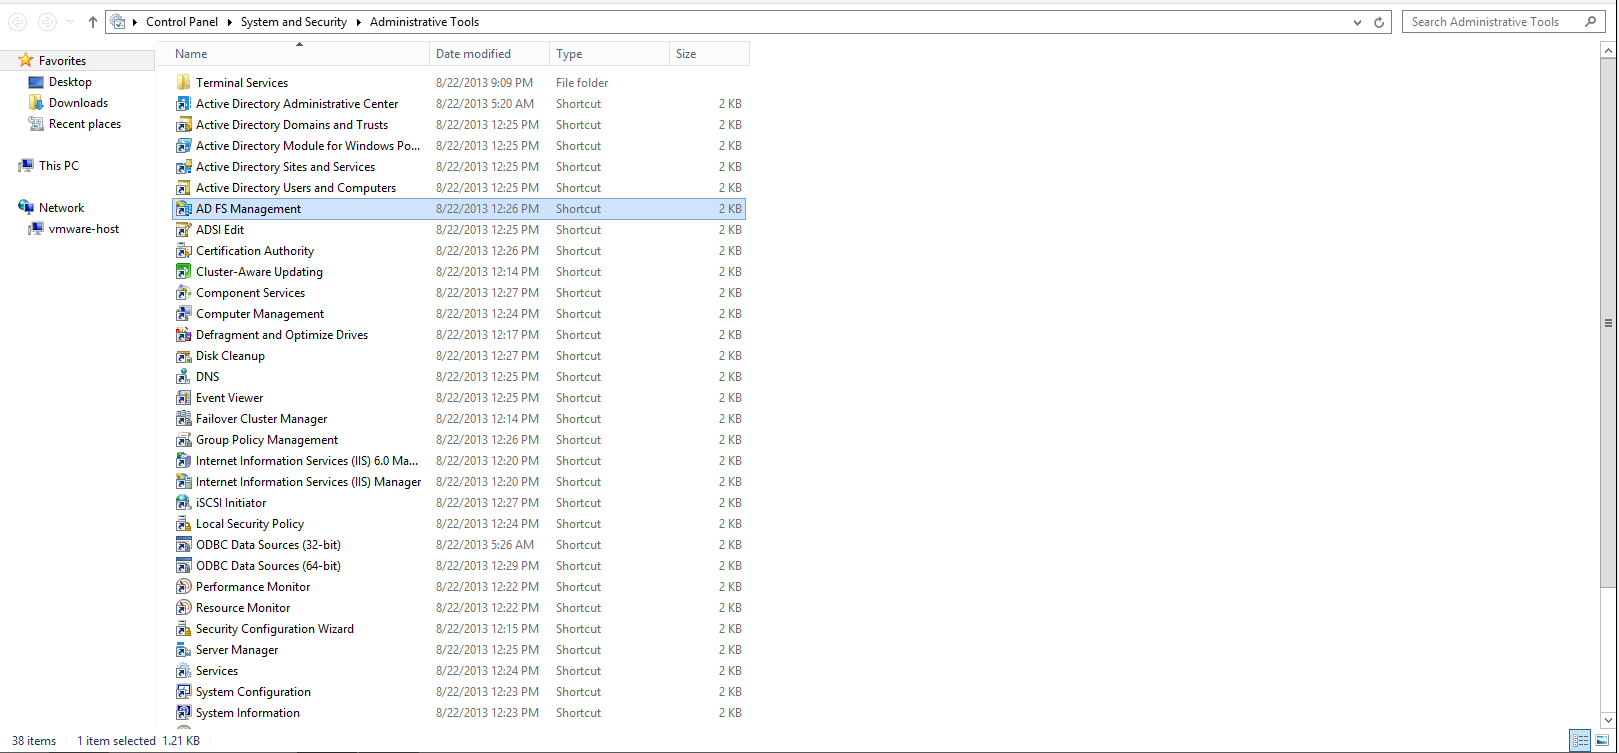
ADFS Management Screen is where you can view your relying party trust configuration. This can be accessed by going to Control Panel -> Administrative Tools -> AD FS Management
Where to see Relying Party Trust ?
A relying party (RP) is a term used to refer to a server providing access to a secure software application. Claims-based applications, where a claim is a statement an entity makes about itself in order to establish access, are also called relying party (RP) applications. You can see the Relying Parties configured directly on the main screen as soon as you open AD FS Management. As you can see in the below screenshot we have a relying party trust with the name “ephesoft sso” with a unique Identifier which is used to establish connection between Ephesoft and ADFS.

How to add Relying Party Trust (In context with Ephesoft Metadata File) ?
In order to add a Relying Party Trust you need to right click on Trust Relationship -> Relying Party Trusts Option and select Add Relying Party Trust as shown in the screenshot below:

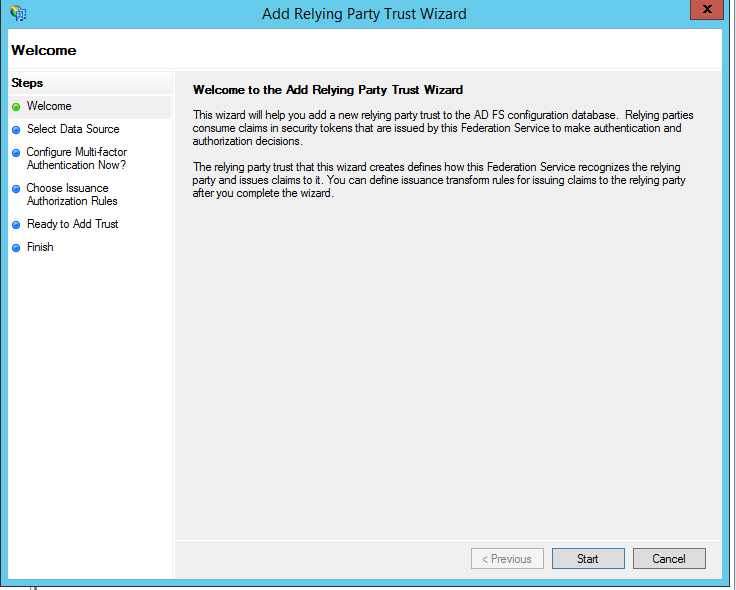
After “Add Relying Party Trust Option” is selected a new window will open as below:
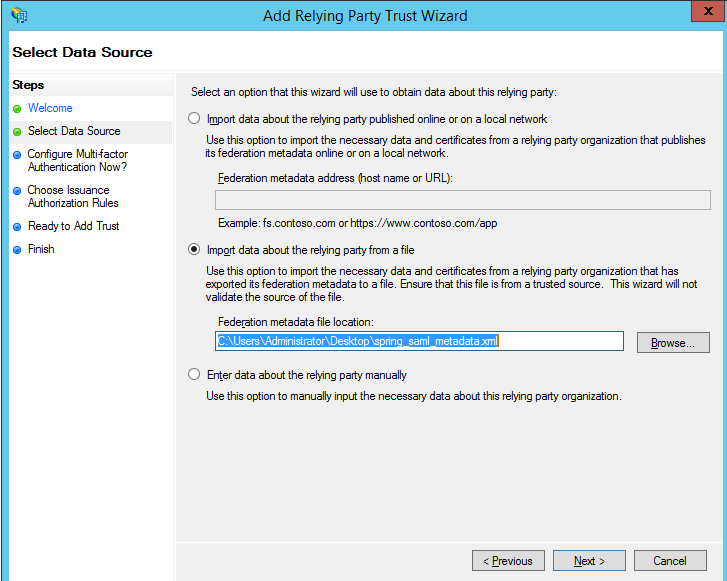
In Select Data Source option select the second option which says “import information about relying party trust from a file”. This is the file which we get from ephesoft after hitting URL https://<URL>:<PORT>/dcma/saml/metadata on ephesoft server. This file has metadata information like name of entityId and its properties like secure hash algorithm, certificate information etc as mentioned further in this article.
Example of Ephesoft meta data file to be imported at ADFS side can be downloaded from here.
Now you can go ahead and keep clicking on Next Option and Finish the Import.
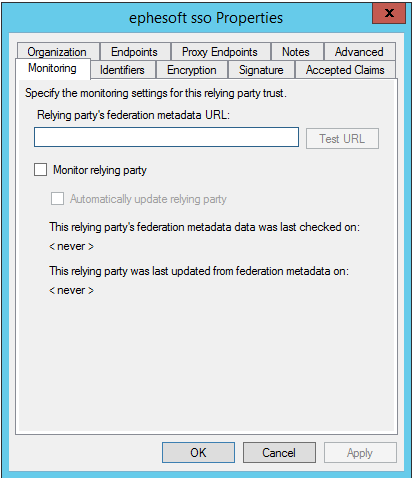
Where to see various properties associated for Relying Party Trust ?
We will only go through the properties required or needed by Ephesoft for successful integration with ADFS. You can open or view the properties by right clicking on Relying Party Trust followed by clicking on properties option.

Below is the window that will open once you click on Properties and this is the section where we can configure Identifiers, Endpoints, Signature methods.
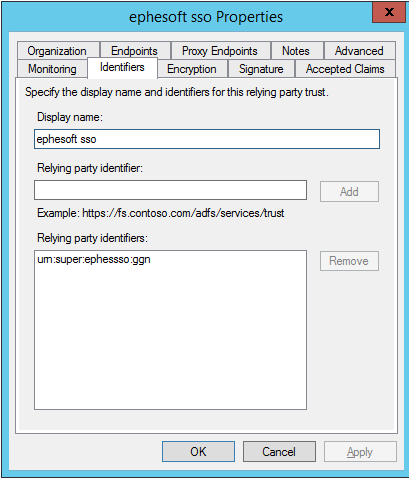
Identifiers Option
Identifiers Tab in the Relying Trust properties window will display the current Identifier name and also provides you the option to Add or remove the identifier. You can make use of this window in case you want to edit the name of the identifier by adding the new unique identifier name followed by removing the old or already existing identifier name.
Encryption and Signature Tab
Encryption and Signature Tab shows you the configured certificate imported from Ephesoft JKS file which is located or mentioned in the applicationContext-Security.xml file. Make sure the generated cert in the JKS file is of the type RSA and not DSA.

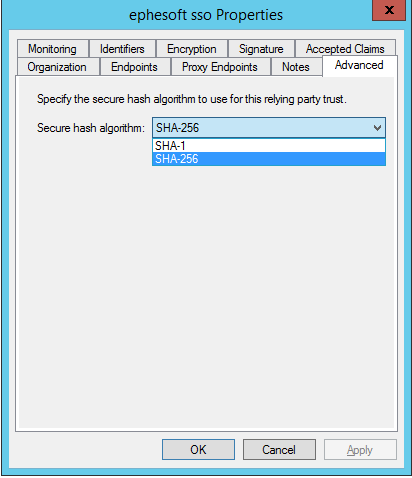
Advanced Tab
In this windows you can configure the secure hash algorithm i.e. either SHA-1 or SHA-256. Based on the selection here you need to make sure you are enabling the respective bean tags in Ephesoft applicationContext-Security.xml configuration files. The secure hash algorithm needs to match at both sides for successful handshake.
Endpoints Tab
This window has configuration associated with URL where ADFS should redirect after login and after logout. Make sure to correct the URL and PORT as configured on your Ephesoft Side. Make sure index and Bindings are similar to what is mentioned in the below screenshot. Only change required here is with respect to URL where you need to define SAML Assertion Consumer Endpoint type as https://<DNS,IP,FQDN>:<PORT>/dcma/saml/SSO and SAML Logout Endpoints needs to be configured with URL https://<DNS,IP,FQDN>:<PORT>/dcma/saml/SingleLogout

How to Configure Claim Rules
Claim rules are used as a part of Request and Response Mechanism and needs to be configured at ADFS side. You can open claim rules by right clicking on relying party trust and then selecting Edit Claim Rules options.

Once Edit Claim Rules option is clicked you will see the home screen for configuring, adding ,removing and editing existing claim rules. As seen in the below screenshot we have three claim rules configured. NameId is a mandatory claim rule and needs to be present. FirstName is used for Authentication and if you also want to Authorize then you need to have Groups Claim rule as well.

Below are the screenshot which you need to configure at your end and you can select below options as Incoming and Outgoing claim rules.
Screenshot for NameId Claim Rule which is a mandatory claim rule and this needs to be present:

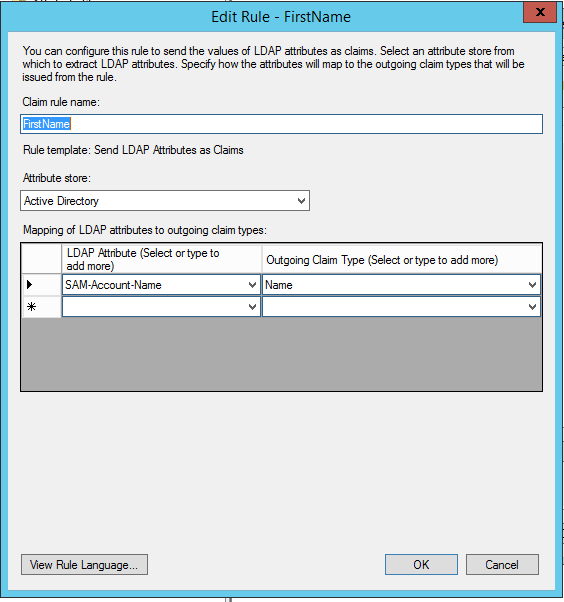
Screenshot for FirstName Claim Rule used for Authentication:
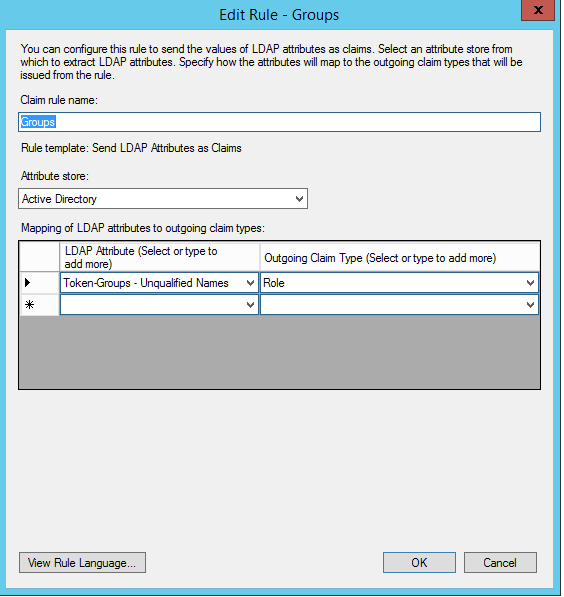
Screenshot for Group Claim Rule for Authorization:
How to get the Rule Language or Syntax to configure in epheSaml filter bean of applicationContext-Security configuration file at Ephesoft
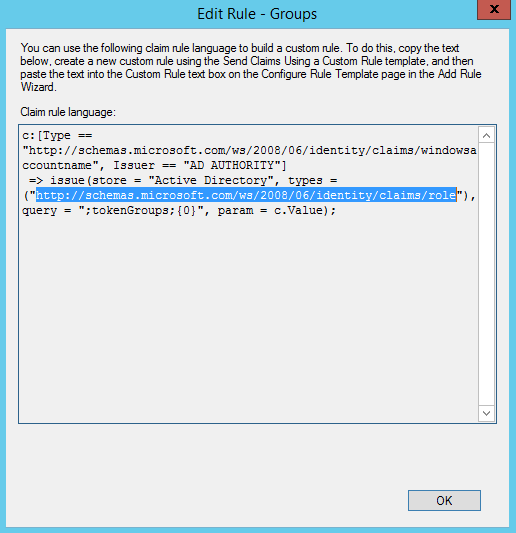
To get the syntax of the configured rule you need to open the claim rule and click on View Rule Language button and you can grab the syntax defined after “Types” property as shown below:
How to export certificate from ADFS ?
Go to ADFS Management Screen -> Services -> Certificates
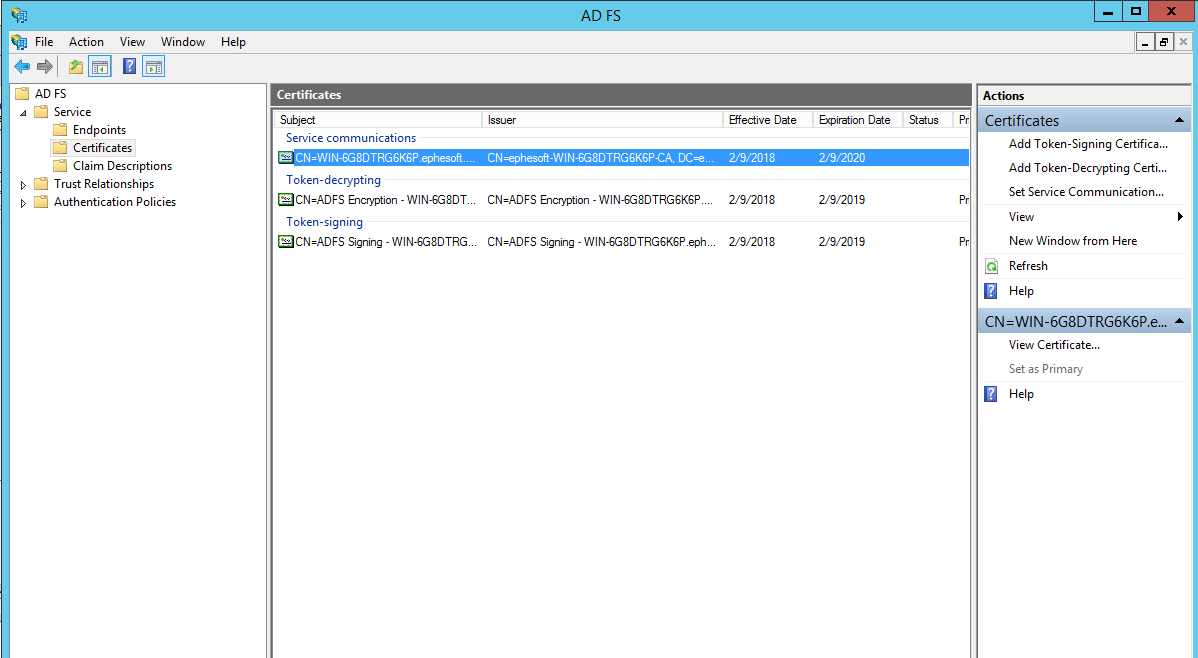
Click on view certificate

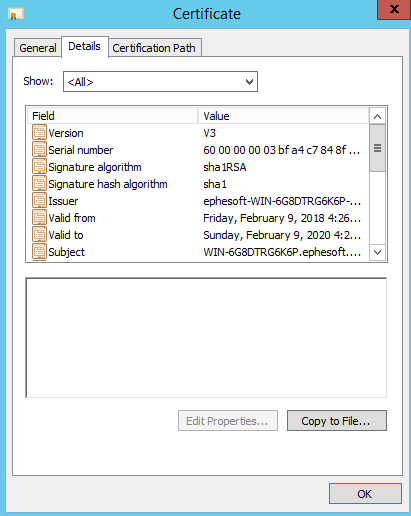
Navigate to Details Tab and click on Copy to File and save the certificate with DER encoded format.
Please make sure that all the above configurations should match with the configurations with your ADFS Setup.