SSO (Single Sign-On) is a mechanism of access control that can be applied on multiple related but independent software systems. This way, a user logs in once and gains access to multiple systems without being prompted to log in again for each individual application.
Previously, the SSO mechanism in Ephesoft Transact only supported integration of the SAML-enabled Spring Security framework. For more information on this feature, refer here.
In Transact 4.5.0.0, SSO functionality can also be implemented on the basis of CAS (Central Authentication Service). Now, you can configure Transact with Spring Security and CAS, both with and without CAS proxy support.
CAS (Central Authentication Service)
CAS is an Enterprise Java solution for web application authentication that also provides the benefit of Single Sign-On (SSO). Technically, SSO can be achieved because the authentication can be removed from the web application and handled centrally. And, when this authentication is handled by a single service, access to many services can be granted once and “remembered” for the life of the web session or even longer. Keep in mind that the SSO feature does not have to be employed and yet CAS authentication still provides a reliable authentication mechanism.
CAS Server
The CAS server is a Java servlet built on the Spring Framework. Its primary responsibility is to authenticate users and grant access to CAS-enabled services, commonly called CAS clients or services, by issuing and validating tickets. An SSO session is created when the CAS server issues a ticket-granting ticket (TGT) to the user upon successful login. A service-ticket (ST) is issued to a service at the user’s request via browser redirect using the TGT as a token. The ST is subsequently validated at the CAS server via back-channel communication. Ephesoft Transact also supports proxy-granting-ticket (PGT), in which the server issues a PGT to Transact. Transact uses this PGT to create proxy tickets for accessing other web applications under the same authentication umbrella.
CAS Clients
The term “CAS client” has two distinct meanings in its common use. A CAS client is any CAS-enabled application that can communicate with the server via a supported protocol. A CAS client is also a software package that can be integrated with various software platforms and applications to communicate with the CAS server via some authentication protocol (e.g. CAS, SAML, OAuth). In our case, Ephesoft is a CAS client that communicates with the CAS server for the purpose of authentication and SSO.
CAS with Proxy Support
If proxy support is required, the CAS client requests a proxy-granting-ticket (PGT) rather than a normal service-ticket (ST). Using this proxy ticket, the CAS client can securely communicate with other CAS clients under the same CAS SSO umbrella. This rapidly increases the performance of the CAS client when communicating with other CAS clients under this umbrella because the CAS client with PGT no longer needs to request an ST for each request to other CAS clients. Configuring the CAS client with proxy support should be handled carefully as improper configuration may lead to a security breach. Proper configuration steps and suggestions are provided below.
CAS without Proxy Support
CAS without proxy support should be used when there is only a single application under the SSO umbrella or when the system does not require communication between CAS clients under the same umbrella. When CAS is used without proxy support, the CAS client works on a service-ticket (ST) granted by the CAS server. This configuration is preferable if the situation does not require proxy support as it is less vulnerable to a security breach.
Configuring CAS-based SSO mechanism
The following files must be configured:
- EPHESOFT_HOME/JavaAppServer/conf/server.xml
- EPHESOFT_HOME/Application/applicationContext.xml
- EPHESOFT_HOME/Application/WEB-INF/classes/META_INF/CAS-config/cas-config.properties
- EPHESOFT_HOME/Application/WEB-INF/web.xml
Configuring server.xml
To integrate CAS, Ephesoft Transact must be run over SSL with the following suggested configurations:
- Uncomment the connector protocol. A sample Tomcat connector with suggested configurations is shown below:
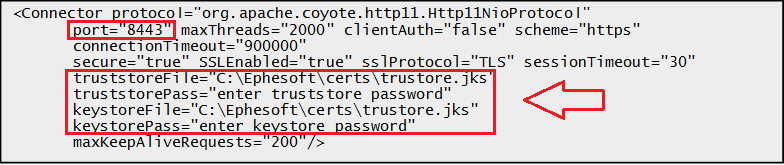
- Provide the keystore file path and its password (if using proxy setup).
- Provide the truststore file path and password. Make sure the truststore file is the same as that of %JAVA_HOME% because CAS internally looks for the truststore in the %JAVA_HOME%/jre/lib/security folder.
- Specify the port number (the suggested port is 8443).
- Comment out any other connector, if required.
Configuring applicationContext.xml
- Uncomment the applicationContext-securityCASwithProxy.xml bean in applicationContext.xml to enable CAS SSO with proxy support, or
- Uncomment the applicationContext-securityCASwithoutProxy.xml bean in applicationContext.xml to enable CAS SSO without proxy support.

Configuring cas-config.properties
- Provide values for cas.server.host and cas.service.host in the properties file. Ephesoft recommends using port number 8443.

- cas.server.host represents the complete host address of the CAS server. Ex: casServer:8443
- cas.service.host represents the complete host address of the system where Ephesoft is running. Ex: casService:8443
These host addresses are further used to calculate the required URLs and to ensure proper communication between the CAS server and Ephesoft Transact.
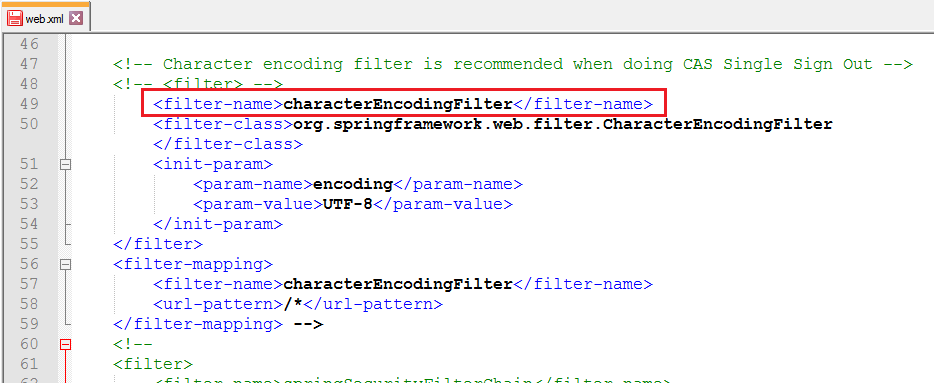
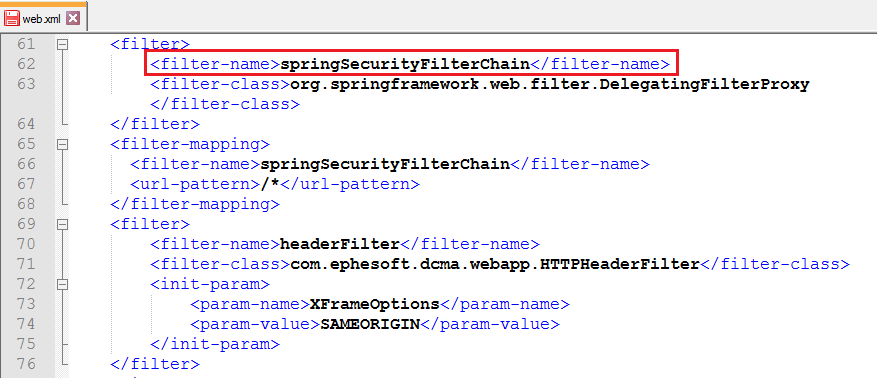
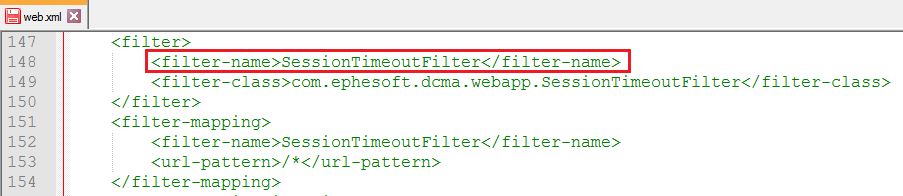
Configuring web.xml
1. Uncomment the “characterEncodingFilter” filter and its filter mapping.
2. Uncomment the “springSecurityFilterChain” filter and its filter mapping.
3. Comment out the “sessionTimeoutFilter” and its filter mapping.
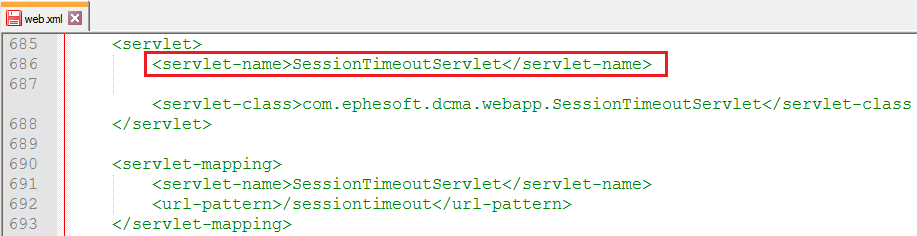
4. Comment out the “SessionTimeoutServlet” and its servlet mapping.
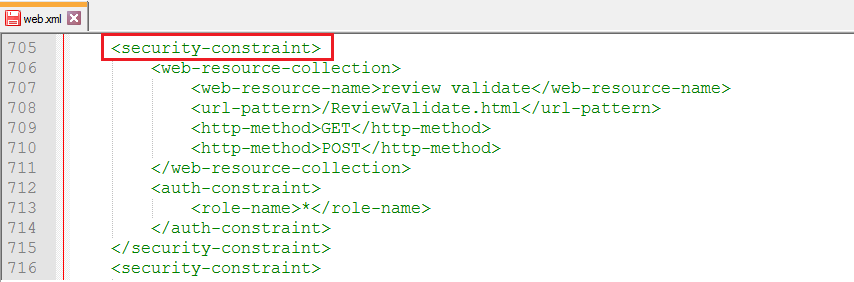
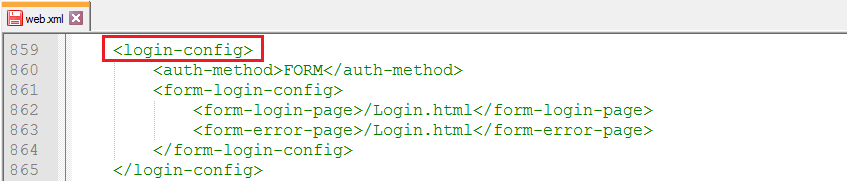
5. Comment out all “security-constraint” and “login-config” nodes.
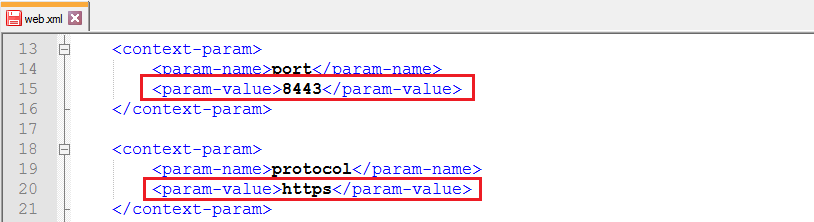
6. Change the port to 8443.
7. Change the protocol to https.
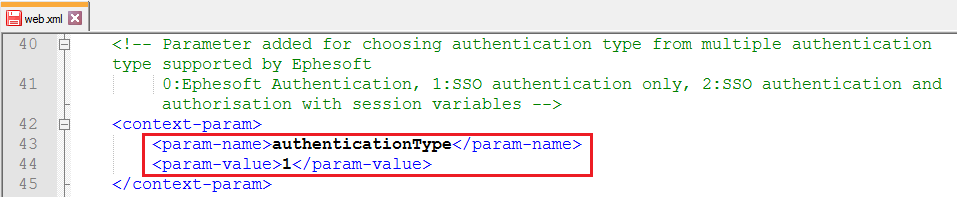
8. Choose ‘1’ as the value for “authenticationType”.
Truststore and Keystore
A Java Key Store (JKS) is a repository of security certificates. CAS exchanges involve usage of cryptography for signing and encryption of data. This Key Store will contain a certificate and private key that will be used to digitally sign CAS messages and encrypt their content.
The CAS server and CAS client (Ephesoft Transact) interact with each other in an encrypted environment. For that purpose, the CAS server and Ephesoft Transact both maintain their own keystore and truststore. The certificate in the CAS server’s keystore must be imported into the Ephesoft Transact truststore.
To use CAS with proxy support, the certificate in the Ephesoft Transact keystore must be imported into the CAS server’s truststore.
Creating Private Key
- Open a command line or terminal window and make sure you’re in your home directory.
- Execute the following command:
| keytool -genkey -alias tomcat -keyalg RSA -validity 365 |
NOTE: The “validity” parameter allows you to specify (number of days) how long the certificate should be valid for. The longer the time-period, the less likely you are to need to recreate it. To recreate it, you’d need to delete the old one and then follow these instructions again.
The response will look something like this:
| Enter keystore password:
Re-enter new password: What is your first and last name? [Unknown]: $REPLACE_WITH_FULL_MACHINE_NAME What is the name of your organizational unit? [Unknown]: Test What is the name of your organization? [Unknown]: Test What is the name of your City or Locality? [Unknown]: Test What is the name of your State or Province? [Unknown]: Test What is the two-letter country code for this unit? [Unknown]: US Is CN=$FULL_MACHINE_NAME, OU=Test, O=Test, L=Test, ST=Test, C=US correct? [no]: yes |
For the keystore password, you should enter “changeit” without the quotation marks. When prompted for the first and last name, you should enter your machine name during development. Enter the rest of the information specific to your organization. After confirming the information you have provided, a keystore will be created and a private key will be added to that keystore.
Any application that wishes to securely connect to this CAS server would need to import the certificate. You can export a certificate that’s compatible with other JVM keystores by executing the following command:
| keytool -export -alias tomcat -file server.crt |
You’ll get output that looks like this:
| Enter keystore password:
Certificate stored in file <server.crt> |
You can then import the server.crt into the Ephesoft Transact JVM keystore by executing the following command:
| keytool -import -file server.crt -keystore $JAVA_HOME/jre/lib/security/cacerts -alias tomcat |
The path of this newly created keystore will be used in configuring the CAS server using Tomcat.
Note: For using CAS with proxy support, perform the following procedure in Ephesoft Transact to create a keystore and import Transact’s certificate into the CAS server truststore.
Creating Private Key
- Open a command line or terminal window and make sure you’re in your home directory.
- Execute the following command:
| keytool -genkey -alias tomcat -keyalg RSA -validity 365 |
The response will look something like this:
| Enter keystore password:
Re-enter new password: What is your first and last name? [Unknown]: $REPLACE_WITH_FULL_MACHINE_NAME What is the name of your organizational unit? [Unknown]: Test What is the name of your organization? [Unknown]: Test What is the name of your City or Locality? [Unknown]: Test What is the name of your State or Province? [Unknown]: Test What is the two-letter country code for this unit? [Unknown]: US Is CN=$FULL_MACHINE_NAME, OU=Test, O=Test, L=Test, ST=Test, C=US correct? [no]: yes |
For the keystore password, you should enter “changeit” without the quotation marks. When prompted for the first and last name, you should enter your machine name during development. Enter the rest of the information as it applies to your organization. After confirming all the entries, a keystore will be created and a private key will be added to that keystore.
Any application that wishes to securely connect to Ephesoft Transact would need to import the certificate. You can export a certificate that’s compatible with other JVM keystores by executing the following command:
| keytool -export -alias tomcat -file server.crt |
You’ll get output that looks like this:
| Enter keystore password:
Certificate stored in file <server.crt> |
You can then import the server.crt into the CAS JVM keystores by executing a command like this:
| keytool -import -file server.crt -keystore $JAVA_HOME/jre/lib/security/cacerts -alias tomcat |
After completing all the above-mentioned configurations, restart the Ephesoft Transact server.
Suggestions for CAS server setup
To use CAS with proxy support, the CAS server must have the “allowedToProxy” attribute of the Ephesoft Transact service set to “true”. By default, the “allowedToProxy” attribute is set to “false”.
Setting the allowedToProxy attribute to true
Perform the following steps for CAS server versions 3.4.x, 3.5.x, 3.6.x, or 4.0.x.
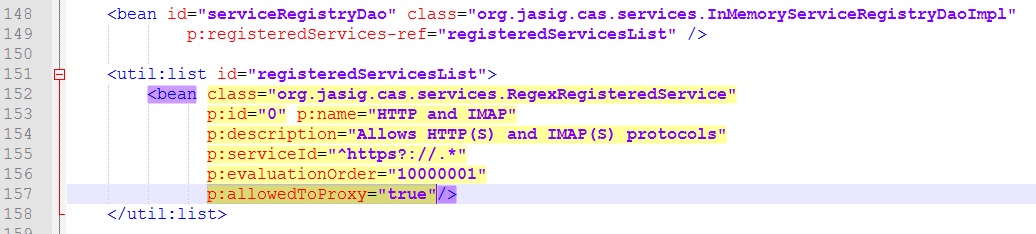
- Open the “deployerConfigContext.xml” file.
- Add the “allowedToProxy” attribute in the registeredServicesList section and set its value to “true”.
Perform the following steps for CAS server versions 4.1.x and 4.2.x.
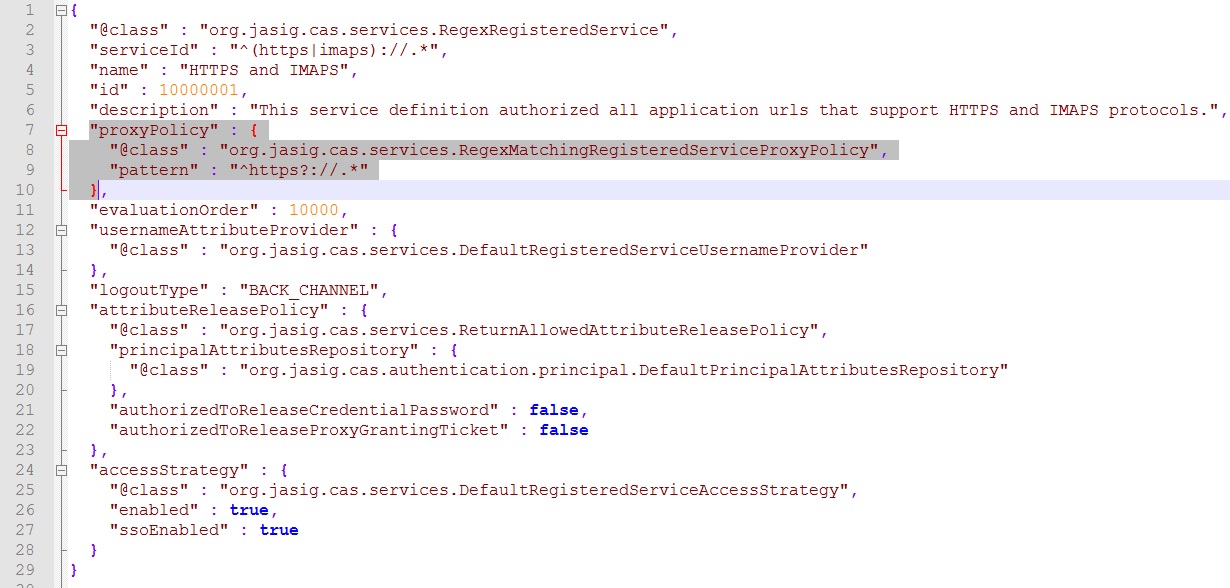
- Open the “HTTPSandIMAPS” file corresponding to the Ephesoft Transact service.
- Add a regex pattern for the “proxyPolicy” attribute as given below:
“proxyPolicy” : {
“@class” : “org.jasig.cas.services.RegexMatchingRegisteredServiceProxyPolicy”,
“pattern” : “^https?://.*”
}
Note: Use a proper regex pattern instead of the default pattern to further restrict access to services within your domain (including subdomains). You can find the available regex patterns using the following path: CAS installation Directory -> WEB-INF -> classes -> services.